Looking for a fun, easy way to get crafty with the kids—or just unleash your own creativity? Salt dough is the ultimate DIY magic! Whether you’re making keepsakes, holiday decor, or playful ornaments, these 18 creative recipes will turn simple ingredients into unforgettable projects. Grab your flour and salt—it’s time to roll up your sleeves and dive into some seriously satisfying crafting fun!
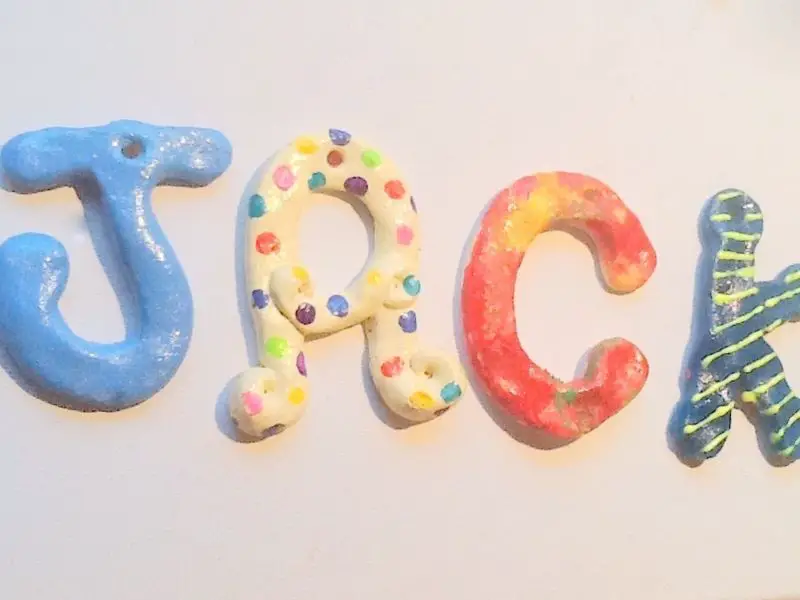
Classic Salt Dough Ornaments

These nostalgic salt dough ornaments are a holiday must—simple enough for kids to help with and sturdy enough to last for years.
Ingredients
- 2 cups all-purpose flour
- 1 cup salt
- 1 cup warm water
- 1 tbsp vegetable oil (optional, for smoother dough)
Instructions
- Mix dry ingredients: In a large bowl, whisk together 2 cups all-purpose flour and 1 cup salt until evenly combined.
- Add wet ingredients: Gradually stir in 1 cup warm water and 1 tbsp vegetable oil (if using) until a thick, slightly sticky dough forms.
- Knead: Turn dough onto a lightly floured surface and knead for 5 minutes until smooth and pliable. Add a sprinkle of flour if too sticky.
- Roll & cut: Roll dough to ¼-inch thickness and cut into shapes with cookie cutters. Use a straw to poke holes for hanging.
- Bake: Arrange ornaments on a parchment-lined baking sheet and bake at 200°F for 2–3 hours, flipping halfway, until completely hard and dry.
- Cool & decorate: Let cool completely before painting or sealing with mod podge for a glossy finish.
The magic? This dough bakes rock-solid yet stays lightweight—perfect for delicate designs or handprint keepsakes.
Tip: For extra durability, bake ornaments longer at a lower temperature (175°F for 4+ hours).
Salt Dough Handprint Keepsakes

These adorable salt dough handprints are the perfect way to preserve tiny fingers (or paws!)—just mix, shape, and bake for a heartfelt keepsake.
Ingredients:
- 2 cups all-purpose flour
- 1 cup salt
- 3/4 cup warm water
- 1 tbsp vegetable oil
Instructions:
- Preheat oven to 200°F and line a baking sheet with parchment paper.
- In a large bowl, whisk together 2 cups flour and 1 cup salt. Gradually stir in 3/4 cup warm water and 1 tbsp vegetable oil until a smooth dough forms (add a splash more water if too crumbly).
- Roll dough to 1/2-inch thickness on a floured surface. Press hands, paws, or cookie cutters firmly into the dough, then use a straw to poke a hole at the top for hanging.
- Transfer shapes to the baking sheet and bake for 2–3 hours, flipping halfway, until completely hard and dry. Cool before painting or sealing.
The slow, low-temperature bake ensures your keepsakes stay crack-free—ideal for gifting or holiday ornaments!
Tip: For extra durability, brush baked pieces with a thin layer of Mod Podge or clear acrylic sealer.
Salt Dough Bead Necklaces
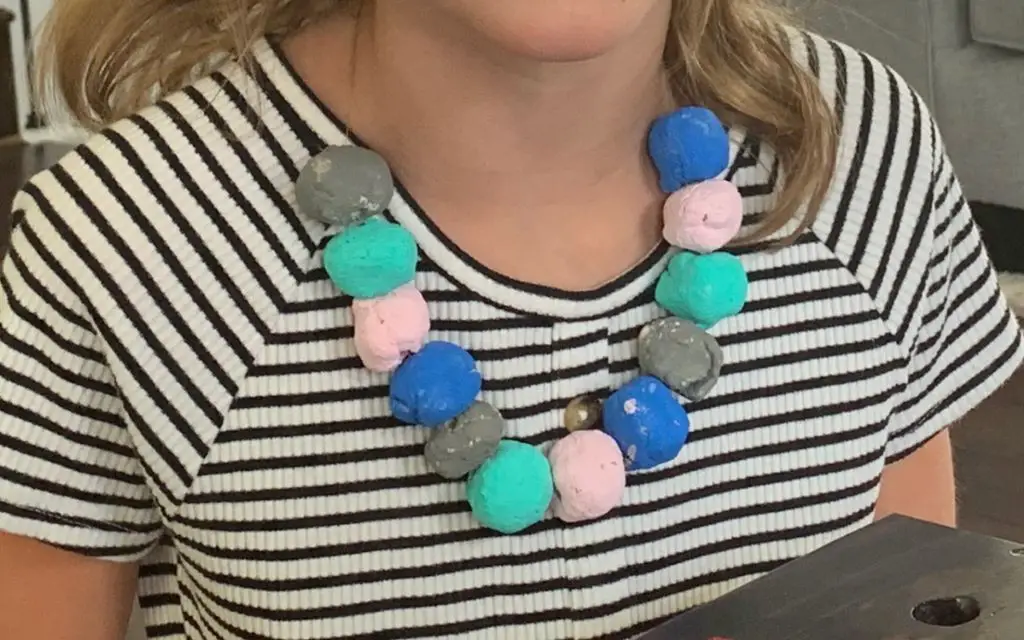
These salt dough bead necklaces are a nostalgic DIY project that’s perfect for crafting with kids—simple, customizable, and oh-so-satisfying to wear!
- 2 cups all-purpose flour
- 1 cup fine salt
- 1 cup warm water
- 1 tbsp vegetable oil
- Food coloring or acrylic paint (optional)
- Twine or yarn for stringing
- Make the dough: In a large bowl, mix 2 cups all-purpose flour and 1 cup fine salt. Gradually stir in 1 cup warm water and 1 tbsp vegetable oil until a smooth dough forms. If using food coloring, knead it in now until evenly distributed.
- Shape the beads: Pinch off small pieces of dough and roll them into balls (about 1-inch diameter), or get creative with shapes like stars or hearts. Use a skewer to poke a hole through each bead for threading later.
- Dry the beads: Arrange beads on a parchment-lined baking sheet and bake at 200°F for 2–3 hours, flipping halfway, until completely hard. Alternatively, air-dry for 24–48 hours.
- Decorate (optional): Once cool, paint beads with acrylics for vibrant designs or leave them rustic for a natural look.
- String the necklace: Cut twine to your desired length, thread the beads, and knot the ends securely.
The best part? These beads are lightweight and sturdy, making them ideal for little hands to craft and wear with pride.
Tip: For extra durability, seal painted beads with a layer of clear glue or mod podge.
Salt Dough Photo Frames

These charming salt dough frames are a nostalgic DIY project—perfect for preserving memories with a handmade touch.
Ingredients:
- 2 cups all-purpose flour
- 1 cup table salt
- 1 cup warm water
- 1 tbsp vegetable oil
- Acrylic paint and sealant (optional, for decorating)
Instructions:
- Mix the dough: In a large bowl, combine 2 cups all-purpose flour and 1 cup table salt. Gradually stir in 1 cup warm water and 1 tbsp vegetable oil until a smooth dough forms.
- Shape the frames: Roll the dough to ¼-inch thickness on a floured surface. Cut into rectangles or heart shapes, then use a smaller cutter to remove the center (leave a 1-inch border). Smooth edges with damp fingers.
- Bake: Transfer frames to a parchment-lined baking sheet. Bake at 250°F for 2–3 hours until completely hard and dry, flipping halfway.
- Decorate: Once cool, paint with acrylics and seal with a clear varnish for durability (optional).
The rustic texture and customizable shapes make these frames extra special—ideal for gifting or displaying vacation snapshots.
Tip: For quicker drying, use a dehydrator at 200°F for 4–5 hours.
Salt Dough Candle Holders
These charming salt dough candle holders add a rustic, handmade touch to your tablescape—plus, they’re surprisingly simple to whip up with pantry staples!
- 2 cups all-purpose flour
- 1 cup fine salt
- 1 cup warm water
- 1 tbsp vegetable oil
- Mix the dough: In a large bowl, combine 2 cups all-purpose flour and 1 cup fine salt. Gradually stir in 1 cup warm water and 1 tbsp vegetable oil until a smooth, pliable dough forms (add a sprinkle more flour if sticky).
- Shape: Roll dough to ½-inch thickness on a floured surface. Cut into circles or freeform shapes using cookie cutters or a knife, then press a tea light into the center of each to create an indent (remove the candle afterward).
- Dry: Arrange holders on a parchment-lined baking sheet and bake at 200°F for 2–3 hours, flipping halfway, until completely hard and dry. Let cool fully before use.
The natural texture of salt dough gives these holders a lovely, earthy look—perfect for showcasing flickering candlelight at dinner parties or cozy nights in.
Tip: For a glossy finish, brush cooled holders with a thin layer of mod podge or clear nail polish.
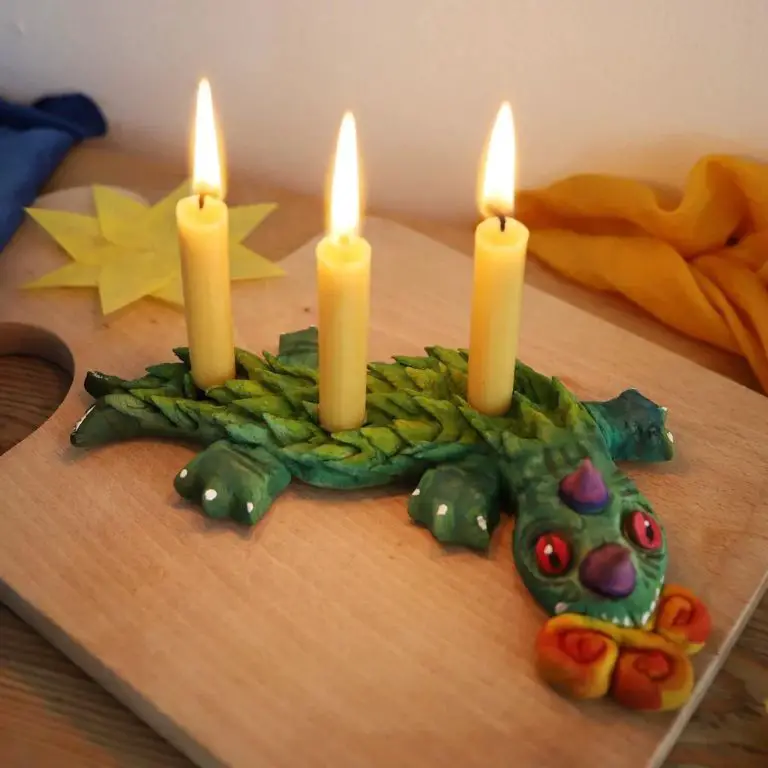
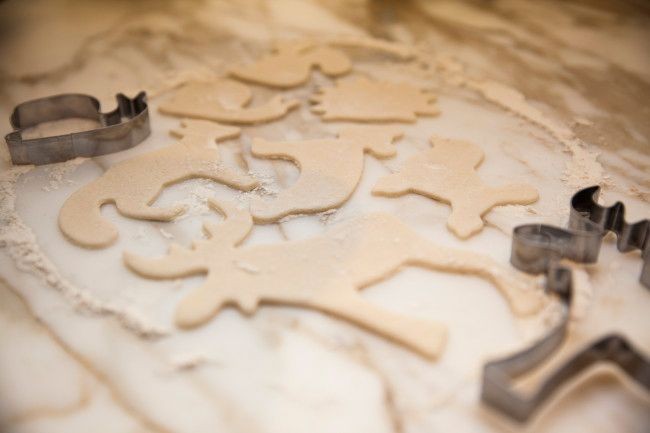
Salt Dough Animal Figurines
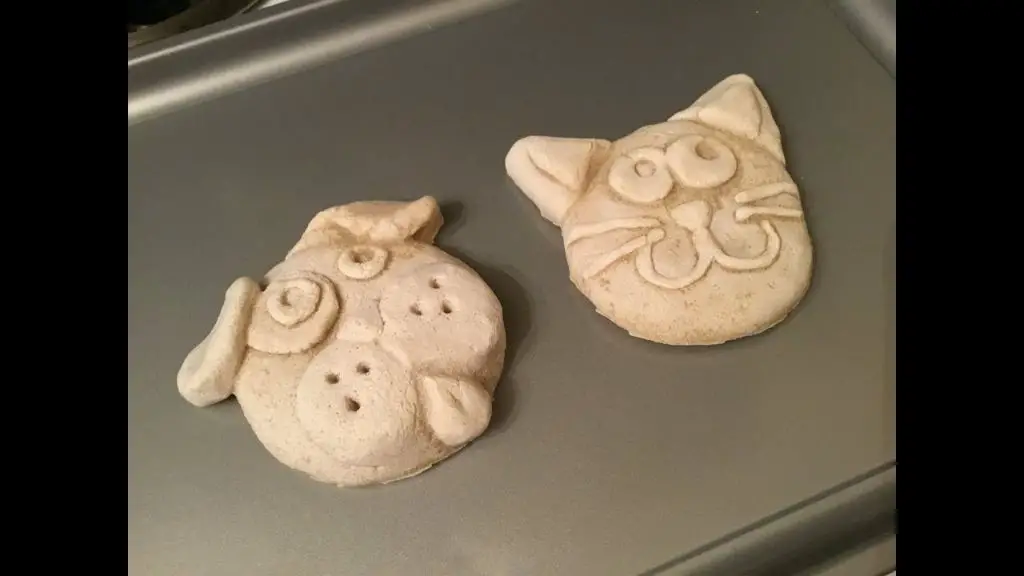
These adorable salt dough figurines are a fun, kid-friendly craft that bakes into sturdy keepsakes or playful decorations.
Ingredients:
- 2 cups all-purpose flour
- 1 cup table salt
- 3/4 cup warm water
- 1 tbsp vegetable oil
Instructions:
- Mix the dough: In a large bowl, combine 2 cups all-purpose flour and 1 cup table salt. Gradually stir in 3/4 cup warm water and 1 tbsp vegetable oil until a smooth, playdough-like consistency forms (add a teaspoon more water if too crumbly).
- Shape: Roll dough to 1/4-inch thickness on a floured surface. Use cookie cutters or sculpt animal shapes by hand, pressing details like eyes or fur with toothpicks.
- Dry: Arrange figurines on a parchment-lined baking sheet. Bake at 200°F for 2–3 hours until completely hard and dry, flipping halfway for even drying.
The dough’s high salt content gives these figurines a rustic, ceramic-like finish that holds paint beautifully—perfect for personalizing with acrylics after cooling.
Tip: For faster drying, leave figurines uncovered at room temperature for 48 hours instead of baking.
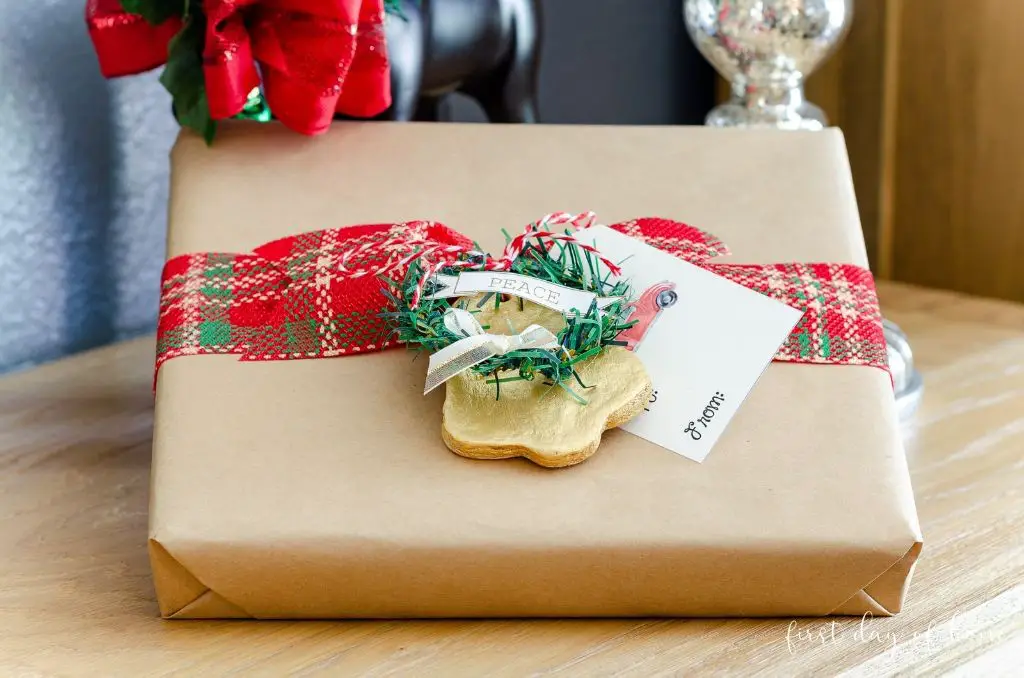
Salt Dough Christmas Decorations
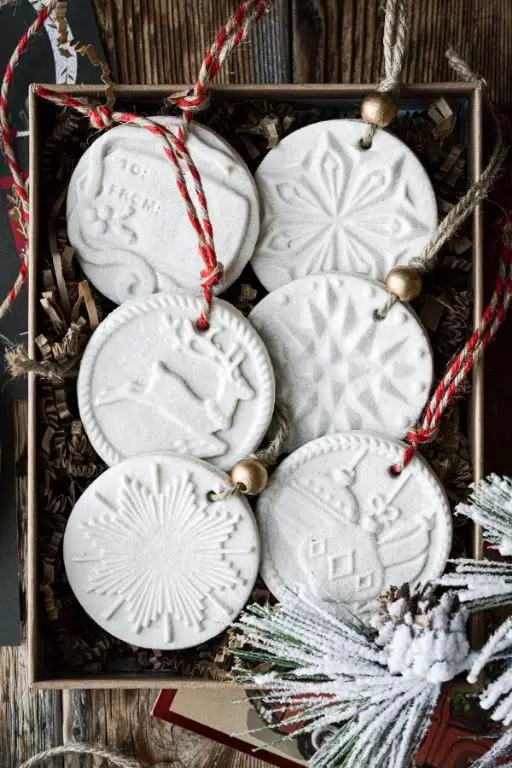
These charming salt dough ornaments are a nostalgic holiday craft project—perfect for gifting or decorating your tree with little helpers!
Ingredients:
- 2 cups all-purpose flour
- 1 cup table salt
- 3/4 cup warm water (110°F)
- 1 tbsp vegetable oil
Instructions:
- Mix the dough: In a large bowl, whisk together 2 cups all-purpose flour and 1 cup table salt. Gradually stir in 3/4 cup warm water and 1 tbsp vegetable oil until a smooth ball forms (add 1 tsp more water if crumbly).
- Roll & cut: On a floured surface, roll dough to 1/4-inch thickness. Use cookie cutters to create shapes, poking a hole at the top with a straw for hanging.
- Bake: Arrange on parchment-lined baking sheets and bake at 200°F for 2–3 hours, flipping halfway, until completely hard and dry.
- Decorate: Once cool, paint with acrylics or seal with mod podge for a glossy finish.
The magic? These air-dry-style ornaments bake low and slow to prevent puffing, keeping your designs crisp. String with ribbon for rustic charm!
Tip: For extra sparkle, sprinkle dough with glitter before baking or dab wet paint with loose glitter after drying.
Salt Dough Coasters
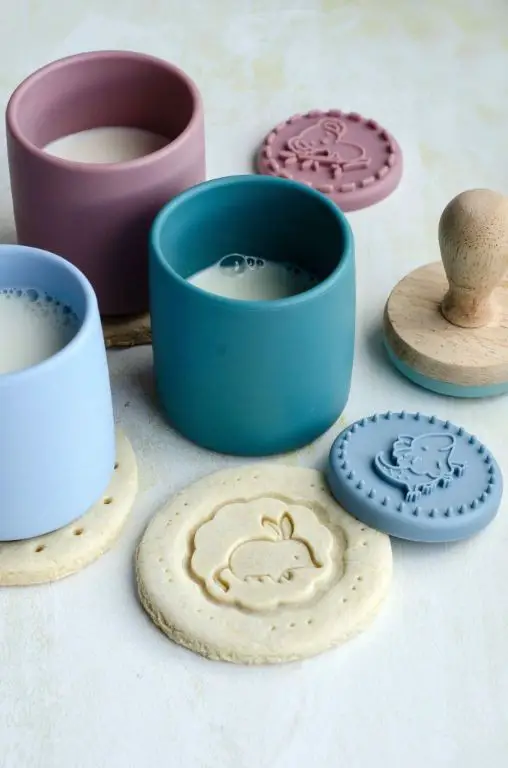
These DIY salt dough coasters are a fun, customizable project that adds a handmade touch to your table—plus, they’re surprisingly sturdy!
Ingredients:
- 2 cups all-purpose flour
- 1 cup fine salt
- 1 cup warm water
- 1 tbsp vegetable oil
Instructions:
- Mix the dough: In a large bowl, combine 2 cups all-purpose flour and 1 cup fine salt. Stir in 1 cup warm water and 1 tbsp vegetable oil until a smooth dough forms (add a splash more water if too crumbly).
- Roll and cut: On a floured surface, roll the dough to 1/4-inch thickness. Use a round cookie cutter or glass to cut 4-inch circles, rerolling scraps as needed.
- Dry or bake: Air-dry method: Let sit on parchment paper for 48 hours, flipping once. Oven method: Bake at 200°F for 2–3 hours until completely hard, checking every 30 minutes.
- Seal (optional): Once cool, brush with acrylic sealer or mod podge for water resistance.
The magic? The salt creates a dense, ceramic-like finish that holds up to condensation. Personalize them with stamps or paint before sealing!
Tip: For a rustic look, press dried herbs or citrus slices into the dough before drying.
Salt Dough Keychains
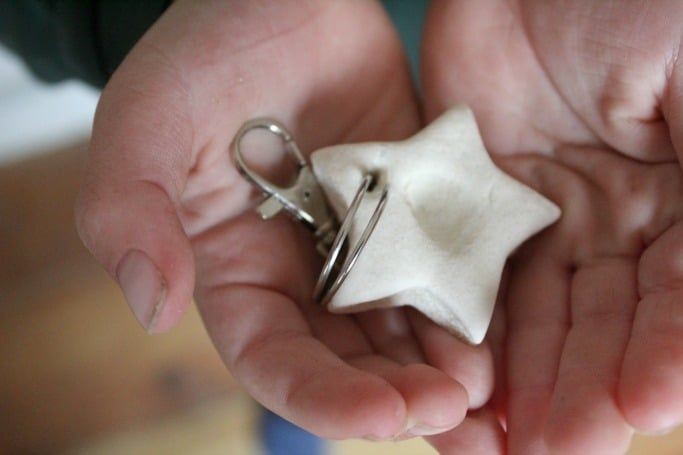
These adorable DIY keychains are a fun, budget-friendly craft project—perfect for gifting or keeping your keys organized in style!
Ingredients:
- 1 cup all-purpose flour
- 1/2 cup table salt
- 1/2 cup warm water
- 1 tbsp vegetable oil
- Acrylic paint and clear sealant (optional, for decorating)
Instructions:
- Mix the dough: In a bowl, combine 1 cup all-purpose flour and 1/2 cup table salt. Stir in 1/2 cup warm water and 1 tbsp vegetable oil until a smooth dough forms.
- Shape: Roll the dough to 1/4-inch thickness on a floured surface. Use cookie cutters or a knife to create small shapes (hearts, stars, etc.), and poke a hole at the top with a straw for the keyring.
- Bake: Arrange shapes on a parchment-lined baking sheet and bake at 250°F for 2 hours, flipping halfway, until completely hard and dry.
- Decorate: Once cool, paint with acrylics and seal with a clear spray or Mod Podge for durability (optional). Thread a keyring through the hole once fully dry.
The best part? These lightweight keychains are fully customizable—try stamping initials or adding glitter before baking for extra personality!
Tip: For faster drying, use an air fryer at 200°F for 45–60 minutes (check often to avoid browning).
Salt Dough Leaf Imprints
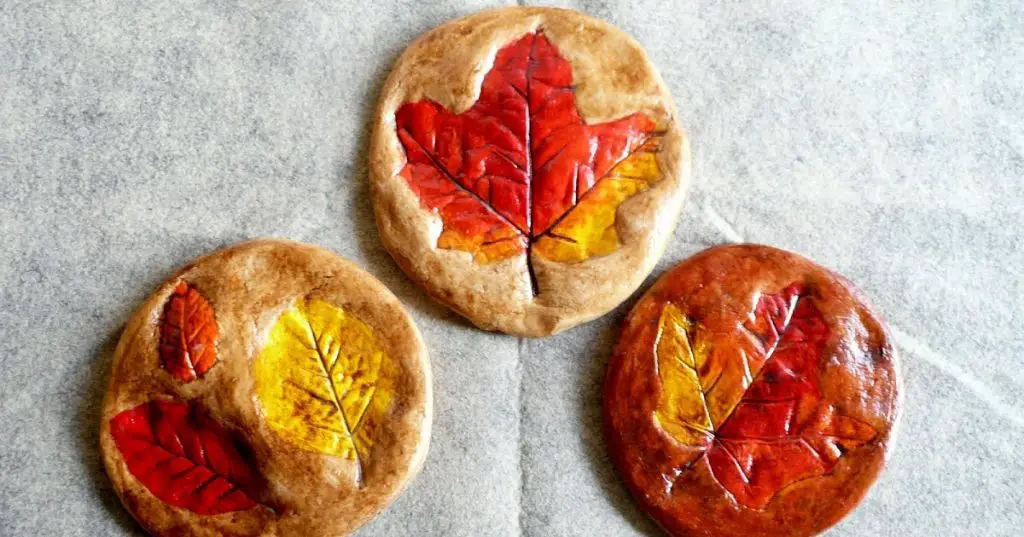
Turn backyard finds into charming keepsakes with this simple salt dough recipe—perfect for capturing the delicate details of autumn leaves.
Ingredients:
- 2 cups all-purpose flour
- 1 cup salt
- 3/4 cup warm water
- 1 tbsp vegetable oil
Instructions:
- Mix the dough: In a large bowl, combine 2 cups all-purpose flour and 1 cup salt. Gradually stir in 3/4 cup warm water and 1 tbsp vegetable oil until a smooth, pliable dough forms (add a teaspoon more water if too crumbly).
- Roll and imprint: On a floured surface, roll the dough to 1/4-inch thickness. Press clean, dry leaves (vein-side down) firmly into the dough, then carefully peel them away to reveal the imprint.
- Dry or bake: Air-dry for 48 hours, flipping occasionally, or bake at 200°F for 2–3 hours until completely hard. Let cool before handling.
The dough’s fine texture picks up even the tiniest leaf veins, making each piece a miniature work of art. String them as ornaments or display them in a rustic bowl!
Tip: For extra durability, seal finished pieces with a coat of mod podge or clear acrylic spray.
Salt Dough Fairy Houses
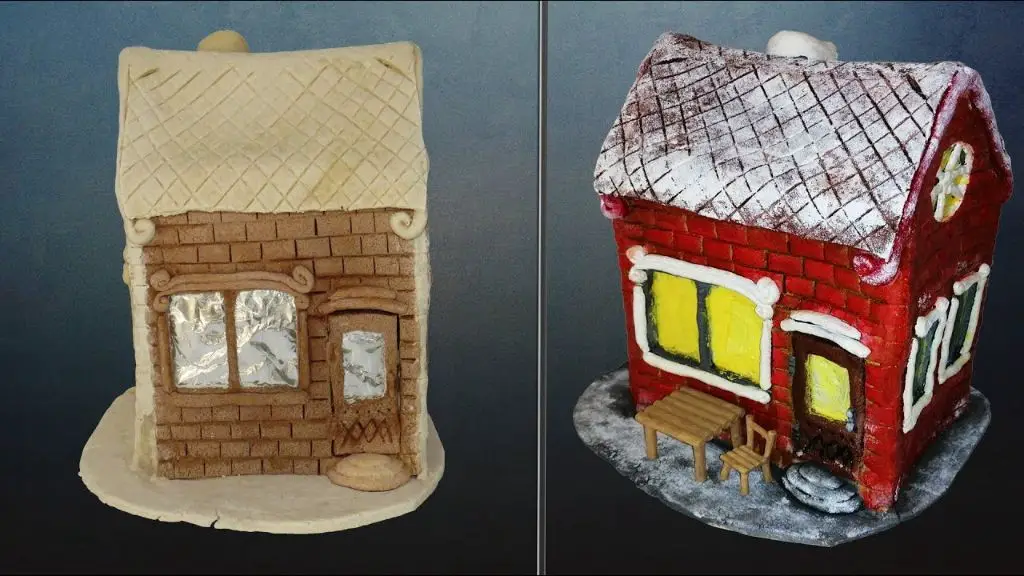
These charming salt dough fairy houses are a whimsical craft project that’s perfect for sparking creativity with kids—or just indulging your inner child!
Ingredients:
- 2 cups all-purpose flour
- 1 cup table salt
- 1 cup warm water
- 1 tbsp vegetable oil
Instructions:
- Mix the dough: In a large bowl, combine 2 cups all-purpose flour and 1 cup table salt. Stir in 1 cup warm water and 1 tbsp vegetable oil until a smooth dough forms (add a sprinkle more flour if sticky).
- Shape: Roll out dough to ¼-inch thickness on a floured surface. Cut or mold pieces into fairy house shapes (walls, roofs, doors) using cookie cutters or freehand.
- Dry: Arrange pieces on a parchment-lined baking sheet. Bake at 200°F for 2–3 hours until completely hard and dry, flipping halfway for even drying.
- Decorate: Once cooled, paint with acrylics or seal with mod podge for a glossy finish (optional).
The magic? This dough bakes rock-solid, so your fairy houses will withstand backyard adventures or shelf displays for seasons to come.
Tip: For quicker drying, break the project into smaller pieces—tiny windows and chimneys dry faster than thick walls!
Salt Dough Alphabet Magnets
These DIY alphabet magnets are a fun, kid-friendly project that doubles as playful kitchen decor—perfect for spelling out grocery lists or sweet notes on the fridge!
Ingredients:
- 2 cups all-purpose flour
- 1 cup table salt
- 1 cup warm water
- 1 tbsp vegetable oil
- Acrylic paint and brush (assorted colors)
- Small round magnets (12–16)
- Strong glue (like E6000)
Instructions:
- Make the dough: In a large bowl, mix 2 cups flour and 1 cup salt. Gradually stir in 1 cup warm water and 1 tbsp vegetable oil until a smooth dough forms (add a sprinkle of flour if sticky).
- Shape the letters: Roll dough to ¼-inch thickness on a floured surface. Use cookie cutters or a knife to cut out alphabet shapes (about 2 inches tall). Transfer to a parchment-lined baking sheet.
- Bake: Preheat oven to 250°F. Bake letters for 2 hours, flipping halfway, until completely hard. Cool for 30 minutes.
- Paint: Decorate cooled letters with acrylic paint. Let dry completely (about 1 hour).
- Attach magnets: Glue a small magnet to the back of each letter using strong adhesive. Let cure overnight before using.
The dough’s ultra-smooth texture makes these letters easy to paint, and their lightweight feel keeps them snug on the fridge without sliding. Bonus? They’re practically indestructible—no more chipped store-bought magnets!
Tip: For glossy letters, seal painted dough with a layer of Mod Podge before attaching magnets.
Salt Dough Garden Markers
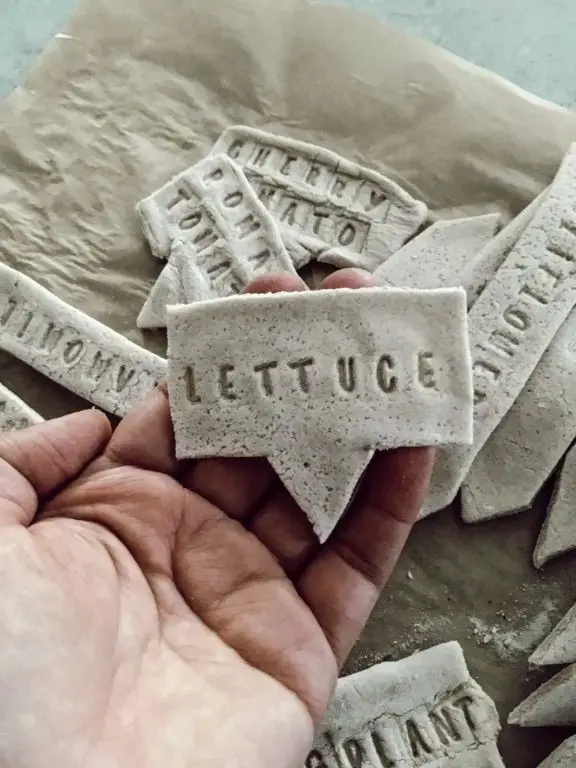
These charming, handmade garden markers are a fun weekend project—durable, customizable, and perfect for labeling herbs or veggies.
Ingredients:
- 1 cup all-purpose flour
- 1/2 cup table salt
- 1/2 cup warm water
- 1 tbsp vegetable oil
- Acrylic paint and sealant (optional, for decorating)
Instructions:
- Mix the dough: In a bowl, combine 1 cup all-purpose flour and 1/2 cup table salt. Gradually stir in 1/2 cup warm water and 1 tbsp vegetable oil until a smooth dough forms.
- Shape the markers: Roll dough to 1/4-inch thickness on a floured surface. Cut into rectangles or fun shapes (like leaves) with a knife or cookie cutter. Use a skewer to poke a hole near the top for hanging.
- Bake: Arrange markers on a parchment-lined baking sheet. Bake at 250°F for 2 hours, flipping halfway, until completely hard and dry.
- Decorate (optional): Once cool, paint with acrylics and seal with a weatherproof spray if using outdoors.
The salt dough bakes into a rustic, stone-like texture that holds up surprisingly well in the garden—no more soggy labels after rain!
Tip: For extra durability, add a thin layer of mod podge before sealing to prevent cracking over time.
Salt Dough Holiday Wreaths

These charming salt dough wreaths are a fun, kid-friendly craft that doubles as festive decor—perfect for gifting or hanging on your tree!
Ingredients:
- 2 cups all-purpose flour
- 1 cup salt
- 3/4 cup warm water
- 1 tbsp vegetable oil
- Green food coloring (optional)
- Ribbon or twine for hanging
Instructions:
- Preheat oven to 250°F. In a large bowl, mix 2 cups all-purpose flour and 1 cup salt until combined.
- Gradually stir in 3/4 cup warm water and 1 tbsp vegetable oil until a dough forms. Add green food coloring (if using) and knead until evenly colored.
- Roll dough into 1/2-inch-thick ropes, then twist into small wreath shapes, pinching the ends to seal.
- Arrange wreaths on a parchment-lined baking sheet. Bake at 250°F for 2 hours until completely hardened. Cool completely.
- Thread ribbon or twine through each wreath for hanging.
The slow bake gives these wreaths a sturdy, ceramic-like finish—no cracking! Let kids personalize them with paint or glitter after baking.
Tip: For a rustic look, press cinnamon sticks or cloves into the dough before baking.
Salt Dough Memory Boxes
These charming salt dough boxes are the perfect way to preserve tiny treasures—think seashells, notes, or baby’s first curl—with a nostalgic handmade touch.
Ingredients:
- 2 cups all-purpose flour
- 1 cup fine salt
- 3/4 cup warm water
- 1 tbsp vegetable oil
Instructions:
- Mix the dough: In a large bowl, combine 2 cups all-purpose flour and 1 cup fine salt. Gradually stir in 3/4 cup warm water and 1 tbsp vegetable oil until a smooth, pliable dough forms (add a teaspoon more water if too crumbly).
- Shape: Roll the dough to 1/4-inch thickness on a floured surface. Cut into rectangles for box sides (4 pieces) and a square for the base. Score edges with a fork, then press sides together with a dab of water to seal.
- Bake: Place on a parchment-lined baking sheet and bake at 250°F for 2–2.5 hours until completely hard and dry. Cool fully before decorating with paint or markers.
What makes these boxes special? The dough bakes rock-solid, so they’ll hold up for years—unlike fragile papier-mâché or cardboard.
Tip: For a rustic look, press lace or leaves into the dough before baking to leave delicate imprints.
Salt Dough Puzzle Pieces
These DIY salt dough puzzle pieces are a fun, tactile craft project—perfect for kids or as quirky homemade gifts!
Ingredients:
- 2 cups all-purpose flour
- 1 cup table salt
- 3/4 cup warm water
- 1 tbsp vegetable oil
Instructions:
- Mix the dough: In a large bowl, combine 2 cups all-purpose flour and 1 cup table salt. Stir in 3/4 cup warm water and 1 tbsp vegetable oil until a smooth, pliable dough forms (add a teaspoon more water if too crumbly).
- Shape: Roll the dough to 1/4-inch thickness on a floured surface. Use cookie cutters or a knife to cut puzzle-piece shapes, pressing lines lightly with a toothpick for details.
- Bake: Arrange pieces on a parchment-lined baking sheet. Bake at 250°F for 2 hours, flipping halfway, until completely hard and dry.
- Cool & decorate: Let cool completely before painting with acrylics or sealing with mod podge for durability.
The low baking temperature ensures the dough dries without cracking, leaving you with sturdy pieces ready for play or display. Tip: For extra durability, let the dough air-dry for 24 hours before baking!
Salt Dough Seasonal Garlands
These charming garlands add a rustic touch to your holiday decor—plus, they’re fun to make with kids!
Ingredients:
- 2 cups all-purpose flour
- 1 cup salt
- 1 cup warm water
- 1 tbsp vegetable oil
- 1 tsp cinnamon (optional, for scent)
- Acrylic paint or food coloring (for decorating)
Instructions:
- Preheat oven to 250°F. Line a baking sheet with parchment paper.
- In a large bowl, whisk together 2 cups all-purpose flour and 1 cup salt. Stir in 1 cup warm water, 1 tbsp vegetable oil, and 1 tsp cinnamon (if using) until a smooth dough forms.
- Roll dough to ¼-inch thickness on a floured surface. Use cookie cutters to create seasonal shapes (leaves, stars, etc.), and poke a small hole at the top of each with a skewer for threading.
- Arrange shapes on the baking sheet. Bake for 2 hours, flipping halfway, until completely hard and dry.
- Cool completely, then decorate with paint or food coloring. Thread twine through the holes to assemble garlands.
The dough’s subtle texture and earthy scent make these garlands feel like a handmade heirloom—perfect for draping over mantels or gifting to friends.
Tip: For extra shimmer, mix a pinch of glitter into the dough before baking!
Salt Dough Miniature Food Replicas

These adorable salt dough replicas are a fun way to create tiny, lifelike food decorations—perfect for dollhouses, ornaments, or playful kitchen decor!
Ingredients:
- 2 cups all-purpose flour
- 1 cup fine salt
- 3/4 cup warm water
- 1 tbsp vegetable oil
- Food coloring (optional, for tinting dough)
Instructions:
- Mix the dough: In a large bowl, combine the flour and salt. Gradually stir in the warm water and vegetable oil until a smooth, pliable dough forms. If using food coloring, knead it in until evenly distributed.
- Shape your miniatures: Roll out the dough to 1/4-inch thickness and use small cookie cutters or a knife to create tiny food shapes (like fruits, cookies, or veggies). Add texture with toothpicks or a fork for realism.
- Dry or bake: Air-dry the pieces on parchment paper for 48 hours, flipping halfway, or bake at 200°F for 2–3 hours until hard and dry. Cool completely before handling.
The best part? These lightweight replicas hold fine details beautifully, making them ideal for crafting with kids or adding whimsy to your space.
Tip: Seal finished pieces with acrylic sealer or mod podge for durability and a glossy “food-like” finish!
Conclusion
With so many fun and creative salt dough ideas, there’s something for every crafter to enjoy! Whether you’re making ornaments, keepsakes, or playful creations, these recipes are perfect for sparking creativity. Give them a try, and don’t forget to share your favorites in the comments or pin this roundup for later. Happy crafting!

I’m Brandon, the face behind the recipes. As a dedicated food enthusiast, I love experimenting with flavors and sharing my culinary adventures with you.