Craving something sweet but short on time? These 20 delicious refrigerated cake recipes are your ticket to easy, no-bake bliss! Perfect for busy weeknights, last-minute gatherings, or just treating yourself, these fuss-free desserts come together in a flash—no oven required. From creamy cheesecakes to fruity delights, get ready to satisfy your sweet tooth with minimal effort. Let’s dive in!
Chocolate Mousse Refrigerator Cake
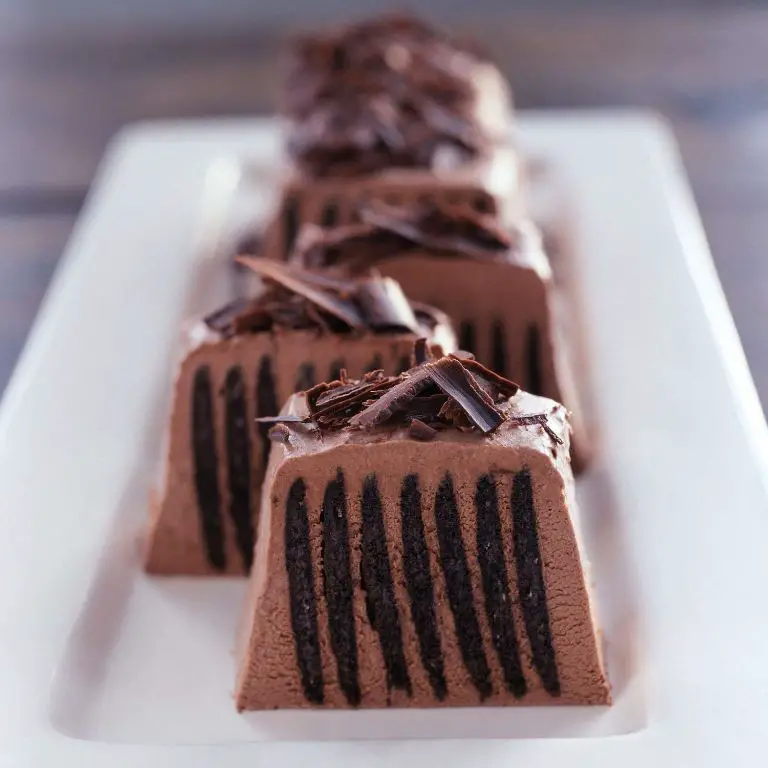
This no-bake beauty is like a cross between a rich chocolate mousse and a decadent icebox cake—perfect for when you crave something indulgent but effortless.
Ingredients:
- 1 (14 oz) package chocolate graham crackers
- 2 cups heavy cream
- 1/2 cup powdered sugar
- 1/4 cup unsweetened cocoa powder
- 1 tsp vanilla extract
- 1/4 tsp salt
- 1/2 cup mini chocolate chips (plus extra for topping)
Instructions:
- Whip the cream: In a large bowl, beat the heavy cream, powdered sugar, cocoa powder, vanilla extract, and salt with a hand mixer until stiff peaks form, about 3–4 minutes. Fold in the 1/2 cup mini chocolate chips.
- Layer the cake: In a 9×13-inch dish, arrange a single layer of chocolate graham crackers, breaking them as needed to fit. Spread half the mousse mixture evenly over the crackers. Repeat with another layer of crackers and the remaining mousse.
- Chill: Cover and refrigerate for at least 4 hours (or overnight) until the graham crackers soften into a cake-like texture.
- Serve: Sprinkle with extra mini chocolate chips before slicing.
The magic? Those humble graham crackers transform into something velvety, while the mousse stays light yet intensely chocolatey—no oven required!
Tip: For a fun twist, swap the chocolate graham crackers for cinnamon or vanilla ones.
No-Bake Cheesecake with Fresh Berries
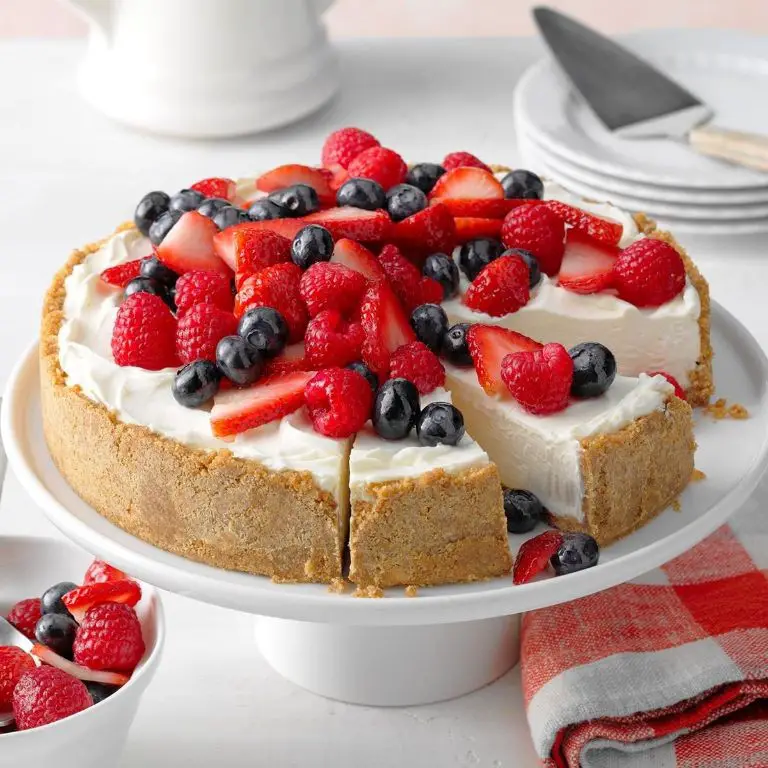
No-Bake Cheesecake with Fresh Berries
This dreamy no-bake cheesecake is a summer stunner—creamy, light, and topped with juicy berries for the perfect sweet-tart balance.
Ingredients:
- 1 1/2 cups graham cracker crumbs
- 6 tbsp unsalted butter, melted
- 1/4 cup granulated sugar
- 16 oz cream cheese, softened
- 1/2 cup powdered sugar
- 1 tsp vanilla extract
- 1 cup heavy cream, cold
- 2 cups mixed fresh berries (strawberries, blueberries, raspberries)
- 1 tbsp honey (optional, for drizzling)
Instructions:
- Make the crust: In a bowl, mix 1 1/2 cups graham cracker crumbs, 6 tbsp melted butter, and 1/4 cup granulated sugar until combined. Press firmly into a 9-inch springform pan. Chill for 15 minutes.
- Whip the filling: Beat 16 oz cream cheese with 1/2 cup powdered sugar and 1 tsp vanilla extract until smooth. In another bowl, whip 1 cup heavy cream to stiff peaks, then fold into the cream cheese mixture.
- Assemble: Spread the filling over the chilled crust. Smooth the top and refrigerate for at least 4 hours (or overnight).
- Serve: Top with 2 cups mixed berries and drizzle with 1 tbsp honey if desired. Slice and enjoy!
The magic here? The fluffy filling sets without baking, letting the berries shine for a dessert that’s effortlessly elegant.
Tip: For cleaner slices, dip your knife in hot water and wipe it between cuts.
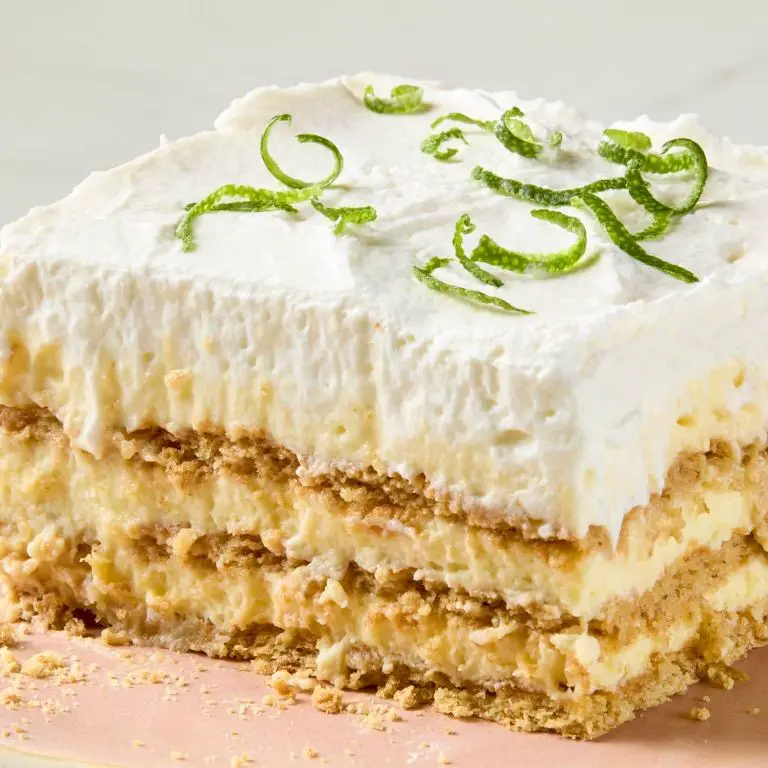
Lemon Icebox Cake with Whipped Cream
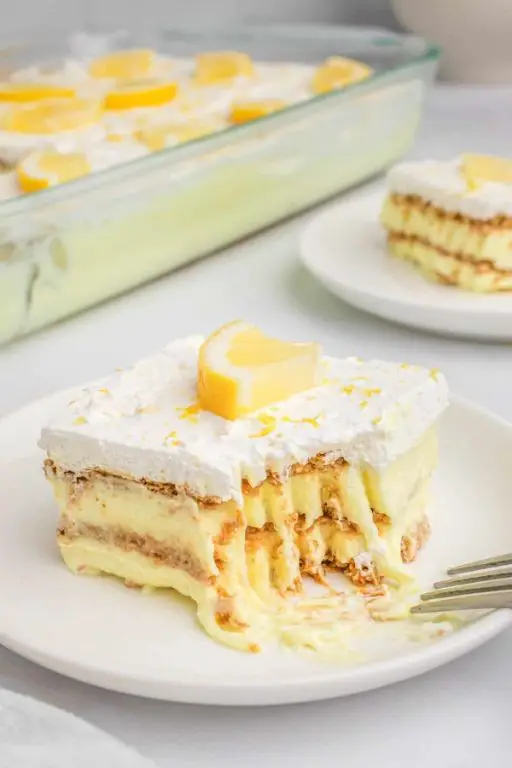
This no-bake stunner is like sunshine on a plate—bright, creamy, and impossibly easy to throw together for any occasion.
Ingredients
- 2 cups heavy cream, chilled
- 1/3 cup powdered sugar
- 1 tsp vanilla extract
- 1 (14 oz) box graham crackers
- 1 (15 oz) jar lemon curd
- Zest of 1 lemon (for garnish)
Instructions
- In a large bowl, beat 2 cups heavy cream, 1/3 cup powdered sugar, and 1 tsp vanilla extract with a hand mixer until stiff peaks form, about 3 minutes.
- Spread a thin layer of whipped cream on the bottom of an 8×8″ baking dish. Top with a single layer of graham crackers, breaking them to fit as needed.
- Dollop half the lemon curd over the crackers, then spread gently. Cover with half the remaining whipped cream. Repeat layers (crackers, lemon curd, whipped cream).
- Cover and refrigerate for at least 4 hours (or overnight) until crackers soften into cake-like layers.
- Just before serving, sprinkle with lemon zest.
The magic happens in the fridge—the graham crackers transform into delicate, custard-soft layers that melt with each lemony bite.
Tip: For clean slices, dip your knife in hot water before cutting.
Tiramisu Refrigerator Cake

No-Bake Tiramisu Refrigerator Cake
This fuss-free tiramisu cake skips the fuss of layering and chilling individual components—just assemble, chill, and let the flavors meld into creamy, coffee-kissed perfection.
Ingredients
- 1 (14 oz) package soft ladyfingers
- 1 1/2 cups strong brewed coffee, cooled
- 2 tbsp coffee liqueur (optional)
- 2 (8 oz) blocks cream cheese, softened
- 1 1/4 cups powdered sugar
- 2 cups heavy cream
- 1 tsp vanilla extract
- 2 tbsp unsweetened cocoa powder
Instructions
- Prep the base: Quickly dip 1/3 of the ladyfingers (one at a time) into the cooled coffee mixed with coffee liqueur (if using). Arrange them snugly in a single layer in a 9×13-inch dish.
- Make the filling: Beat cream cheese and 1 1/4 cups powdered sugar until smooth. In another bowl, whip heavy cream and 1 tsp vanilla to stiff peaks. Fold whipped cream into cream cheese mixture until combined.
- Layer: Spread half the filling over the soaked ladyfingers. Repeat dipping and layering with another 1/3 of ladyfingers, then top with remaining filling. Cover and refrigerate for at least 6 hours (or overnight).
- Serve: Just before serving, dust with 2 tbsp cocoa powder through a fine sieve. Slice and enjoy chilled.
The magic here? The ladyfingers soften just enough to slice cleanly, while the filling stays luxuriously light—like a cross between classic tiramisu and cheesecake.
Tip: For a kid-friendly version, swap the coffee for chocolate milk and omit the liqueur.
Strawberry Shortcake Icebox Cake
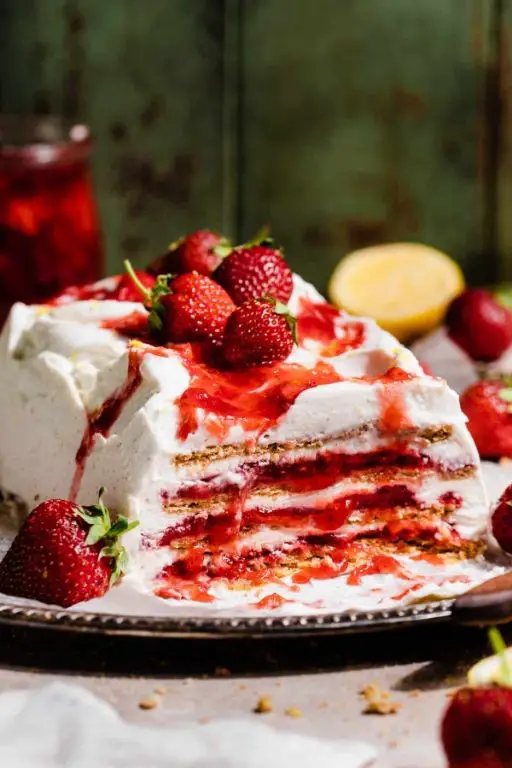
This no-bake beauty layers fluffy whipped cream, fresh strawberries, and graham crackers into a dreamy dessert that’s as easy as it is impressive.
Ingredients:
- 2 cups heavy cream
- 1/4 cup powdered sugar
- 1 tsp vanilla extract
- 1 lb fresh strawberries, thinly sliced
- 14 oz graham crackers (about 24 full sheets)
- 1/4 cup strawberry jam
Instructions:
- In a large bowl, beat heavy cream, powdered sugar, and vanilla extract with a hand mixer until stiff peaks form, about 3–4 minutes.
- Spread a thin layer of whipped cream (about 1/2 cup) on the bottom of a 9×13-inch baking dish. Arrange a single layer of graham crackers over the cream, breaking them as needed to fit.
- Spread half the remaining whipped cream over the crackers, then top with half the sliced strawberries. Repeat layers: crackers, whipped cream, and strawberries.
- Warm strawberry jam in the microwave for 15 seconds, then drizzle over the top layer of strawberries. Cover and refrigerate for at least 4 hours (or overnight) until crackers soften into cake-like layers.
The magic? Graham crackers transform into tender cake layers while the jam adds a glossy, fruity finish—no oven required!
Tip: For extra flair, garnish with whole strawberries and a dusting of powdered sugar before serving.
Banana Pudding Refrigerator Cake
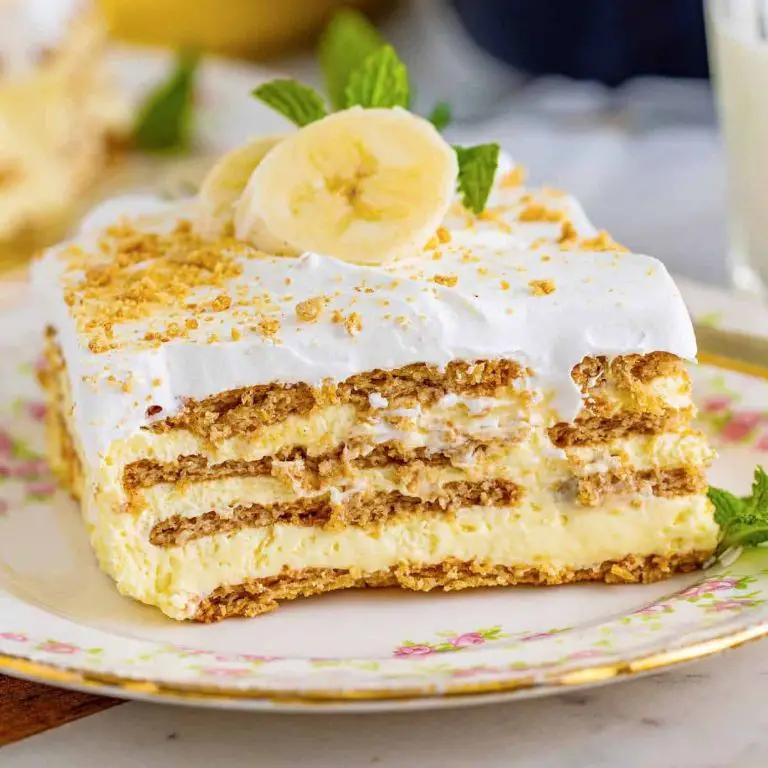
This no-bake beauty layers creamy pudding, ripe bananas, and buttery vanilla wafers into a dessert that’s pure nostalgia—with zero oven time!
Ingredients:
- 1 (14 oz) can sweetened condensed milk
- 1 ½ cups cold water
- 1 (3.4 oz) box instant vanilla pudding mix
- 2 cups heavy whipping cream
- 1 tsp vanilla extract
- 4 ripe bananas, sliced ¼-inch thick
- 1 (11 oz) box vanilla wafers
Instructions:
- In a large bowl, whisk together the sweetened condensed milk and cold water until smooth. Add the vanilla pudding mix and whisk for 2 minutes until thickened. Let stand 5 minutes.
- In another bowl, beat the heavy whipping cream and 1 tsp vanilla extract with a hand mixer until stiff peaks form. Gently fold the whipped cream into the pudding mixture until fully combined.
- In a 9×13-inch dish, layer half the vanilla wafers, followed by half the banana slices. Spread half the pudding mixture evenly over the bananas. Repeat layers once more, ending with pudding.
- Cover and refrigerate for at least 4 hours (or overnight) until the wafers soften into cake-like layers.
The magic? Those wafers transform into tender cake layers while the bananas stay perfectly fresh—no mushy texture here!
Tip: For extra flair, crush a few extra wafers and sprinkle over the top before serving.
Oreo Icebox Cake with Chocolate Ganache
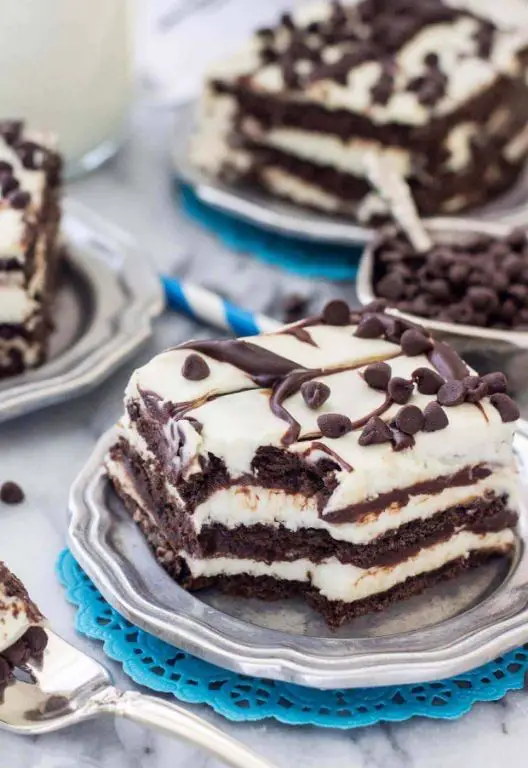
No-bake, fuss-free, and irresistibly creamy—this Oreo icebox cake is a crowd-pleaser that comes together in minutes.
Ingredients:
- 2 (14.3 oz) packages Oreo cookies (divided)
- 3 cups heavy cream (cold)
- 1/4 cup powdered sugar
- 1 tsp vanilla extract
- 1/2 cup semi-sweet chocolate chips
- 1/4 cup heavy cream (for ganache)
Instructions:
- Prep the layers: Crush 20 Oreos into fine crumbs (save the rest for layering). In a large bowl, whip 3 cups heavy cream, 1/4 cup powdered sugar, and 1 tsp vanilla extract to stiff peaks.
- Assemble the cake: In a 9×13-inch dish, spread a thin layer of whipped cream. Top with a single layer of whole Oreos, then spread 1/3 of the remaining cream over them. Repeat twice, ending with cream. Sprinkle crushed Oreos on top.
- Make the ganache: Heat 1/4 cup heavy cream until steaming (about 30 seconds in the microwave). Pour over 1/2 cup chocolate chips, let sit 1 minute, then stir until smooth. Drizzle over the cake.
- Chill: Refrigerate for at least 6 hours (or overnight) to soften the cookies into cake-like layers.
The magic? The cookies transform into a soft, cakey texture while the ganache adds a rich, glossy finish.
Tip: For extra crunch, reserve a few crushed Oreos to sprinkle on top just before serving.
Peanut Butter Chocolate Refrigerator Cake
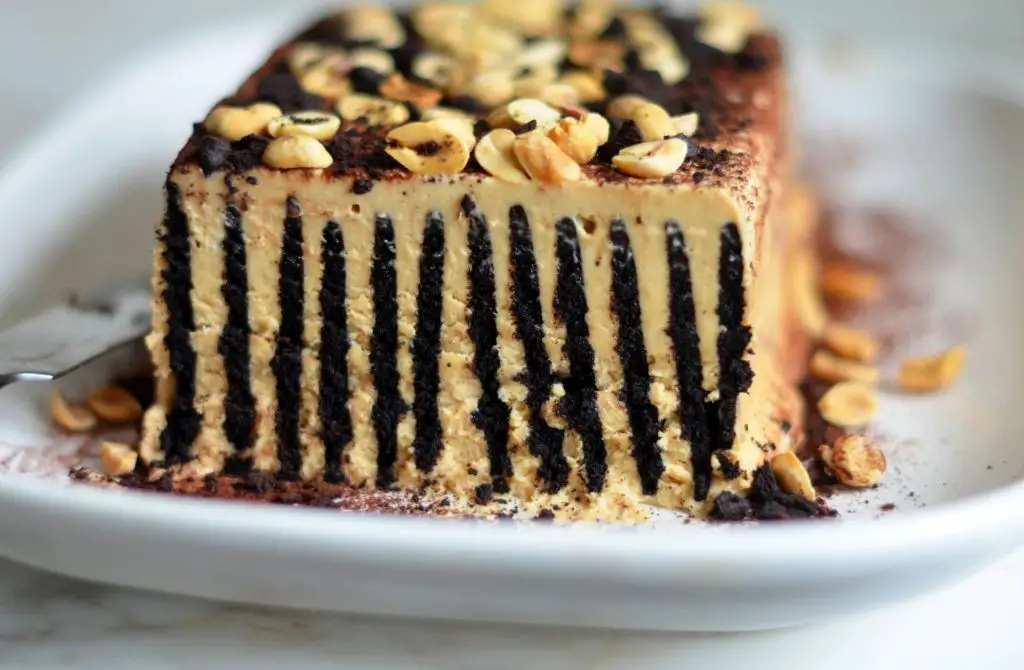
This no-bake dessert is a dreamy mashup of creamy peanut butter and rich chocolate—perfect for when you need a fuss-free treat that still feels indulgent.
Ingredients:
- 2 cups graham cracker crumbs
- 1/2 cup unsalted butter, melted
- 1 cup creamy peanut butter
- 1 cup powdered sugar
- 1 tsp vanilla extract
- 1 1/2 cups semi-sweet chocolate chips
- 1/2 cup heavy cream
- 1/4 cup chopped peanuts (for topping)
Instructions:
- In a bowl, mix graham cracker crumbs and melted butter until combined. Press firmly into the bottom of a 9×9-inch pan.
- In another bowl, beat peanut butter, powdered sugar, and vanilla extract until smooth. Spread evenly over the crust.
- Heat heavy cream in a small saucepan until steaming (do not boil). Pour over chocolate chips in a heatproof bowl; let sit 2 minutes, then stir until smooth. Pour over peanut butter layer.
- Sprinkle chopped peanuts on top. Refrigerate 4 hours (or overnight) until set. Slice into squares and serve chilled.
The magic here? The layers stay distinct but meld into a perfect bite—crunchy, creamy, and decadent all at once.
Tip: For cleaner slices, dip your knife in hot water before cutting.
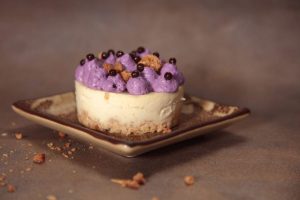
Pistachio Cream Refrigerator Cake
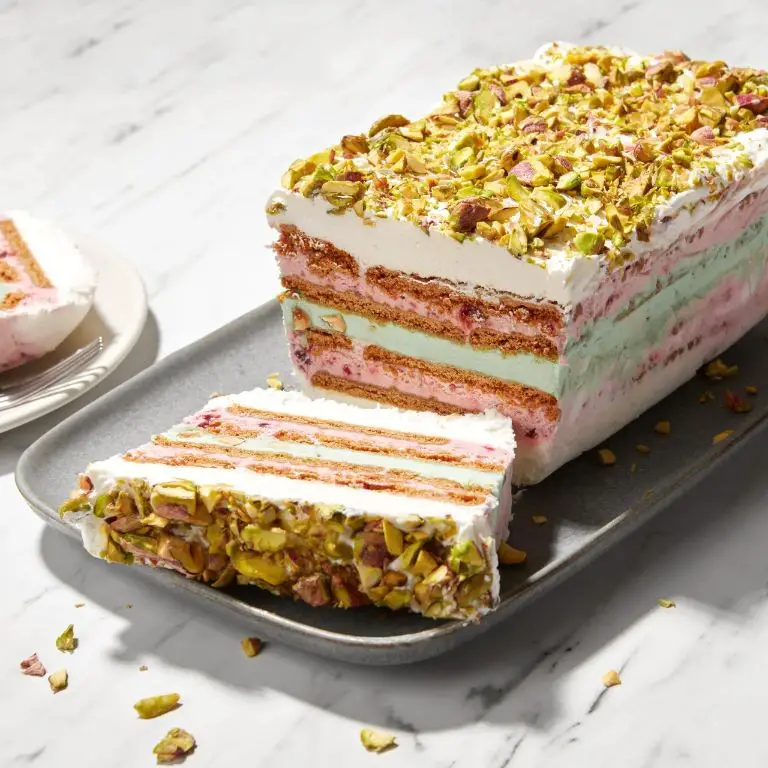
No baking required—just layer, chill, and let this dreamy pistachio cream cake work its magic in the fridge. Perfect for when you want a showstopper dessert without turning on the oven!
Ingredients:
- 2 cups graham cracker crumbs (about 16 full sheets)
- 1/2 cup unsalted butter, melted
- 1/4 cup granulated sugar
- 1 (8 oz) package cream cheese, softened
- 1 cup powdered sugar
- 1 tsp vanilla extract
- 1 1/2 cups heavy whipping cream
- 3/4 cup shelled pistachios, finely chopped (plus extra for garnish)
- 1/4 tsp salt
Instructions:
- Prep the crust: In a bowl, mix graham cracker crumbs, melted butter, and granulated sugar until combined. Press firmly into the bottom of a 9×9-inch pan. Chill for 15 minutes.
- Make the filling: Beat cream cheese, powdered sugar, vanilla extract, and salt until smooth. In another bowl, whip heavy cream to stiff peaks. Fold whipped cream and chopped pistachios into the cream cheese mixture.
- Assemble: Spread filling over the chilled crust. Sprinkle extra pistachios on top. Cover and refrigerate for at least 4 hours (or overnight) until set.
The creamy, nutty layers and buttery crust get even better as they meld together—slice it cold for the cleanest cuts!
Tip: For a pop of color, dust the top with matcha powder or add a drizzle of melted white chocolate.
Raspberry Swirl Cheesecake Icebox Cake

This no-bake beauty layers creamy cheesecake filling with tart raspberry swirls and graham crackers for a dessert that’s as stunning as it is simple.
Ingredients:
- 2 cups heavy cream, cold
- 8 oz cream cheese, softened
- 1/2 cup powdered sugar
- 1 tsp vanilla extract
- 14 oz graham crackers (about 24 full sheets)
- 1/2 cup seedless raspberry jam
- Fresh raspberries (for garnish)
Instructions:
- In a large bowl, beat heavy cream until stiff peaks form, about 3–4 minutes. Set aside.
- In another bowl, beat cream cheese, powdered sugar, and vanilla extract until smooth. Gently fold in the whipped cream until fully combined.
- Spread a thin layer of the cream mixture in the bottom of a 9×13-inch baking dish. Top with a single layer of graham crackers, breaking them as needed to fit.
- Dollop half the remaining cream mixture over the crackers, then drizzle with 1/4 cup raspberry jam. Use a knife to gently swirl the jam into the cream. Repeat with another layer of graham crackers, the remaining cream, and the last 1/4 cup jam.
- Cover and refrigerate for at least 4 hours (or overnight) until the crackers soften. Garnish with fresh raspberries before serving.
The magic? Graham crackers transform into cake-like layers while the raspberry swirl adds a vibrant tang to every bite.
Tip: Warm the jam for 10 seconds in the microwave to make swirling easier!
Key Lime Pie Refrigerator Cake
This no-bake dessert layers creamy lime filling with graham crackers for a fuss-free twist on the classic pie—perfect for beating the summer heat!
Ingredients:
- 14 oz sweetened condensed milk
- 1/2 cup key lime juice (or regular lime juice)
- 1 tbsp lime zest
- 8 oz whipped topping (like Cool Whip), thawed
- 12 full-sheet graham crackers
- 1/2 cup heavy cream
- 2 tbsp powdered sugar
Instructions:
- In a bowl, whisk together 14 oz sweetened condensed milk, 1/2 cup key lime juice, and 1 tbsp lime zest until smooth. Fold in 8 oz whipped topping until just combined.
- Spread a thin layer of the lime mixture in the bottom of an 8×8-inch dish. Top with a single layer of graham crackers, breaking them to fit as needed.
- Repeat layers (lime mixture, graham crackers) twice more, ending with lime mixture. Cover and refrigerate for at least 4 hours or overnight.
- Before serving, whip 1/2 cup heavy cream and 2 tbsp powdered sugar to stiff peaks. Spread over the top and garnish with extra lime zest.
The magic? The graham crackers soften into a cake-like texture while keeping a hint of crunch—no oven required!
Tip: For extra tang, swap 1/4 cup of the lime juice with lemon juice.
Caramel Apple Icebox Cake
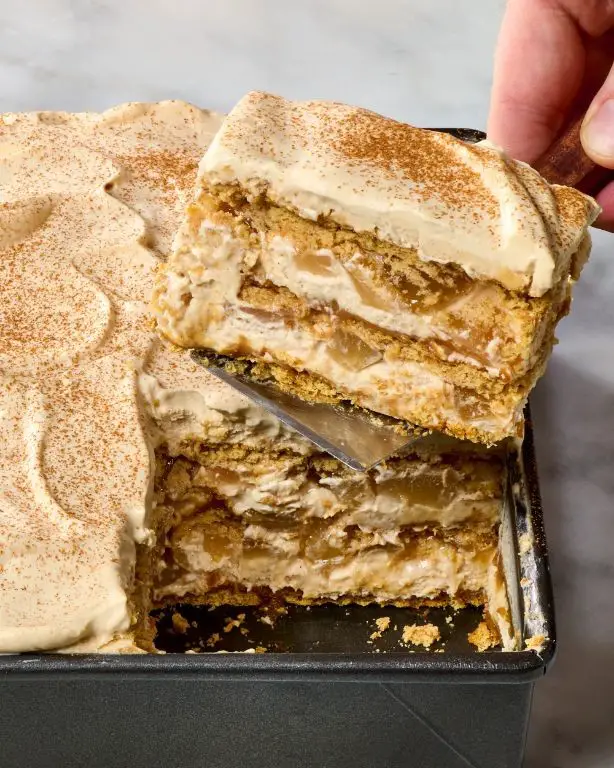
This no-bake dessert layers spiced apples, caramel, and whipped cream between graham crackers for a fuss-free treat that tastes like autumn in every bite.
Ingredients:
- 2 cups heavy cream
- 1/4 cup powdered sugar
- 1 tsp vanilla extract
- 3 medium Granny Smith apples, thinly sliced
- 1 tsp ground cinnamon
- 1/4 tsp nutmeg
- 1/2 cup caramel sauce (plus extra for drizzling)
- 14 oz graham crackers (about 24 full sheets)
Instructions:
- In a large bowl, whip heavy cream, powdered sugar, and vanilla extract to stiff peaks (about 3-4 minutes). Refrigerate.
- Toss apple slices with cinnamon and nutmeg until evenly coated.
- In a 9×13″ dish, layer 1/3 of graham crackers (breaking to fit), followed by 1/2 the whipped cream, 1/2 the apples, and 1/4 cup caramel sauce. Repeat layers, ending with graham crackers.
- Cover and chill for at least 4 hours (or overnight) until crackers soften like cake layers.
- Before serving, drizzle with extra caramel and slice into squares.
The magic? Graham crackers transform into tender cake layers while the spiced apples stay crisp—no soggy textures here!
Tip: For extra crunch, sprinkle crushed graham crackers on top just before serving.
Matcha Green Tea Refrigerator Cake
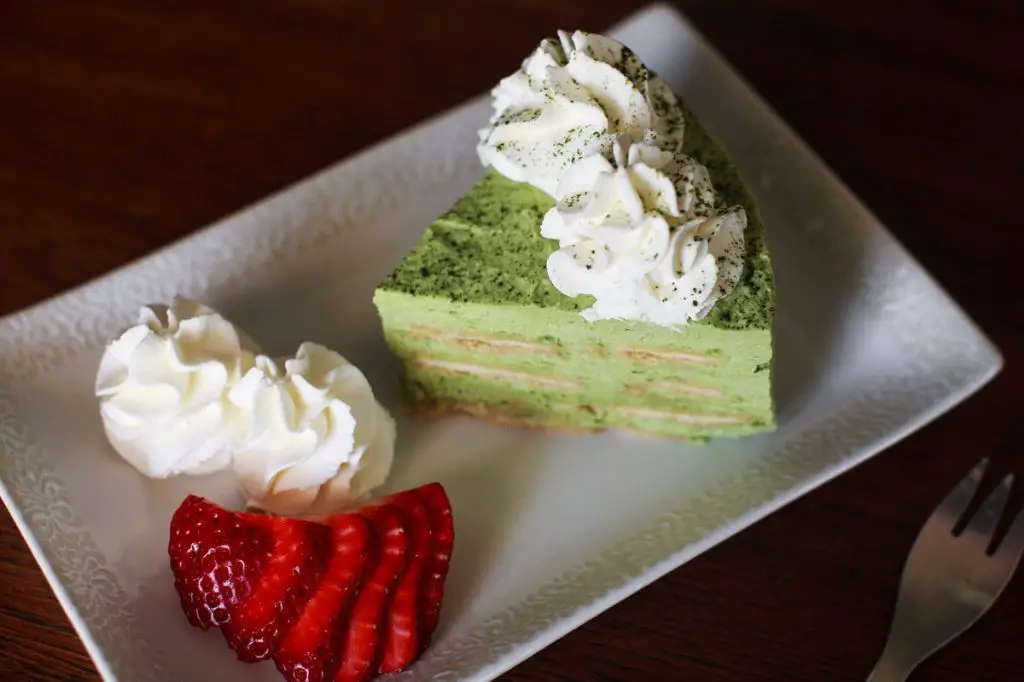
This no-bake dessert is a dreamy, creamy treat with earthy matcha flavor and a buttery graham cracker crust—perfect for when you want something sweet without turning on the oven.
Ingredients:
- 1 1/2 cups graham cracker crumbs (about 12 sheets)
- 1/4 cup granulated sugar
- 6 tbsp unsalted butter, melted
- 1 1/2 cups heavy cream, cold
- 1 (8 oz) package cream cheese, softened
- 1/2 cup powdered sugar
- 2 tbsp high-quality matcha powder
- 1 tsp vanilla extract
Instructions:
- Make the crust: In a bowl, mix 1 1/2 cups graham cracker crumbs, 1/4 cup granulated sugar, and 6 tbsp melted butter until combined. Press firmly into the bottom of an 8×8-inch baking dish. Chill for 15 minutes.
- Whip the cream: Using a hand mixer, beat 1 1/2 cups cold heavy cream until stiff peaks form. Set aside.
- Prepare the filling: In another bowl, beat the softened cream cheese, 1/2 cup powdered sugar, 2 tbsp matcha powder, and 1 tsp vanilla extract until smooth. Gently fold in the whipped cream until no streaks remain.
- Assemble: Spread the matcha cream over the chilled crust. Smooth the top with a spatula and refrigerate for at least 4 hours (or overnight) until set.
The magic here? The matcha’s vibrant color and slightly bitter notes balance the sweet creaminess—like a sliceable matcha latte! Tip: Dust extra matcha powder on top before serving for a gorgeous finish.
Coconut Cream Refrigerator Cake
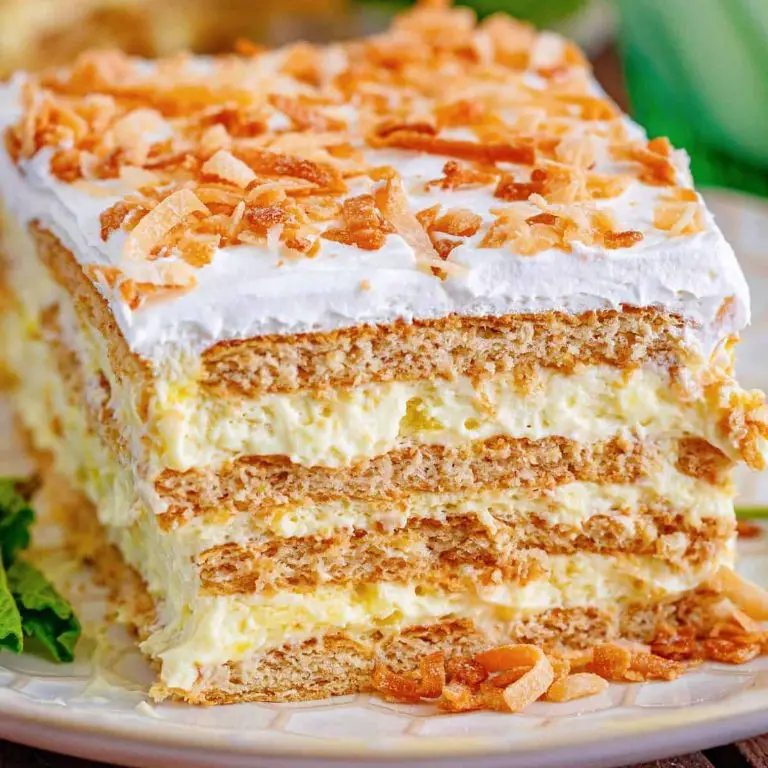
This no-bake dream is like a tropical vacation in dessert form—creamy, coconutty, and perfect for beating the heat.
Ingredients:
- 1 (14 oz) can full-fat coconut milk, chilled overnight
- 1/2 cup powdered sugar
- 1 tsp vanilla extract
- 1 (11 oz) box vanilla wafer cookies
- 1 1/2 cups sweetened shredded coconut, toasted
- 1/4 cup coconut cream (skimmed from the chilled can)
Instructions:
- Prep the coconut cream: Scoop the solid coconut cream from the chilled can into a bowl (reserve 1/4 cup for topping). Whip with 1/2 cup powdered sugar and 1 tsp vanilla extract until fluffy, about 2 minutes.
- Layer the cake: In an 8×8″ dish, arrange a single layer of vanilla wafers. Spread half the whipped coconut cream over them, then sprinkle with 1/2 cup toasted coconut. Repeat layers once more.
- Chill and finish: Cover and refrigerate for at least 4 hours (or overnight). Before serving, drizzle with the reserved 1/4 cup coconut cream and top with remaining 1/2 cup toasted coconut.
The magic? The wafers soften just enough to mimic cake layers, while the toasted coconut adds a crave-worthy crunch.
Tip: For extra flair, press crushed pineapple (drained well) between the layers!
Blueberry Lemon Icebox Cake
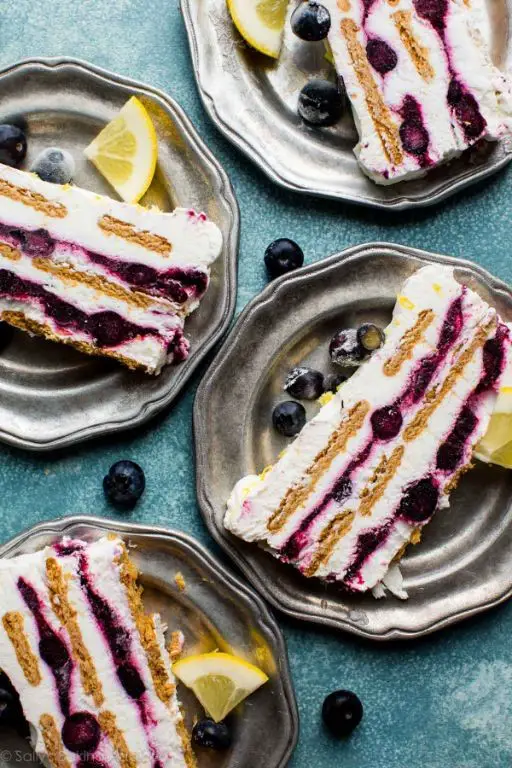
This no-bake beauty layers bright lemon zest with juicy blueberries and creamy whipped topping for a dessert that’s as refreshing as it is effortless.
Ingredients:
- 2 cups heavy cream
- 1/2 cup powdered sugar
- 1 tbsp lemon zest (from about 2 lemons)
- 2 tbsp fresh lemon juice
- 1 tsp vanilla extract
- 24 graham cracker sheets (about 1.5 boxes)
- 2 cups fresh blueberries, divided
- 1/4 cup blueberry jam
Instructions:
- In a large bowl, beat heavy cream, powdered sugar, lemon zest, lemon juice, and vanilla extract with a hand mixer until stiff peaks form, about 3 minutes.
- Spread a thin layer of the whipped cream mixture in the bottom of a 9×13-inch baking dish. Arrange a single layer of graham crackers over the cream, breaking them as needed to fit.
- Spread half the remaining whipped cream over the crackers, then sprinkle with 1 cup blueberries. Dollop 2 tbsp blueberry jam in small spoonfuls across the top.
- Repeat layers: graham crackers, remaining whipped cream, remaining 1 cup blueberries, and remaining 2 tbsp jam.
- Cover and refrigerate for at least 4 hours (or overnight) until crackers soften into cake-like layers.
The magic happens in the fridge—the graham crackers transform into a tender, almost custardy base that lets the lemony cream and berries shine.
Tip: For a prettier finish, reserve a handful of blueberries and a sprinkle of lemon zest to garnish just before serving.
Chocolate Hazelnut Refrigerator Cake
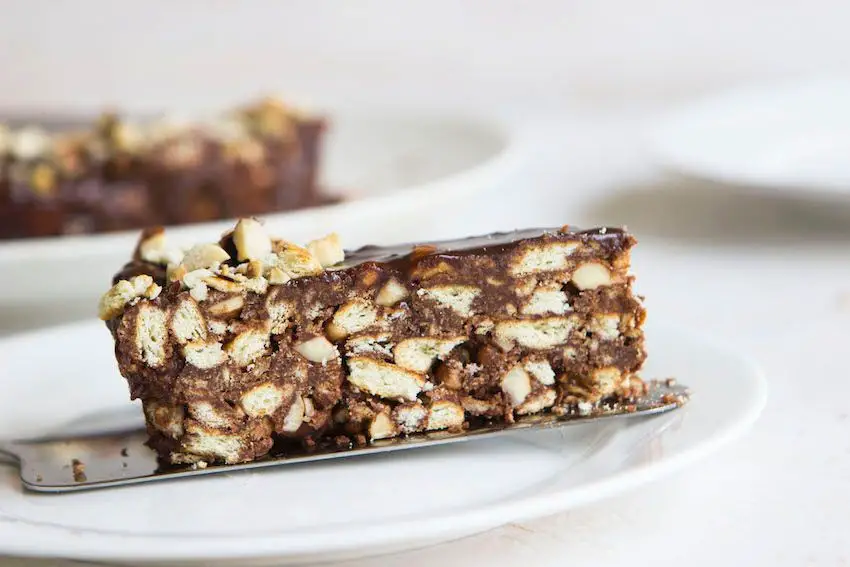
No oven required—this rich, no-bake dessert comes together with just a bowl, a spoon, and a little patience while it chills.
Ingredients:
- 2 cups crushed graham crackers (about 12 full sheets)
- 1 cup chocolate-hazelnut spread (like Nutella)
- 1/2 cup heavy cream
- 1/4 cup powdered sugar
- 1/2 tsp vanilla extract
- 1/2 cup chopped toasted hazelnuts
- Pinch of salt
Instructions:
- Prep the pan: Line an 8×8-inch baking dish with parchment paper, leaving overhang on two sides for easy removal.
- Layer the crust: Sprinkle half the crushed graham crackers evenly into the bottom of the dish.
- Make the filling: In a bowl, whisk together the chocolate-hazelnut spread, heavy cream, powdered sugar, vanilla extract, and salt until smooth and glossy.
- Assemble: Pour the filling over the graham cracker layer, spreading gently to cover. Top with the remaining graham crackers and chopped hazelnuts, pressing lightly to adhere.
- Chill: Refrigerate for at least 4 hours (or overnight) until firm. Slice into squares and serve cold.
The magic here? The graham crackers soften just enough to mimic cake layers, while the hazelnut filling stays luxuriously fudgy.
Tip: For clean slices, dip your knife in hot water and wipe it dry between cuts.
Vanilla Bean Icebox Cake with Fresh Fruit
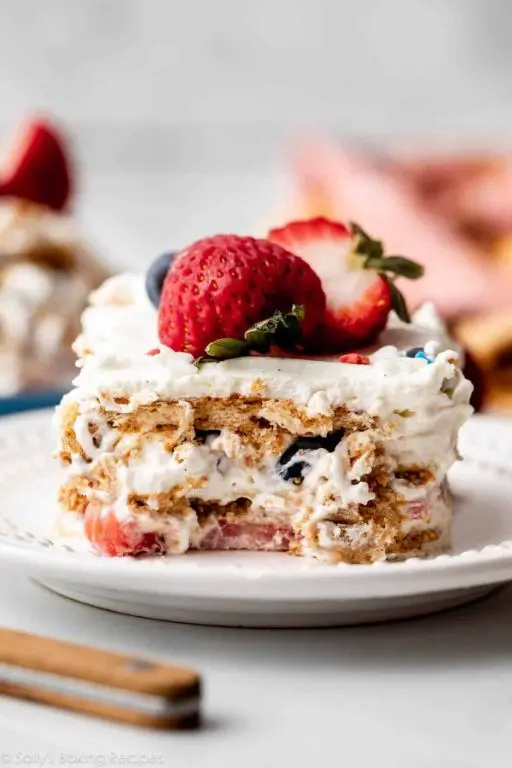
This no-bake stunner layers creamy vanilla bean goodness with juicy seasonal fruit—perfect for lazy summer days when you want dessert without the oven.
Ingredients
- 2 cups heavy cream, chilled
- 1/3 cup powdered sugar
- 1 vanilla bean, split and seeds scraped (or 2 tsp pure vanilla extract)
- 24 crisp graham crackers
- 2 cups mixed fresh berries (strawberries, blueberries, raspberries)
- 1 tbsp honey
Instructions
- In a large bowl, beat heavy cream, powdered sugar, and vanilla seeds with a hand mixer until stiff peaks form, about 3 minutes.
- Spread a thin layer of whipped cream (about 1/2 cup) on the bottom of an 8×8-inch dish. Top with a single layer of graham crackers, breaking them to fit as needed.
- Repeat layers twice more (cream, crackers, cream, crackers), ending with a final thick layer of whipped cream. Cover and refrigerate for at least 6 hours or overnight.
- Just before serving, toss berries with honey and spoon over the cake. Slice with a sharp knife—the crackers will have softened into cake-like layers!
The magic? Graham crackers transform into pillowy layers while the vanilla bean cream lets the fruit shine. Tip: For a tropical twist, swap berries for diced mango and toasted coconut.
Pumpkin Spice Refrigerator Cake
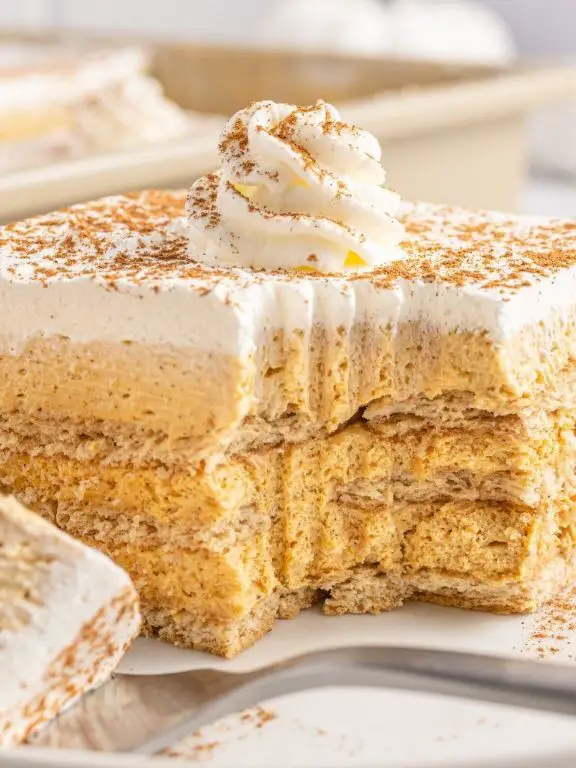
This no-bake dessert is like autumn in a pan—creamy, spiced, and perfect for making ahead.
Ingredients:
- 1 (14 oz) package graham crackers
- 1 (15 oz) can pumpkin puree
- 1 (8 oz) block cream cheese, softened
- 1 cup heavy cream
- 1/2 cup powdered sugar
- 1/4 cup maple syrup
- 2 tsp pumpkin pie spice
- 1 tsp vanilla extract
- Pinch of salt
Instructions:
- Line a 9×13-inch pan with parchment paper, leaving overhang on two sides. Arrange a single layer of graham crackers to cover the bottom (break some to fit).
- Make the filling: In a bowl, beat cream cheese, pumpkin puree, maple syrup, 2 tsp pumpkin pie spice, 1 tsp vanilla, and a pinch of salt until smooth.
- In another bowl, whip heavy cream and 1/2 cup powdered sugar to stiff peaks. Fold into pumpkin mixture until combined.
- Spread half the filling over the graham crackers. Add another layer of crackers, then the remaining filling. Top with a final cracker layer.
- Chill 4+ hours (or overnight) until firm. Lift out using parchment, slice, and serve cold.
The magic? Layers of spiced pumpkin mousse soften the crackers into cake-like tenderness without turning soggy.
Tip: For extra flair, drizzle slices with caramel or sprinkle with crushed gingersnaps.
Mango Coconut Refrigerator Cake
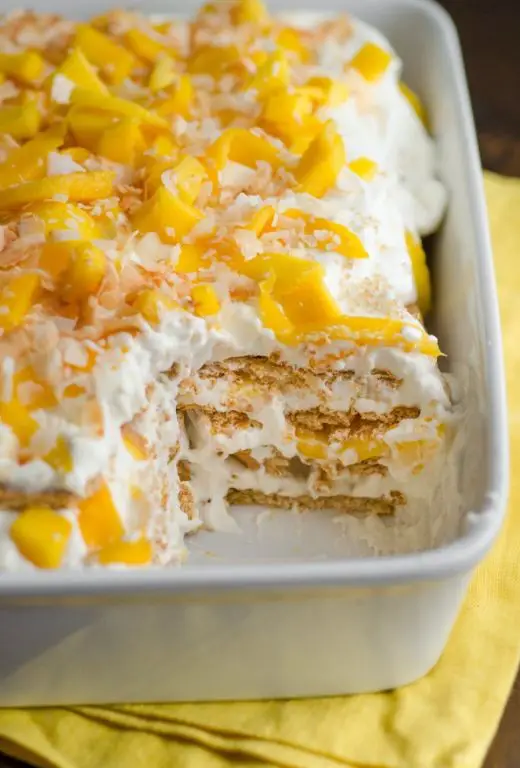
This no-bake tropical treat is like sunshine on a spoon—creamy, fruity, and perfect for beating the heat!
Ingredients:
- 2 cups heavy cream, chilled
- 1/4 cup powdered sugar
- 1 tsp vanilla extract
- 14 oz (1 can) sweetened condensed milk
- 1 cup unsweetened shredded coconut, toasted
- 24 ladyfinger cookies
- 2 ripe mangoes, thinly sliced
- 1/2 cup mango puree (from 1 small mango)
Instructions:
- Whip the cream: In a large bowl, beat heavy cream, 1/4 cup powdered sugar, and 1 tsp vanilla extract until stiff peaks form. Fold in sweetened condensed milk until smooth.
- Toast the coconut: Spread shredded coconut in a dry skillet over medium heat. Stir for 3-5 minutes until golden, then immediately transfer to a plate.
- Layer the cake: In an 8×8″ dish, arrange half the ladyfingers in a single layer. Spread with 1/2 cup mango puree, then half the whipped cream mixture. Top with half the mango slices and 1/2 cup toasted coconut. Repeat layers.
- Chill: Cover and refrigerate for at least 6 hours (or overnight) until set.
The magic happens in the fridge—the ladyfingers soften into a cake-like texture while the coconut adds a nutty crunch to every bite.
Tip: For extra flair, drizzle slices with leftover mango puree and sprinkle with fresh lime zest.
Red Velvet Icebox Cake with Cream Cheese Frosting

This no-bake stunner layers tender red velvet cookies with fluffy cream cheese frosting for a dessert that’s as easy as it is eye-catching.
Ingredients
- 1 (14-oz) package red velvet cookies (like Oreo Thins Red Velvet)
- 1 (8-oz) block cream cheese, softened
- 1 cup heavy cream
- 1/2 cup powdered sugar
- 1 tsp vanilla extract
- 1/8 tsp salt
Instructions
- In a large bowl, beat the cream cheese with an electric mixer until smooth. Gradually add the heavy cream, powdered sugar, vanilla extract, and salt, whipping until stiff peaks form (about 3–4 minutes).
- Arrange a single layer of red velvet cookies in the bottom of an 8×8-inch dish, breaking a few to fill gaps. Spread 1/3 of the cream cheese frosting evenly over the cookies.
- Repeat layers twice more, ending with frosting. Cover and refrigerate for at least 4 hours (or overnight) until cookies soften into cake-like layers.
The magic? Those crisp cookies transform into melt-in-your-mouth layers while keeping their vibrant color—no oven required!
Tip: For clean slices, dip your knife in hot water before cutting.
Conclusion
With 20 easy-to-make refrigerated cake recipes, there’s something for every sweet tooth! Whether you’re craving creamy cheesecake, fluffy tiramisu, or fruity delights, these no-bake treats are perfect for any occasion. Give them a try, and let us know which one’s your favorite in the comments! Don’t forget to share this delicious roundup on Pinterest so others can enjoy these fuss-free desserts too. Happy baking—err, chilling!

I’m Brandon, the face behind the recipes. As a dedicated food enthusiast, I love experimenting with flavors and sharing my culinary adventures with you.