Struggling to find protein-packed meals that actually taste amazing and help you shed pounds? You’re in luck! We’ve rounded up 19 delicious, waistline-friendly recipes—from hearty dinners to crave-worthy snacks—that prove eating for weight loss doesn’t mean sacrificing flavor. Whether you’re meal-prepping or craving quick comfort food, these dishes are your ticket to staying full, energized, and on track. Let’s dig in!
Quinoa and Black Bean Protein Bowl
Mastering the art of a nutritious and satisfying meal starts with this Quinoa and Black Bean Protein Bowl, a dish that’s as versatile as it is delicious. Let’s break down the process into simple, manageable steps to ensure your bowl is packed with flavor and texture.
Ingredients
- 1 cup quinoa (I love the nutty flavor of tri-color quinoa here)
- 2 cups water (for that perfect fluffy quinoa)
- 1 can (15 oz) black beans, rinsed and drained (organic beans are my preference for their texture)
- 1 tbsp extra virgin olive oil (my go-to for its fruity notes)
- 1/2 tsp cumin (toasted and ground for maximum aroma)
- 1/2 tsp chili powder (adjust based on your heat preference)
- 1 avocado, sliced (ripe but firm works best)
- 1/4 cup cilantro, chopped (for a fresh finish)
- 1 lime, juiced (about 2 tbsp, for that zesty kick)
- Salt to taste (I prefer sea salt for its clean flavor)
Instructions
- Rinse the quinoa under cold water in a fine-mesh strainer to remove any bitterness.
- In a medium saucepan, combine the rinsed quinoa and water. Bring to a boil over high heat.
- Once boiling, reduce the heat to low, cover, and simmer for 15 minutes, or until the water is absorbed and the quinoa is fluffy. Tip: Let it sit covered for 5 minutes off the heat for extra fluffiness.
- While the quinoa cooks, heat the olive oil in a skillet over medium heat. Add the black beans, cumin, and chili powder. Stir and cook for 5 minutes until the beans are warm and coated in spices. Tip: Smash a few beans to thicken the mixture slightly.
- Fluff the quinoa with a fork and divide it between two bowls. Top with the spiced black beans.
- Garnish each bowl with avocado slices, chopped cilantro, and a squeeze of lime juice. Tip: Drizzle with a bit more olive oil for richness if desired.
- Season with salt to taste and serve immediately.
Enjoy the contrasting textures of creamy avocado and fluffy quinoa against the hearty beans, with each bite brightened by lime and cilantro. This bowl is also fantastic with a sprinkle of crumbled feta or a dash of hot sauce for an extra flavor boost.
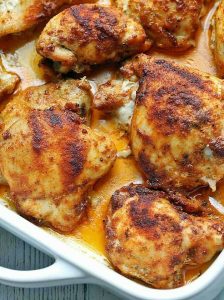
Slow Cooker Shredded Chicken Tacos
Kickstart your taco night with this effortlessly delicious Slow Cooker Shredded Chicken Tacos recipe, perfect for busy weeknights or lazy weekends. Let your slow cooker do the heavy lifting while you enjoy the aromas filling your kitchen.
Ingredients
- 2 lbs boneless, skinless chicken breasts (I find organic chicken breasts yield the best flavor)
- 1 cup chicken broth (homemade or low-sodium store-bought works great)
- 1 tbsp olive oil (extra virgin is my preference for its fruity notes)
- 1 packet taco seasoning (or 2 tbsp homemade blend for those who like to control the salt)
- 1 lime, juiced (about 2 tbsp, fresh lime juice makes all the difference)
- 1/2 cup chopped cilantro (adds a fresh, vibrant touch)
- 8 corn tortillas (warmed, for serving)
Instructions
- Place the chicken breasts in the slow cooker. Pour the chicken broth and olive oil over the chicken.
- Sprinkle the taco seasoning evenly over the chicken. Use a spoon to lightly mix the seasoning into the liquid around the chicken.
- Cover and cook on LOW for 6 hours or HIGH for 3 hours. Tip: Resist the urge to open the lid; keeping it closed ensures even cooking.
- Once cooked, use two forks to shred the chicken directly in the slow cooker. Tip: For extra flavor, let the shredded chicken sit in the juices for 10 minutes before serving.
- Stir in the lime juice and chopped cilantro. Tip: Adding lime juice at the end brightens the flavors beautifully.
- Serve the shredded chicken on warmed corn tortillas. Now, isn’t that easy?
Now, the chicken is tender and juicy, with a perfect balance of spices and a hint of lime. Try topping these tacos with a dollop of sour cream and a sprinkle of cotija cheese for an extra layer of flavor.
Greek Yogurt and Berry Protein Smoothie
After a long day or a tough workout, nothing beats the refreshing and nutritious punch of a Greek Yogurt and Berry Protein Smoothie. This guide will walk you through each step to create this delicious, protein-packed drink that’s perfect for any time of the day.
Ingredients
- 1 cup of Greek yogurt (I love using full-fat for extra creaminess, but any type works)
- 1/2 cup of mixed berries (fresh or frozen, though frozen gives a thicker texture)
- 1 scoop of vanilla protein powder (this is my secret for a sweet, flavorful boost)
- 1/2 cup of almond milk (or any milk you prefer; I find almond milk adds a nice nutty flavor)
- 1 tbsp of honey (local honey is my go-to for its rich flavor and health benefits)
- A handful of ice cubes (optional, but I recommend it for that extra chill)
Instructions
- Gather all your ingredients and a blender. This ensures a smooth, uninterrupted blending process.
- Add the Greek yogurt, mixed berries, protein powder, almond milk, and honey into the blender. Tip: Layer the ingredients with liquids at the bottom for easier blending.
- Blend on high for 30 seconds, then pause to scrape down any ingredients stuck to the sides. Tip: This ensures everything is evenly mixed.
- Add the ice cubes if using, and blend again for another 30 seconds until the smoothie is completely smooth. Tip: For a thicker smoothie, add more ice or frozen berries.
- Pour the smoothie into a glass and serve immediately. The result is a creamy, velvety smoothie with a perfect balance of tart and sweet flavors. Try garnishing with a few fresh berries on top for an extra touch of elegance.
Velvety and vibrant, this smoothie is not just a treat for the taste buds but also a feast for the eyes. Enjoy it as a quick breakfast, a post-workout refresher, or a healthy dessert alternative.
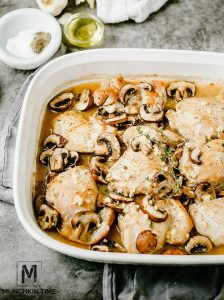
Grilled Tofu with Sesame Ginger Glaze
Creating a delicious Grilled Tofu with Sesame Ginger Glaze is simpler than you might think, and it’s a fantastic way to introduce more plant-based meals into your routine. Let’s walk through the process together, ensuring you end up with a dish that’s bursting with flavor and perfectly textured.
Ingredients
- 1 block (14 oz) extra-firm tofu – I always press mine for at least 30 minutes to remove excess water, ensuring a firmer texture.
- 2 tbsp toasted sesame oil – It adds a depth of flavor that regular sesame oil just can’t match.
- 3 tbsp soy sauce – I opt for low-sodium to better control the dish’s saltiness.
- 2 tbsp honey – For a vegan version, maple syrup works just as well.
- 1 tbsp freshly grated ginger – The fresher, the better; it really makes the glaze pop.
- 2 cloves garlic, minced – Because what’s a good glaze without a little garlic?
- 1 tbsp sesame seeds – For that perfect crunch and nutty finish.
Instructions
- Preheat your grill to medium-high heat, about 375°F, ensuring it’s clean and lightly oiled to prevent sticking.
- Slice the pressed tofu into 1/2-inch thick slabs. This thickness ensures they hold up well on the grill while getting nicely charred.
- In a small bowl, whisk together the sesame oil, soy sauce, honey, grated ginger, and minced garlic until well combined. This is your glaze, and it’s packed with flavor.
- Brush both sides of the tofu slabs generously with the glaze. Reserve some glaze for serving; it’s great for drizzling.
- Place the tofu on the grill. Cook for about 4-5 minutes per side, or until you see distinct grill marks and the edges start to crisp up.
- During the last minute of grilling, sprinkle the sesame seeds over the tofu, allowing them to toast slightly.
- Remove the tofu from the grill and drizzle with the reserved glaze. Tip: Let it sit for a couple of minutes before serving; this allows the flavors to meld beautifully.
Out of the grill, this tofu is wonderfully charred on the outside yet tender inside, with a glaze that’s sweet, tangy, and slightly spicy. Serve it over a bed of steamed rice or alongside a crisp Asian slaw for a complete meal that’s sure to impress.
Spicy Turkey Meatballs with Zucchini Noodles
Spicy turkey meatballs with zucchini noodles are a fantastic way to enjoy a hearty, healthy meal that doesn’t skimp on flavor. Starting with lean turkey keeps it light, while the zucchini noodles add a fresh, crisp texture that pairs perfectly with the spice.
Ingredients
- 1 lb ground turkey (I find the 93% lean variety works best for juicy meatballs)
- 1/2 cup breadcrumbs (I like to use panko for a bit of crunch)
- 1 large egg (room temperature eggs blend more smoothly)
- 2 tbsp extra virgin olive oil (my go-to for its fruity notes)
- 1 tsp red pepper flakes (adjust based on your heat preference)
- 2 medium zucchinis (spiralized into noodles)
- 2 cloves garlic (minced, because fresh is always better)
- 1/2 tsp salt (I prefer sea salt for its clean taste)
- 1/4 tsp black pepper (freshly ground makes all the difference)
Instructions
- Preheat your oven to 375°F (190°C) to ensure it’s ready for baking the meatballs.
- In a large bowl, combine the ground turkey, breadcrumbs, egg, red pepper flakes, salt, and black pepper. Mix gently with your hands to avoid overworking the meat.
- Shape the mixture into 1-inch meatballs, placing them on a baking sheet lined with parchment paper for easy cleanup.
- Bake the meatballs for 20 minutes, or until they’re golden brown and reach an internal temperature of 165°F (74°C).
- While the meatballs bake, heat the olive oil in a large skillet over medium heat. Add the minced garlic and sauté for 1 minute until fragrant.
- Add the zucchini noodles to the skillet, tossing them gently in the garlic oil for 2-3 minutes until just tender but still crisp.
- Divide the zucchini noodles among plates, topping with the baked meatballs. Serve immediately for the best texture and flavor.
Mouthwatering and satisfying, these spicy turkey meatballs with zucchini noodles offer a delightful contrast of textures and a kick of heat that’s balanced by the freshness of the zucchini. Try serving them with a sprinkle of Parmesan cheese or a dollop of Greek yogurt for an extra layer of flavor.
Grilled Shrimp and Asparagus Skewers
After a long day, there’s nothing quite like the simplicity and elegance of grilled shrimp and asparagus skewers to bring a touch of gourmet to your dinner table. This dish is not only a feast for the eyes but also a testament to how minimal ingredients can create maximum flavor.
Ingredients
- 1 lb large shrimp, peeled and deveined (I find that wild-caught shrimp have a sweeter taste)
- 1 bunch of asparagus, trimmed (look for spears that are bright green and firm)
- 2 tbsp extra virgin olive oil (my go-to for its fruity notes)
- 1 tbsp lemon zest (freshly grated makes all the difference)
- 1 tsp garlic powder (for that quick flavor boost)
- 1/2 tsp salt (I prefer sea salt for its clean taste)
- 1/4 tsp black pepper (freshly ground, if possible)
Instructions
- Preheat your grill to medium-high heat, aiming for about 400°F to get those perfect grill marks.
- In a large bowl, toss the shrimp and asparagus with extra virgin olive oil, ensuring each piece is lightly coated.
- Sprinkle the lemon zest, garlic powder, salt, and black pepper over the shrimp and asparagus, mixing gently to distribute the seasonings evenly.
- Thread the shrimp and asparagus alternately onto skewers, leaving a little space between each piece for even cooking.
- Place the skewers on the preheated grill. Cook for 2-3 minutes on each side, or until the shrimp turn pink and opaque and the asparagus is tender-crisp.
- Tip: If using wooden skewers, soak them in water for 30 minutes beforehand to prevent burning.
- Tip: Don’t overcrowd the skewers; this ensures each ingredient gets perfectly grilled.
- Tip: A quick squeeze of fresh lemon juice before serving can elevate the flavors even more.
Ready to serve, these skewers offer a delightful contrast between the juicy shrimp and the crisp asparagus, with a hint of smokiness from the grill. For a creative twist, serve them over a bed of quinoa or alongside a creamy avocado dip for an extra layer of texture and flavor.
Protein-Packed Oatmeal with Almond Butter
Perfect for a hearty breakfast or a post-workout snack, this Protein-Packed Oatmeal with Almond Butter is a game-changer for anyone looking to fuel their day with nutritious, energy-boosting ingredients. Let’s dive into making this simple yet satisfying dish.
Ingredients
- 1 cup rolled oats (I love the texture they bring)
- 2 cups water (for a creamier texture, you can use almond milk)
- 1 tbsp almond butter (crunchy or smooth, your choice)
- 1 scoop vanilla protein powder (this is my secret for extra flavor and protein)
- 1/2 tsp cinnamon (a little goes a long way in adding warmth)
- A pinch of salt (to enhance all the flavors)
Instructions
- In a medium saucepan, bring the water to a boil over high heat.
- Once boiling, stir in the rolled oats and reduce the heat to medium-low. Let it simmer for about 5 minutes, stirring occasionally to prevent sticking.
- After the oats have thickened, remove the saucepan from the heat. Tip: Letting the oats sit for a minute off the heat helps them absorb any remaining liquid.
- Quickly stir in the protein powder until fully incorporated. Tip: Adding the protein powder off the heat prevents clumping.
- Mix in the almond butter, cinnamon, and a pinch of salt. Tip: For an extra creamy texture, you can add a splash of almond milk here.
- Serve immediately while warm. Enjoy the creamy, nutty flavors with a hint of cinnamon.
Enjoy this oatmeal’s creamy texture and rich, nutty flavor, perfect for starting your day or refueling after exercise. Try topping it with fresh berries or a drizzle of honey for an extra touch of sweetness.
Blackened Cod with Mango Salsa
Venturing into the world of seafood can be as exciting as it is delicious, especially when you start with something as flavorful as blackened cod paired with a fresh mango salsa. This dish combines the bold spices of the blackened fish with the sweet and tangy notes of the salsa, creating a perfect balance that’s sure to impress.
Ingredients
- 1 lb cod fillets (I like to use thick cuts for even cooking)
- 2 tbsp blackening seasoning (homemade or store-bought, but check for salt content)
- 1 tbsp extra virgin olive oil (my go-to for its fruity notes)
- 1 ripe mango, diced (about 1 cup, look for a fragrant one)
- 1/4 cup red onion, finely chopped (soak in cold water for 10 minutes to mellow the bite)
- 1 jalapeño, seeded and minced (adjust to your heat preference)
- 2 tbsp fresh cilantro, chopped (stems are fine, they pack flavor)
- 1 lime, juiced (about 2 tbsp, roll it first to get more juice)
- Salt, just a pinch (I prefer sea salt for its clean taste)
Instructions
- Pat the cod fillets dry with paper towels to ensure the seasoning sticks well.
- Generously coat both sides of the cod with the blackening seasoning, pressing lightly to adhere.
- Heat the olive oil in a large skillet over medium-high heat until it shimmers, about 2 minutes.
- Place the cod in the skillet and cook for 4 minutes on the first side without moving to get a good crust.
- Flip the cod carefully and cook for another 3-4 minutes until the fish flakes easily with a fork.
- While the cod cooks, combine the mango, red onion, jalapeño, cilantro, lime juice, and salt in a bowl to make the salsa.
- Remove the cod from the skillet and let it rest for 2 minutes before serving to allow the juices to redistribute.
- Serve the blackened cod topped with the mango salsa.
Succulent and spicy, the blackened cod offers a crispy exterior with a tender, flaky inside, while the mango salsa adds a refreshing contrast. Try serving it over a bed of quinoa or with a side of grilled vegetables for a complete meal that’s as nutritious as it is delicious.
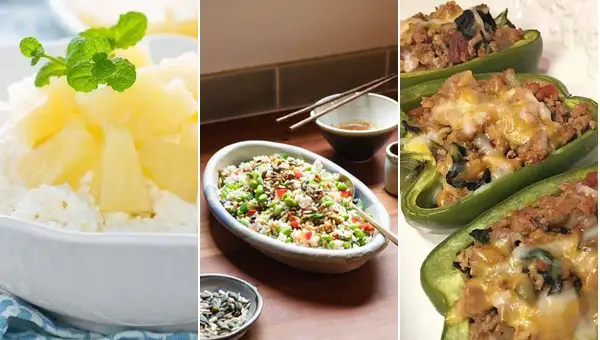
Edamame and Brown Rice Salad
Zesty and wholesome, this Edamame and Brown Rice Salad is a perfect blend of textures and flavors that’s both satisfying and easy to whip up. Let’s dive into creating this nutritious dish that’s as versatile as it is delicious.
Ingredients
- 1 cup brown rice (I love the nutty flavor it brings)
- 1.5 cups shelled edamame (frozen works great, just thaw it first)
- 2 tbsp extra virgin olive oil (my go-to for its fruity notes)
- 1 tbsp rice vinegar (for that subtle tang)
- 1 tsp honey (a touch of sweetness balances the flavors)
- 1/2 tsp salt (I prefer sea salt for its mildness)
- 1/4 cup chopped cilantro (adds a fresh, herby kick)
- 1/4 cup diced red bell pepper (for color and crunch)
Instructions
- Rinse 1 cup of brown rice under cold water until the water runs clear to remove excess starch.
- Cook the rinsed brown rice according to package instructions, usually about 45 minutes, until tender. Tip: Let it sit covered for 5 minutes off the heat for fluffier rice.
- While the rice cooks, thaw 1.5 cups of shelled edamame by placing it in a colander and running warm water over it for a few minutes.
- In a large bowl, whisk together 2 tbsp extra virgin olive oil, 1 tbsp rice vinegar, 1 tsp honey, and 1/2 tsp salt until well combined. Tip: Adjust the honey based on your sweetness preference.
- Add the cooked brown rice, thawed edamame, 1/4 cup chopped cilantro, and 1/4 cup diced red bell pepper to the bowl with the dressing.
- Toss everything together until evenly coated. Tip: Let the salad sit for 10 minutes before serving to allow the flavors to meld.
Savory with a hint of sweetness, this salad boasts a delightful mix of chewy rice, crunchy edamame, and crisp bell pepper. Serve it atop a bed of greens for an extra nutrient boost or as a standalone dish for a light lunch.
Ground Turkey Lettuce Wraps
Yearning for a light yet satisfying meal that’s both easy to make and packed with flavor? These Ground Turkey Lettuce Wraps are your answer, combining lean protein with crisp vegetables for a refreshing dish that’s perfect for any day of the week.
Ingredients
- 1 lb ground turkey (I find the 93% lean variety offers the perfect balance of flavor and healthiness.)
- 1 tbsp extra virgin olive oil (My go-to for its fruity notes and health benefits.)
- 2 cloves garlic, minced (Freshly minced garlic makes all the difference here.)
- 1 tbsp ginger, grated (A little ginger adds a wonderful zing.)
- 1/4 cup hoisin sauce (This sweet and savory sauce is key for depth of flavor.)
- 1 tbsp soy sauce (I opt for low-sodium to control the saltiness.)
- 1 tsp sesame oil (Just a dash for that nutty aroma.)
- 1 cup water chestnuts, diced (They add a delightful crunch.)
- 1/2 cup green onions, sliced (For a pop of color and freshness.)
- 8 large lettuce leaves (Butter or iceberg lettuce works best for their crispness and pliability.)
Instructions
- Heat the extra virgin olive oil in a large skillet over medium heat until shimmering, about 2 minutes.
- Add the ground turkey to the skillet, breaking it apart with a spoon. Cook until no pink remains, about 5-7 minutes.
- Stir in the minced garlic and grated ginger, cooking for another minute until fragrant. Tip: Keep the garlic from burning by stirring constantly.
- Mix in the hoisin sauce, soy sauce, and sesame oil, ensuring the turkey is evenly coated. Let it simmer for 2 minutes to meld the flavors.
- Add the diced water chestnuts and sliced green onions, cooking for an additional 2 minutes. Tip: The water chestnuts should retain their crunch for texture contrast.
- Remove the skillet from heat and let the mixture cool slightly, about 3 minutes. Tip: This prevents the lettuce from wilting when assembling the wraps.
- Spoon the turkey mixture into the center of each lettuce leaf, folding the sides over to enclose the filling.
The wraps offer a delightful contrast between the warm, savory filling and the cool, crisp lettuce. Serve them with a drizzle of extra hoisin sauce or a sprinkle of sesame seeds for an extra touch of elegance.
Chocolate Peanut Butter Protein Bites
Whipping up a batch of these no-bake Chocolate Peanut Butter Protein Bites is easier than you think, and they’re perfect for a quick energy boost or a post-workout snack. Let’s dive into making these delicious, protein-packed treats together.
Ingredients
- 1 cup creamy peanut butter (I swear by the natural kind for its smooth texture and rich flavor)
- 1/2 cup honey (local honey adds a lovely floral note)
- 1 cup old-fashioned oats (for that perfect chew)
- 1/2 cup ground flaxseed (a great way to sneak in some omega-3s)
- 1/2 cup chocolate protein powder (chocolate flavor adds depth, but vanilla works in a pinch)
- 1/4 cup mini chocolate chips (because more chocolate is always better)
- 1 tsp vanilla extract (pure extract makes all the difference)
Instructions
- In a large mixing bowl, combine the peanut butter and honey. Stir until the mixture is smooth and well blended.
- Add the oats, ground flaxseed, protein powder, and vanilla extract to the bowl. Mix thoroughly until all ingredients are evenly distributed.
- Fold in the mini chocolate chips, ensuring they’re spread throughout the mixture for that perfect chocolatey bite.
- Using your hands, roll the mixture into small balls, about 1 inch in diameter. Tip: If the mixture is too sticky, lightly wet your hands to make rolling easier.
- Place the balls on a baking sheet lined with parchment paper. Chill in the refrigerator for at least 30 minutes to set. Tip: For a firmer texture, let them chill for an hour.
- Once set, transfer the protein bites to an airtight container. Store in the refrigerator for up to a week. Tip: For longer storage, freeze them and thaw as needed.
Ready to enjoy? These Chocolate Peanut Butter Protein Bites are delightfully chewy with a rich, nutty flavor and just the right amount of sweetness. Try drizzling them with melted chocolate for an extra indulgent treat or pack them in your gym bag for a quick protein fix.
Conclusion
With these 19 delicious protein-packed recipes, weight loss doesn’t have to mean boring meals! From hearty breakfasts to satisfying dinners, there’s something here for every craving. Give them a try, and let us know which ones you love in the comments. Don’t forget to share this roundup on Pinterest to help others on their health journey—happy cooking!

I’m Brandon, the face behind the recipes. As a dedicated food enthusiast, I love experimenting with flavors and sharing my culinary adventures with you.