Struggling to find lunch ideas that are both delicious and diabetes-friendly? You’re in luck! We’ve rounded up 20 healthy, flavorful recipes that make midday meals a breeze—no bland salads or boring routines here. From hearty soups to vibrant grain bowls, these dishes prove eating well doesn’t mean sacrificing taste. Ready to mix up your lunch game? Let’s dive in!
Grilled Chicken and Avocado Salad
Craving something fresh yet filling? This Grilled Chicken and Avocado Salad is your ticket to a vibrant, protein-packed meal that’s as easy to make as it is delicious.
Ingredients
- 2 boneless, skinless chicken breasts (I always go for organic, free-range—better flavor and texture)
- 1 ripe avocado, sliced (the creamier, the better)
- 2 cups mixed greens (I love arugula for its peppery kick)
- 1/4 cup extra virgin olive oil (my go-to for dressings)
- 1 tbsp lemon juice (freshly squeezed, please)
- 1/2 tsp salt (sea salt adds a nice crunch)
- 1/2 tsp black pepper (freshly ground for that aromatic punch)
- 1/4 cup crumbled feta cheese (because everything’s better with cheese)
Instructions
- Preheat your grill to medium-high heat (about 375°F). A well-heated grill means perfect char marks.
- Brush the chicken breasts with 1 tbsp olive oil and season with salt and pepper. This ensures every bite is flavorful.
- Grill the chicken for 6-7 minutes per side, or until the internal temperature reaches 165°F. No guesswork here—use a meat thermometer.
- Let the chicken rest for 5 minutes before slicing. This keeps it juicy.
- In a large bowl, toss the mixed greens with the remaining olive oil and lemon juice. Dress it lightly; you want to taste the greens.
- Top the greens with sliced avocado, grilled chicken, and crumbled feta. The avocado adds a buttery contrast to the crisp greens.
Mouthwatering doesn’t begin to cover it. The creamy avocado and tangy feta play off the smoky chicken, while the greens keep it light. Serve it in a hollowed-out avocado half for an Instagram-worthy presentation.
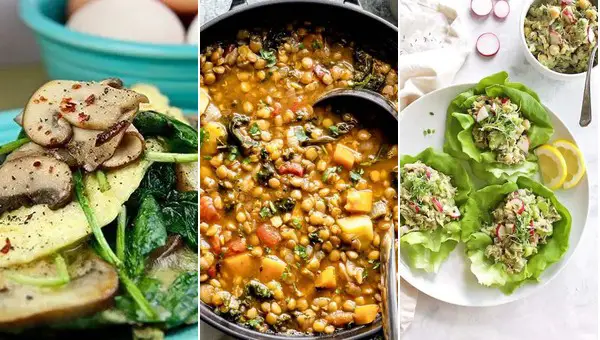
Turkey and Spinach Lettuce Wraps
C
raving something light yet satisfying? These Turkey and Spinach Lettuce Wraps are your go-to for a quick, healthy fix. Packed with flavor and crunch, they’re perfect for lunch or a fuss-free dinner.
Ingredients
- 1 lb ground turkey (I go for 93% lean for the best balance of flavor and health)
- 2 tbsp extra virgin olive oil (my kitchen staple for that rich, fruity depth)
- 1 cup diced onions (yellow ones bring a sweet, mellow vibe)
- 2 garlic cloves, minced (fresh is best—no jarred stuff here)
- 1 tbsp soy sauce (low-sodium to keep it in check)
- 1 tsp ginger, grated (a microplane zester works wonders)
- 4 cups fresh spinach (baby spinach leaves are tender and sweet)
- 8 large lettuce leaves (butter lettuce is my top pick for its soft, pliable cups)
- 1/2 cup shredded carrots (for a pop of color and crunch)
- 1/4 cup chopped cilantro (skip if you’re team ‘cilantro tastes like soap’)
Instructions
- Heat olive oil in a large skillet over medium heat until shimmering—about 1 minute.
- Add onions and garlic, sautéing until translucent, 3-4 minutes. Tip: Don’t let the garlic brown or it’ll turn bitter.
- Stir in ground turkey, breaking it apart with a spatula. Cook until no pink remains, 5-6 minutes.
- Mix in soy sauce and ginger, stirring well to coat the turkey evenly.
- Fold in spinach and cook just until wilted, about 1 minute. Tip: Overcooking spinach makes it soggy—keep it vibrant.
- Remove from heat and let the mixture cool slightly, 2 minutes. This prevents the lettuce from wilting when assembled.
- Spoon the turkey mixture into lettuce leaves, topping with shredded carrots and cilantro. Tip: Serve with lime wedges for an extra zing.
R
elish the contrast of the cool, crisp lettuce against the warm, savory filling. These wraps shine as a standalone meal or paired with a tangy Asian slaw for extra crunch.
Cauliflower Fried Rice with Shrimp
Kickstart your meal prep with this low-carb, high-flavor twist on a classic. Cauliflower Fried Rice with Shrimp swaps grains for greens, packing a punch with every bite.
Ingredients
- 1 lb shrimp, peeled and deveined (I like them juicy, so I don’t skimp on size)
- 4 cups riced cauliflower (fresh or frozen, but squeeze out excess water if using frozen)
- 2 tbsp extra virgin olive oil (my go-to for that rich flavor)
- 3 cloves garlic, minced (because more garlic is always better)
- 1 cup peas and carrots, frozen (a lazy chef’s best friend)
- 2 eggs, beaten (room temp eggs blend smoother)
- 3 tbsp soy sauce (low sodium lets you control the saltiness)
- 1 tsp sesame oil (for that nutty finish)
- Green onions, sliced (for a crisp garnish)
Instructions
- Heat 1 tbsp olive oil in a large skillet over medium-high heat. Add shrimp, cook for 2 minutes per side until pink. Remove and set aside.
- In the same skillet, add remaining olive oil. Sauté garlic for 30 seconds until fragrant.
- Toss in peas and carrots, stir-fry for 2 minutes to soften.
- Push veggies to one side, pour beaten eggs into the other. Scramble until just set, about 1 minute.
- Add riced cauliflower and soy sauce. Mix well, cook for 5 minutes, stirring occasionally.
- Return shrimp to the skillet, drizzle with sesame oil. Stir-fry for another 2 minutes to combine flavors.
- Garnish with green onions before serving.
Whip this up for a dish that’s crunchy, savory, and slightly sweet. Serve it in a hollowed-out pineapple for a tropical twist that’ll wow at any dinner party.
Greek Yogurt Chicken Salad
Absolutely nobody has time for bland chicken salad—swap mayo for Greek yogurt and **boom**, you’ve got a creamy, protein-packed lunch that’s actually exciting.
Ingredients
- 2 cups cooked chicken, shredded (I’m all for using leftover rotisserie chicken here—saves time and adds flavor)
- 1/2 cup Greek yogurt (go full-fat for maximum creaminess, trust me)
- 1 tbsp lemon juice (freshly squeezed, because bottled just doesn’t hit the same)
- 1/4 cup red onion, finely diced (soak in cold water for 5 mins if you’re sensitive to the bite)
- 1/2 cup celery, chopped (the crunch is non-negotiable)
- 1/4 cup dried cranberries (for a sweet pop that’s totally worth it)
- 1/4 cup walnuts, chopped (toast them for 5 mins at 350°F for extra crunch)
- 1/2 tsp salt (I use sea salt, but whatever you have works)
- 1/4 tsp black pepper (freshly ground, please)
Instructions
- In a large bowl, combine the shredded chicken, Greek yogurt, and lemon juice. Mix until the chicken is evenly coated.
- Add the red onion, celery, dried cranberries, and walnuts to the bowl. Gently fold them into the chicken mixture.
- Sprinkle in the salt and black pepper. Stir to distribute the seasoning evenly throughout the salad.
- Let the salad chill in the fridge for at least 30 minutes before serving. This step is crucial—it lets the flavors meld together beautifully.
- Serve the chicken salad on a bed of greens, stuffed in a pita, or with crackers for dipping. Enjoy immediately for the best texture and flavor.
Every bite of this Greek Yogurt Chicken Salad is a mix of creamy, crunchy, and slightly sweet. Try it wrapped in lettuce leaves for a low-carb twist that’s just as satisfying.
Stuffed Portobello Mushrooms with Quinoa
Veg out with these Stuffed Portobello Mushrooms with Quinoa—packed with flavor and ready to impress in under an hour.
Ingredients
- 4 large Portobello mushrooms (go for ones with deep caps for maximum stuffing)
- 1 cup quinoa (I love the tri-color kind for extra visual pop)
- 2 cups vegetable broth (homemade or store-bought, but low-sodium is my pick)
- 1 tbsp extra virgin olive oil (the good stuff makes a difference)
- 1/2 cup diced onion (yellow or white, whatever’s on hand)
- 2 cloves garlic, minced (fresh is best, but I won’t tell if you use pre-minced)
- 1/2 cup grated Parmesan cheese (plus extra for sprinkling)
- 1/4 cup chopped fresh parsley (flat-leaf has more flavor, in my opinion)
- Salt and pepper (don’t skimp, season as you go)
Instructions
- Preheat your oven to 375°F. This ensures everything cooks evenly.
- Clean the Portobello mushrooms with a damp paper towel and remove the stems. Tip: Save the stems for a veggie stock later.
- In a medium saucepan, bring the quinoa and vegetable broth to a boil. Reduce heat, cover, and simmer for 15 minutes. Tip: Fluff with a fork before using to prevent clumping.
- While the quinoa cooks, heat olive oil in a skillet over medium heat. Add onion and garlic, sautéing until translucent, about 5 minutes.
- Combine cooked quinoa, sautéed onion and garlic, Parmesan, and parsley in a bowl. Season with salt and pepper to taste.
- Stuff each mushroom cap with the quinoa mixture, pressing down lightly. Sprinkle with extra Parmesan.
- Bake for 20 minutes, or until the mushrooms are tender and the cheese is golden. Tip: For a crispier top, broil for the last 2 minutes.
Out of the oven, these mushrooms are juicy with a satisfying bite from the quinoa. Serve them atop a bed of arugula for a peppery contrast or alongside grilled chicken for a heartier meal.
Broccoli and Cheddar Frittata
Here’s how to whip up a Broccoli and Cheddar Frittata that’s as easy as it is delicious. Perfect for breakfast, brunch, or a quick dinner, this dish is a crowd-pleaser.
Ingredients
- 6 large eggs (I prefer room temp eggs here—they blend smoother)
- 1 cup broccoli florets, chopped small (steam them a bit first if you like ’em tender)
- 1 cup sharp cheddar cheese, shredded (the sharper, the better for that punch of flavor)
- 2 tbsp extra virgin olive oil (my go-to for its fruity notes)
- 1/4 cup whole milk (for that creamy texture)
- 1/2 tsp salt (don’t skimp—it brings all the flavors together)
- 1/4 tsp black pepper (freshly ground, if you’ve got it)
Instructions
- Preheat your oven to 375°F. This ensures even cooking from the get-go.
- In a 10-inch oven-safe skillet, heat the olive oil over medium heat. Swirl it around to coat the bottom.
- Add the broccoli florets. Sauté for 3-4 minutes until they’re bright green and slightly tender.
- While the broccoli cooks, whisk together eggs, milk, salt, and pepper in a bowl. Pro tip: Whisk until just combined for a fluffier frittata.
- Pour the egg mixture over the broccoli in the skillet. Sprinkle the cheddar cheese evenly on top.
- Cook on the stove for 2 minutes without stirring to let the bottom set.
- Transfer the skillet to the preheated oven. Bake for 15-18 minutes until the top is golden and the center is set.
- Let it cool for a couple of minutes before slicing. This helps it hold together better.
Perfectly fluffy with a crispy edge, this frittata is a texture dream. Serve it with a side of hot sauce or a fresh salad for a meal that’s anything but boring.
Spicy Tofu Stir-Fry with Vegetables
Punch up your dinner routine with this Spicy Tofu Stir-Fry that’s as easy to make as it is to devour. Perfect for those nights when you crave something fiery and fast.
Ingredients
- 14 oz firm tofu, pressed and cubed (trust me, pressing is key for that perfect texture)
- 2 tbsp soy sauce (I go for low-sodium to control the saltiness)
- 1 tbsp sriracha (adjust if you’re not into too much heat)
- 1 tbsp honey (for that sweet balance)
- 2 tbsp vegetable oil (extra virgin olive oil works too, but I like the neutral taste here)
- 3 cups mixed bell peppers and broccoli (colorful veggies make the dish pop)
- 2 cloves garlic, minced (fresh is best, no compromises)
- 1 tsp ginger, grated (a little goes a long way)
- 1/2 cup green onions, sliced (for that fresh crunch)
Instructions
- Heat oil in a large skillet over medium-high heat until shimmering, about 1 minute.
- Add tofu cubes in a single layer. Cook until golden on all sides, flipping occasionally, about 5 minutes. Tip: Don’t crowd the pan to get that crispy exterior.
- Push tofu to one side. Add garlic and ginger to the empty space, sauté for 30 seconds until fragrant.
- Toss in bell peppers and broccoli. Stir-fry for 3 minutes until veggies are crisp-tender. Tip: Keep the heat high to avoid soggy veggies.
- Whisk together soy sauce, sriracha, and honey in a small bowl. Pour over the stir-fry, tossing to coat evenly. Cook for another 2 minutes.
- Sprinkle with green onions, give it one final toss, and remove from heat. Tip: Let it sit for a minute before serving to let the flavors meld.
Get ready for a dish that’s bursting with bold flavors and textures—crispy tofu, crunchy veggies, and a sauce that packs a punch. Serve it over steamed rice or noodles for an easy meal that’ll have everyone asking for seconds.
Cucumber and Tomato Salad with Feta
Transform your summer with this crisp, refreshing Cucumber and Tomato Salad with Feta. **Toss** together in minutes, and boom—instant vibes.
Ingredients
- 2 cups diced cucumbers (I leave the skin on for crunch)
- 1.5 cups cherry tomatoes, halved (rainbow ones look fab)
- 1/2 cup crumbled feta (the block kind, not pre-crumbled—trust me)
- 2 tbsp extra virgin olive oil (my go-to for dressings)
- 1 tbsp red wine vinegar (adds a nice zing)
- 1/4 tsp salt (I use sea salt for a cleaner taste)
- 1/4 tsp black pepper (freshly ground, please)
- 1/4 cup red onion, thinly sliced (soak in ice water for 5 mins to mellow the bite)
Instructions
- **Soak** the sliced red onion in ice water for 5 minutes, then drain. This step removes the harsh onion taste.
- **Combine** cucumbers, cherry tomatoes, and drained red onion in a large bowl.
- **Sprinkle** salt and black pepper over the veggies. Toss gently to coat.
- **Drizzle** olive oil and red wine vinegar over the salad. Toss again until everything is lightly dressed.
- **Add** crumbled feta on top. For the best flavor, let the salad sit for 10 minutes before serving.
**Bright** flavors and textures make this salad a winner. The cucumbers stay crisp, the tomatoes burst with juice, and the feta adds a creamy saltiness. Serve it alongside grilled chicken or scoop it up with pita chips for a fun twist.
Grilled Shrimp and Mango Salsa
Unleash a burst of summer on your plate with this vibrant combo—juicy shrimp meet sweet mango salsa in a match made for your next backyard bash.
Ingredients
- 1 lb large shrimp, peeled and deveined (I like them with tails on for that fancy look)
- 2 ripe mangoes, diced (go for the Ataulfo variety—they’re the sweetest)
- 1/4 cup red onion, finely chopped (soak in cold water for 5 mins to mellow the bite)
- 1 jalapeño, seeded and minced (keep the seeds if you dare)
- 1/4 cup fresh cilantro, chopped (no stems, please)
- 2 tbsp lime juice (freshly squeezed—bottled just won’t cut it)
- 1 tbsp extra virgin olive oil (my go-to for that smooth finish)
- 1/2 tsp salt (I swear by Himalayan pink for its subtle flavor)
- 1/2 tsp black pepper (freshly ground—it makes all the difference)
Instructions
- Preheat your grill to medium-high, about 400°F—you want those grill marks!
- In a bowl, toss shrimp with olive oil, salt, and pepper. Let them marinate while the grill heats up.
- Meanwhile, mix mangoes, red onion, jalapeño, cilantro, and lime juice in another bowl. Set aside to let flavors marry.
- Grill shrimp for 2-3 minutes per side until they’re pink and slightly charred. Tip: Don’t overcrowd the grill to ensure even cooking.
- Remove shrimp from grill and let them rest for a minute—this keeps them juicy.
- Serve shrimp topped with mango salsa. Tip: A squeeze of extra lime juice right before serving brightens everything up.
Out of this world—the smoky shrimp and zesty salsa are a texture dream. Try stacking them on crispy tostadas for an extra crunch that’ll have everyone coming back for more.
Eggplant and Chickpea Stew
Bold flavors collide in this hearty eggplant and chickpea stew—your next one-pot wonder that’s as easy as it is delicious.
Ingredients
- 2 tbsp extra virgin olive oil (my go-to for its fruity punch)
- 1 large eggplant, diced into 1-inch cubes (skin on for texture)
- 1 can (15 oz) chickpeas, drained and rinsed (trust me, the canned ones are fine here)
- 1 medium onion, finely chopped (yellow for sweetness)
- 3 garlic cloves, minced (more if you’re a garlic fiend like me)
- 1 tsp ground cumin (toast it first if you’ve got time)
- 1/2 tsp smoked paprika (for that smoky depth)
- 1 can (14.5 oz) diced tomatoes (no need to drain, the juice adds body)
- 2 cups vegetable broth (homemade if you’re feeling fancy)
- Salt to taste (I start with 1/2 tsp and adjust)
- Fresh cilantro, chopped (for that fresh finish)
Instructions
- Heat olive oil in a large pot over medium heat until shimmering.
- Add onion and garlic, sauté until translucent, about 3 minutes—don’t let the garlic burn!
- Toss in eggplant cubes, stirring occasionally until they start to soften, about 5 minutes.
- Sprinkle cumin and smoked paprika over the veggies, stir to coat evenly—this blooms the spices.
- Pour in diced tomatoes and their juices, followed by chickpeas and vegetable broth.
- Bring to a simmer, then lower heat to maintain a gentle bubble. Cover and cook for 20 minutes—the eggplant should be tender but not mushy.
- Season with salt, start with 1/2 tsp and adjust after tasting.
- Garnish with fresh cilantro right before serving.
Velvety eggplant melts into the stew, while chickpeas add a satisfying bite. Serve it over couscous or with crusty bread to soak up every last drop.
Avocado and Tuna Lettuce Wraps
Elevate your lunch game with these no-cook Avocado and Tuna Lettuce Wraps—crisp, creamy, and packed with protein. Perfect for those scorching summer days when you can’t even look at a stove.
Ingredients
- 2 ripe avocados (Haas are my fave for their buttery texture)
- 1 can (5 oz) tuna in water, drained (go for sustainably caught!)
- 1/4 cup mayonnaise (Duke’s has the perfect tang)
- 1 tbsp lemon juice (freshly squeezed, please)
- 1/4 tsp salt (I like flaky sea salt for extra crunch)
- 1/4 tsp black pepper (freshly ground makes all the difference)
- 4 large butter lettuce leaves (the crispier, the better)
- 1/4 cup diced red onion (soak in cold water for 5 mins to mellow the bite)
- 1/4 cup chopped cilantro (optional, but adds a fresh pop)
Instructions
- In a medium bowl, mash the avocados with a fork until smooth but slightly chunky.
- Add the drained tuna, mayonnaise, lemon juice, salt, and pepper to the bowl. Mix well to combine.
- Gently fold in the diced red onion and chopped cilantro for an extra flavor kick.
- Lay out the butter lettuce leaves on a clean surface. Spoon the avocado-tuna mixture evenly onto each leaf.
- Fold the lettuce over the filling, tucking in the sides to create a neat wrap. Serve immediately.
Keep these wraps chilled until serving to maintain their crisp texture. The creamy avocado pairs perfectly with the flaky tuna, while the lettuce adds a refreshing crunch. Try drizzling with a bit of sriracha mayo for a spicy twist!
Roasted Vegetable and Hummus Wrap
Craving a lunch that’s both hearty and healthy? This Roasted Vegetable and Hummus Wrap packs a punch with its vibrant flavors and satisfying crunch. Perfect for on-the-go munching or a lazy Sunday picnic.
Ingredients
- 1 cup chickpeas, drained and rinsed (I swear by the organic ones for extra creaminess)
- 2 tbsp tahini (the backbone of any great hummus)
- 1 lemon, juiced (freshly squeezed makes all the difference)
- 2 cloves garlic, minced (because garlic is life)
- 1/4 cup extra virgin olive oil (my go-to for its fruity notes)
- 1/2 tsp cumin (toasted and ground for maximum aroma)
- Salt to taste (I like a generous pinch)
- 1 red bell pepper, sliced (for that sweet crunch)
- 1 zucchini, sliced (half-moons are my favorite)
- 1 tbsp olive oil (for roasting)
- 4 whole wheat tortillas (warmed slightly for flexibility)
- Handful of spinach leaves (for a fresh green lift)
Instructions
- Preheat your oven to 400°F. This ensures your veggies get perfectly roasted, not steamed.
- Toss the sliced bell pepper and zucchini with 1 tbsp olive oil on a baking sheet. Spread them out; overcrowding leads to soggy veggies.
- Roast for 20 minutes, flipping halfway. You’re looking for those golden edges that scream flavor.
- While veggies roast, blend chickpeas, tahini, lemon juice, garlic, olive oil, cumin, and salt in a food processor until smooth. Tip: Scrape down the sides for an even blend.
- Warm the tortillas for 10 seconds in the microwave. This makes them pliable and tear-resistant.
- Spread a generous layer of hummus on each tortilla, then top with roasted veggies and spinach leaves.
- Roll tightly, tucking in the sides as you go. A snug wrap is a happy wrap.
Fresh out the oven, the veggies bring a smoky sweetness that pairs dreamily with the creamy hummus. Serve it sliced diagonally for that Instagram-worthy cross-section, or keep it whole for maximum portability.
Chicken and Vegetable Skewers with Tzatziki
Fire up your grill for these
Chicken and Vegetable Skewers with Tzatziki
—juicy, charred, and dunkable in the creamiest sauce. Perfect for flipping into your weeknight rotation or weekend BBQ.
Ingredients
- 1.5 lbs chicken breast, cubed (go for organic if you can, it makes a difference)
- 2 bell peppers, any color, cut into 1-inch pieces (I love the pop of red and yellow)
- 1 red onion, cut into 1-inch chunks (they caramelize so nicely)
- 1/4 cup extra virgin olive oil (my kitchen staple)
- 2 tbsp lemon juice (freshly squeezed, please)
- 2 garlic cloves, minced (the more, the merrier)
- 1 tsp dried oregano (trust me, it’s the secret weapon)
- 1/2 tsp salt (I use sea salt for that clean taste)
- 1/2 tsp black pepper (freshly ground is best)
- 1 cup Greek yogurt (full-fat for maximum creaminess)
- 1/2 cucumber, grated and drained (squeeze out the water for thick tzatziki)
- 1 tbsp dill, chopped (fresh dill is a game-changer)
Instructions
- Preheat your grill to medium-high, about 400°F. Clean those grates—no one likes last week’s flavors.
- In a large bowl, whisk together olive oil, lemon juice, garlic, oregano, salt, and pepper. Toss in chicken and veggies until they’re fully coated. Let them marinate for 15 minutes—patience pays off.
- Thread chicken and veggies onto skewers, alternating for that Instagram-worthy look. Leave a little space between pieces for even cooking.
- Grill skewers for 10-12 minutes, turning halfway, until chicken hits 165°F and veggies are charred at the edges. Don’t overcrowd the grill—give them room to breathe.
- While skewers grill, mix yogurt, cucumber, and dill in a bowl for the tzatziki. Chill until serving—it’s all about that cool contrast.
Let these skewers shine with their smoky edges and tender bites. Serve them straight off the grill with tzatziki for dipping, or pile them onto warm pita for a handheld feast.
Spinach and Mushroom Omelette
Get ready to flip your morning routine with this fluffy, veggie-packed delight. Grab your skillet—it’s omelette o’clock.
Ingredients
- 3 large eggs (room temp for fluffier results)
- 1 cup fresh spinach, roughly chopped (stems removed for tenderness)
- 1/2 cup sliced mushrooms (cremini for earthy vibes)
- 1 tbsp extra virgin olive oil (my kitchen staple)
- 1/4 cup shredded cheddar cheese (sharpness kicks it up)
- Salt and pepper (just a pinch, trust me)
Instructions
- Heat olive oil in a non-stick skillet over medium heat (about 350°F).
- Add mushrooms, sauté until golden, 3-4 minutes (listen for that sizzle).
- Toss in spinach, cook until just wilted, 1 minute (keep it bright green).
- Whisk eggs with salt and pepper in a bowl (vigorous whisking equals airy eggs).
- Pour eggs over veggies, tilt pan to spread evenly (no peeking for 2 minutes).
- Sprinkle cheese on one half, fold omelette with a spatula (gooey middle alert).
- Slide onto a plate, serve immediately (hot off the pan is best).
Creamy cheese meets earthy mushrooms and fresh spinach in every bite. Try topping with avocado slices or a dash of hot sauce for an extra kick.
Cabbage and Carrot Slaw with Lime Dressing
Jump into summer with this crunchy, zesty slaw that’s a breeze to whip up. Perfect for picnics or a quick fridge snack, it’s all about that lime kick!
Ingredients
- 4 cups shredded green cabbage (the crunchier, the better)
- 1 cup grated carrots (I love the color pop!)
- 1/4 cup chopped cilantro (skip if you’re team soap-taste)
- 2 tbsp lime juice (freshly squeezed, please)
- 1 tbsp honey (for that sweet balance)
- 1/2 tsp salt (I use sea salt for extra minerals)
- 1/4 tsp black pepper (freshly ground packs a punch)
- 1 tbsp extra virgin olive oil (my go-to for dressings)
Instructions
- In a large bowl, toss together the shredded cabbage and grated carrots.
- In a small bowl, whisk together lime juice, honey, salt, and black pepper until the honey dissolves. Tip: Warm the honey for 10 seconds if it’s too thick.
- Slowly drizzle in the olive oil while whisking to emulsify the dressing. Tip: A steady stream ensures a smooth dressing.
- Pour the dressing over the cabbage and carrots. Toss well to coat every strand. Tip: Use your hands for an even mix—just wash them first!
- Fold in the chopped cilantro last to keep it fresh and vibrant.
- Let the slaw sit for 10 minutes before serving to soften slightly and meld flavors.
Zingy and crisp, this slaw brings a refreshing bite to any meal. Try it atop fish tacos or alongside grilled chicken for a color-packed plate!
Conclusion
With these 20 healthy diabetic lunch recipes, eating well has never been easier—or tastier! Whether you’re meal prepping or craving something fresh, there’s a dish here for every craving. Give them a try, and let us know which ones you love in the comments. Don’t forget to share this roundup on Pinterest to help others enjoy delicious, diabetes-friendly meals too. Happy cooking!

I’m Brandon, the face behind the recipes. As a dedicated food enthusiast, I love experimenting with flavors and sharing my culinary adventures with you.