Getting kids to eat more fruit just got a whole lot easier—and way more fun! From playful popsicles to sneaky smoothies, these 20 easy fruit recipes are perfect for little hands and picky palates. Whether you’re packing lunches, whipping up snacks, or just craving something sweet, these ideas will make healthy eating a breeze. Ready to turn fruit into their new favorite treat? Let’s dive in!
Fruit Kabobs with Yogurt Dip
Dessert doesn’t have to be complicated to be delicious, and these Fruit Kabobs with Yogurt Dip are proof. Perfect for those lazy summer afternoons or when you’re trying to impress with minimal effort, they’re as fun to make as they are to eat.
Ingredients
- 1 cup Greek yogurt
- 2 tbsp honey
- 1 tsp vanilla extract
- 1 cup strawberries, hulled and halved
- 1 cup pineapple chunks
- 1 cup grapes
- 1 banana, sliced into 1-inch pieces
- 6 wooden skewers, soaked in water for 30 minutes
Instructions
- Prep the dip: In a small bowl, whisk together the Greek yogurt, honey, and vanilla extract until smooth. Set aside in the fridge to chill.
- Skewer the fruit: Thread the strawberries, pineapple chunks, grapes, and banana slices onto the soaked wooden skewers, alternating the fruits for a colorful effect.
- Serve immediately: Arrange the fruit kabobs on a platter with the yogurt dip on the side. For an extra touch, drizzle a little extra honey over the kabobs right before serving.
The combination of juicy, fresh fruit with the creamy, slightly tangy yogurt dip is a match made in heaven. Try serving these kabobs at your next barbecue or as a light dessert after a heavy meal – they’re guaranteed to be a hit.
Banana Berry Smoothie
Mornings can be tough, but this Banana Berry Smoothie is like a hug in a glass—easy to whip up and packed with flavors that’ll make you forget you’re actually being healthy. Perfect for those ‘I need breakfast now’ moments.
Ingredients
- 1 ripe banana, peeled and sliced
- 1 cup mixed berries (strawberries, blueberries, raspberries)
- 1/2 cup Greek yogurt
- 1/2 cup almond milk
- 1 tbsp honey
- 1/2 tsp vanilla extract
- 1 cup ice cubes
Instructions
- Prep the fruits: Slice the banana and wash the mixed berries if they’re fresh. Frozen works too—no need to thaw!
- Blend the base: In a blender, combine the banana, berries, Greek yogurt, almond milk, honey, and vanilla extract. Blend on high for 30 seconds until smooth.
- Add ice: Toss in the ice cubes and blend again for another 30 seconds or until the smoothie is thick and frosty. Tip: If it’s too thick, add a splash more almond milk.
- Check consistency: Give it a quick taste—add more honey if you like it sweeter. Tip: For an extra nutrient boost, throw in a handful of spinach; you won’t even taste it!
- Serve immediately: Pour into your favorite glass and enjoy right away. Tip: Garnish with a few whole berries or a banana slice on the rim for that Instagram-worthy look.
This smoothie is creamy, slightly tangy from the berries, and just sweet enough to feel like a treat. Try it with a sprinkle of granola on top for a crunchy contrast, or sip it through a colorful straw for a fun twist.
Apple Cinnamon Muffins
Zesty mornings call for something sweet, and what better way to kickstart your day than with these apple cinnamon muffins? They’re like a hug in muffin form, packed with cozy flavors and just the right amount of sweetness to make your taste buds dance.
Ingredients
- 2 cups all-purpose flour
- 1/2 cup granulated sugar
- 1/4 cup brown sugar, packed
- 1 tbsp baking powder
- 1/2 tsp salt
- 1 tsp ground cinnamon
- 1/2 cup unsalted butter, melted and slightly cooled
- 1 large egg, room temperature
- 1 cup milk, room temperature
- 1 tsp vanilla extract
- 1 1/2 cups apples, peeled and finely chopped
Instructions
- Preheat oven: Heat your oven to 375°F (190°C) and line a muffin tin with paper liners or grease it lightly.
- Mix dry ingredients: In a large bowl, whisk together the flour, granulated sugar, brown sugar, baking powder, salt, and cinnamon until well combined.
- Combine wet ingredients: In another bowl, mix the melted butter, egg, milk, and vanilla extract until smooth. Tip: Make sure your egg and milk are at room temperature to avoid curdling the butter.
- Fold together: Pour the wet ingredients into the dry ingredients and stir until just combined. Be careful not to overmix; a few lumps are okay. Tip: Overmixing can lead to tough muffins.
- Add apples: Gently fold in the chopped apples until evenly distributed throughout the batter.
- Fill muffin cups: Divide the batter evenly among the prepared muffin cups, filling each about 3/4 full. Tip: Use an ice cream scoop for evenly sized muffins.
- Bake: Bake for 20-25 minutes, or until a toothpick inserted into the center of a muffin comes out clean. The tops should be golden brown.
- Cool: Let the muffins cool in the tin for 5 minutes, then transfer to a wire rack to cool completely.
These muffins come out perfectly moist with a tender crumb, thanks to the apples, and the cinnamon adds a warm spice that’s just irresistible. Serve them warm with a dab of butter or a drizzle of caramel for an extra indulgent treat.
Strawberry Banana Popsicles
Vibrant and refreshing, these Strawberry Banana Popsicles are the perfect way to beat the summer heat. Imagine blending the sweet tang of strawberries with the creamy richness of bananas, then freezing them into a popsicle that’s both easy to make and impossible to resist.
Ingredients
- 1 cup fresh strawberries, hulled and halved
- 1 large banana, peeled and sliced
- 1/2 cup plain Greek yogurt
- 2 tbsp honey
- 1 tsp vanilla extract
Instructions
- Blend the fruits: In a blender, combine the strawberries, banana, Greek yogurt, honey, and vanilla extract. Blend until smooth.
- Pour into molds: Carefully pour the mixture into popsicle molds, leaving a little space at the top for expansion.
- Insert sticks: Place popsicle sticks into each mold, making sure they’re centered and stand straight.
- Freeze until solid: Freeze the popsicles for at least 6 hours, or overnight, until they’re completely firm.
- Unmold with care: To remove the popsicles, run the molds under warm water for a few seconds until they slide out easily.
These popsicles are creamy, with a perfect balance of sweetness and tanginess. For an extra fun twist, try dipping them in melted dark chocolate before serving for a decadent treat.
Rainbow Fruit Salad
Hey there! Imagine a bowl so vibrant it could double as a centerpiece at your next BBQ—that’s what we’re making today with this Rainbow Fruit Salad. It’s the perfect mix of sweet, tangy, and downright refreshing, plus it’s a total breeze to throw together.
Ingredients
- 1 cup strawberries, hulled and sliced
- 1 cup pineapple, cubed
- 1 cup mango, cubed
- 1 cup blueberries
- 1 cup green grapes, halved
- 1 cup purple grapes, halved
- 1 tbsp fresh mint, finely chopped
- 1 tbsp honey
- 1 tbsp lime juice
Instructions
- Prep the fruits: Wash all the fruits thoroughly. Hull and slice the strawberries, cube the pineapple and mango, halve the green and purple grapes, and leave the blueberries whole.
- Mix the dressing: In a small bowl, whisk together the honey and lime juice until well combined. This little dressing is the secret to bringing all those flavors together.
- Combine everything: In a large bowl, gently toss the strawberries, pineapple, mango, blueberries, green grapes, and purple grapes with the dressing. Be gentle to keep those beautiful fruit pieces intact.
- Add the mint: Sprinkle the finely chopped mint over the salad and give it one last gentle toss. The mint adds a fresh pop that’ll make this salad unforgettable.
- Chill before serving: Cover the bowl and let the salad chill in the fridge for at least 30 minutes. This lets the flavors mingle and get even more delicious.
When you dig in, you’ll love the juicy crunch of the fruits against the sweet-tangy dressing, with little bursts of mint freshness. Serve it in a hollowed-out watermelon for a show-stopping presentation that’ll have everyone reaching for seconds.
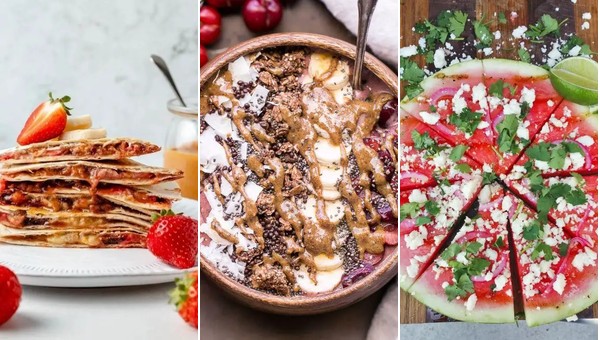
Watermelon Pizza with Honey Drizzle
You know those days when you’re craving something sweet but also kinda want to pretend you’re being healthy? Yeah, me too. That’s where this Watermelon Pizza with Honey Drizzle comes in—it’s the perfect lazy summer treat that looks fancy but is stupid easy to make.
Ingredients
- 1 large watermelon, cut into 1-inch thick rounds
- 1/2 cup Greek yogurt
- 1 tbsp honey, plus extra for drizzling
- 1/4 cup fresh mint leaves, chopped
- 1/4 cup feta cheese, crumbled
- 1/4 cup blueberries
- 1/4 cup strawberries, sliced
Instructions
- Prep the base: Slice your watermelon into 1-inch thick rounds. These will be your ‘pizza crusts’. Pro tip: Pick a seedless watermelon to save yourself the hassle.
- Spread the yogurt: Take 1/2 cup of Greek yogurt and spread it evenly over each watermelon round. This is your ‘sauce’.
- Drizzle honey: Drizzle 1 tbsp of honey over the yogurt. This adds a touch of sweetness that pairs amazingly with the tangy yogurt.
- Add toppings: Sprinkle 1/4 cup of fresh mint leaves, 1/4 cup of crumbled feta cheese, 1/4 cup of blueberries, and 1/4 cup of sliced strawberries over each watermelon round. Feel free to get creative here—any berries or nuts would work!
- Final drizzle: Finish with an extra drizzle of honey for that Instagram-worthy shine.
The combination of juicy watermelon, creamy yogurt, and sweet honey is downright addictive. Serve it up at your next BBQ, and watch it disappear before the burgers are even off the grill.
Peach and Blueberry Parfait
Oh boy, do I have a treat for you today! Imagine layers of sweet peaches, juicy blueberries, and creamy yogurt coming together in a parfait that’s as easy to make as it is delicious. Perfect for those mornings when you’re craving something sweet but don’t want to spend hours in the kitchen.
Ingredients
- 1 cup fresh peaches, diced
- 1 cup fresh blueberries
- 1 cup Greek yogurt
- 1/4 cup granola
- 1 tbsp honey
- 1/2 tsp vanilla extract
Instructions
- Prep the fruit: Wash the peaches and blueberries thoroughly. Dice the peaches into small, bite-sized pieces.
- Mix the yogurt: In a small bowl, combine the Greek yogurt with vanilla extract and honey. Stir until everything is well mixed and smooth.
- Layer the parfait: Start with a layer of the yogurt mixture at the bottom of a glass. Add a layer of diced peaches, followed by a layer of blueberries. Repeat the layers until the glass is full, finishing with a sprinkle of granola on top.
- Chill for freshness: Place the parfait in the refrigerator for at least 10 minutes before serving. This helps the flavors meld together beautifully.
- Serve and enjoy: Grab a spoon and dive into your homemade Peach and Blueberry Parfait. The crunch of the granola, the creaminess of the yogurt, and the burst of fruit flavors make every bite a delight.
This parfait isn’t just a breakfast option; it’s a versatile dish that can double as a dessert or a snack. The contrast between the creamy yogurt and the fresh, juicy fruits is absolutely heavenly. Try serving it in a mason jar for a picnic-friendly version!
Kiwi and Strawberry Fruit Leather
Just when you thought fruit couldn’t get any more fun, here comes Kiwi and Strawberry Fruit Leather to prove you wrong. It’s like summer rolled up into a chewy, sweet strip of sunshine, and honestly, it’s easier to make than you’d think—no fancy equipment needed!
Ingredients
- 2 cups fresh strawberries, hulled and sliced
- 3 ripe kiwis, peeled and chopped
- 1 tablespoon honey
- 1 teaspoon lemon juice
Instructions
- Blend the fruits: Toss the strawberries, kiwis, honey, and lemon juice into a blender. Puree until smooth, scraping down the sides as needed.
- Simmer the puree: Pour the puree into a saucepan over medium heat. Let it simmer for about 10 minutes, stirring occasionally, until it thickens slightly. Tip: A wooden spoon is your best friend here to prevent sticking.
- Prep the baking sheet: Line a baking sheet with parchment paper and lightly grease it with a bit of oil or cooking spray. This ensures your fruit leather won’t stick.
- Spread the puree: Pour the thickened puree onto the prepared baking sheet. Use a spatula to spread it evenly into a thin layer, about 1/8 inch thick. Tip: Aim for uniformity to ensure even drying.
- Dry in the oven: Preheat your oven to the lowest setting, usually around 170°F. Place the baking sheet in the oven and let the puree dry for 4-6 hours. It’s done when it’s no longer sticky to the touch. Tip: Prop the oven door open slightly with a wooden spoon to allow moisture to escape.
- Cut and roll: Once cooled, peel the fruit leather off the parchment paper. Cut it into strips and roll them up for easy storage or snacking.
This fruit leather is delightfully chewy with a perfect balance of sweet and tart. Try rolling up the strips with a sprinkle of coconut flakes for an extra tropical twist!
Frozen Grapes with Chocolate Drizzle
Zesty and refreshing, these frozen grapes with a chocolate drizzle are the perfect pick-me-up for those scorching summer days when you need something sweet but don’t want to turn on the oven. It’s like nature’s candy got a fancy makeover, and trust me, it’s as easy as it is delicious.
Ingredients
- 2 cups seedless grapes, washed and dried
- 1/2 cup semi-sweet chocolate chips
- 1 tsp coconut oil
Instructions
- Freeze the grapes: Spread the grapes out on a baking sheet lined with parchment paper, making sure they’re not touching. Pop them in the freezer for at least 2 hours, or until they’re solid. Tip: Freezing them separately first prevents them from clumping together later.
- Melt the chocolate: In a microwave-safe bowl, combine the chocolate chips and coconut oil. Microwave in 30-second intervals, stirring in between, until the chocolate is completely melted and smooth. Tip: The coconut oil helps thin the chocolate for easier drizzling.
- Drizzle and freeze again: Drizzle the melted chocolate over the frozen grapes. You can use a spoon or a piping bag for more control. Return the grapes to the freezer for about 10 minutes, just until the chocolate sets. Tip: If you’re in a hurry, you can skip this step, but the chocolate won’t be as snappy.
The contrast between the icy crunch of the grapes and the rich, velvety chocolate is downright magical. Serve them straight from the freezer for a cool treat, or toss them into a bowl of yogurt for an extra special breakfast.
Orange Slice Cupcakes
These Orange Slice Cupcakes are like a burst of sunshine in every bite, perfect for when you’re craving something sweet but not too heavy. Trust me, they’re as fun to make as they are to eat, and hey, they might just make you the star of your next potluck.
Ingredients
- 1 1/2 cups all-purpose flour
- 1 cup granulated sugar
- 1/2 cup unsalted butter, softened
- 2 large eggs
- 1/2 cup whole milk
- 1 tbsp orange zest
- 1/4 cup fresh orange juice
- 1 tsp vanilla extract
- 1 1/2 tsp baking powder
- 1/4 tsp salt
Instructions
- Preheat oven: Heat your oven to 350°F (175°C) and line a muffin tin with cupcake liners. This ensures your cupcakes won’t stick and makes cleanup a breeze.
- Mix dry ingredients: In a medium bowl, whisk together the flour, baking powder, and salt. This step is crucial for avoiding lumps in your batter.
- Cream butter and sugar: In a large bowl, beat the softened butter and sugar together until light and fluffy. This incorporates air, making your cupcakes lighter.
- Add eggs and flavorings: Beat in the eggs one at a time, then stir in the vanilla extract, orange zest, and orange juice. The zest is where all that vibrant orange flavor hides, so don’t skip it!
- Combine wet and dry: Alternately add the dry ingredients and milk to the butter mixture, starting and ending with the dry ingredients. Mix until just combined to keep the cupcakes tender.
- Fill and bake: Divide the batter evenly among the cupcake liners, filling each about 2/3 full. Bake for 18-20 minutes, or until a toothpick inserted comes out clean.
The cupcakes come out moist and fluffy, with a bright orange flavor that’s not overpowering. Try topping them with a dollop of whipped cream and a thin orange slice for an extra special touch.
Pineapple and Mango Sorbet
Just imagine this: it’s hotter than a jalapeño’s armpit outside, and you’re craving something cold, fruity, and downright refreshing. That’s where this Pineapple and Mango Sorbet swoops in like a superhero in flip-flops to save the day.
Ingredients
- 2 cups fresh pineapple, chopped (because frozen just doesn’t bring the same vacation vibes)
- 2 cups ripe mango, peeled and chopped (go for the ones that feel like a squishy stress ball)
- 1/2 cup granulated sugar (the sweet talker of the group)
- 1/2 cup water (H2Oh yeah, we need this)
- 1 tbsp lime juice (for that zesty little kick)
- 1/4 tsp salt (just a pinch to make the flavors pop)
Instructions
- Prep the fruit: Toss your chopped pineapple and mango into a blender. No need to be gentle; let them know who’s boss.
- Make the syrup: In a small saucepan, combine sugar and water. Heat over medium until the sugar dissolves, about 3 minutes. Let it cool slightly unless you enjoy molten sugar burns.
- Blend it up: Pour the syrup into the blender with the fruit, add lime juice and salt, and blend until smoother than a jazz playlist.
- Chill out: Pour the mixture into a shallow dish and freeze for about 4 hours. Stir every hour to break up ice crystals unless you’re into chunky sorbet (no judgment).
- Serve with flair: Scoop into bowls and garnish with a mint leaf or a tiny umbrella because why not?
This sorbet is like a tropical getaway in your mouth—smooth, vibrant, and bursting with sunshine. Try serving it in hollowed-out pineapple halves for that extra ‘wow’ factor at your next BBQ.
Mixed Berry Yogurt Bark
Kickstart your morning or snack time with this ridiculously easy Mixed Berry Yogurt Bark that’s like a party on a baking sheet. It’s the perfect mix of creamy, tangy, and sweet, with a crunch that’ll make you forget all about those store-bought snacks.
Ingredients
- 2 cups plain Greek yogurt
- 2 tbsp honey
- 1 tsp vanilla extract
- 1 cup mixed berries (strawberries, blueberries, raspberries), chopped
- 1/4 cup granola
Instructions
- Mix the base: In a bowl, whisk together the Greek yogurt, honey, and vanilla extract until smooth.
- Spread it out: Line a baking sheet with parchment paper and spread the yogurt mixture evenly into a rectangle about 1/4 inch thick.
- Add the toppings: Sprinkle the chopped mixed berries and granola over the yogurt, pressing lightly so they stick.
- Freeze to set: Place the baking sheet in the freezer for at least 4 hours, or until the yogurt bark is completely firm.
- Break into pieces: Once frozen, lift the parchment paper off the baking sheet and break the bark into irregular pieces.
This yogurt bark is a dreamy combo of creamy and crunchy, with bursts of berry sweetness in every bite. Serve it straight from the freezer for a cool treat, or let it sit for a minute if you prefer a slightly softer texture. Either way, it’s a snack that’ll have you coming back for more.
Pear and Apple Crumble
Baking a Pear and Apple Crumble is like throwing a cozy autumn party in your mouth, where every bite is a perfect mix of sweet, tart, and buttery goodness. Let’s dive into making this comforting dessert that’s as easy as pie (but let’s be honest, way easier).
Ingredients
- 2 cups peeled, cored, and sliced pears
- 2 cups peeled, cored, and sliced apples
- 1/2 cup granulated sugar
- 1 tbsp lemon juice
- 1 tsp ground cinnamon
- 1/2 tsp ground nutmeg
- 1 cup all-purpose flour
- 1/2 cup rolled oats
- 1/2 cup packed brown sugar
- 1/2 cup unsalted butter, chilled and diced
- 1/4 tsp salt
Instructions
- Preheat oven: Heat your oven to 375°F (190°C) to ensure it’s ready for baking perfection.
- Mix fruits: In a large bowl, toss the pears and apples with granulated sugar, lemon juice, cinnamon, and nutmeg until evenly coated.
- Prepare topping: In another bowl, combine flour, oats, brown sugar, and salt. Add the diced butter and use your fingers to mix until the mixture resembles coarse crumbs.
- Assemble crumble: Spread the fruit mixture evenly in a 9-inch baking dish. Sprinkle the topping over the fruit, covering it completely.
- Bake to perfection: Place the dish in the preheated oven and bake for 35-40 minutes, or until the topping is golden brown and the fruit is bubbly.
- Cool slightly: Let the crumble sit for about 10 minutes before serving to allow the juices to thicken slightly.
The crumble comes out with a crispy, golden topping that gives way to soft, spiced fruits underneath. Serve it warm with a scoop of vanilla ice cream for an extra indulgent treat, or enjoy it as is for a simple, satisfying dessert.
Fruit-Filled Jelly Cups
You know those days when you want something sweet but also kinda fancy without putting in too much effort? Yeah, me too. That’s exactly why these Fruit-Filled Jelly Cups are about to become your new best friend. They’re ridiculously easy to make, look like you spent hours on them, and taste like a little cup of joy.
Ingredients
- 1 cup water
- 1/2 cup sugar
- 2 tbsp gelatin powder
- 1 cup mixed fresh fruits (like strawberries, blueberries, and kiwi), diced
- 1 tsp lemon juice
Instructions
- Dissolve sugar: In a small saucepan, combine 1 cup water and 1/2 cup sugar. Heat over medium heat, stirring constantly, until the sugar is completely dissolved.
- Add gelatin: Remove the saucepan from heat. Sprinkle 2 tbsp gelatin powder over the sugar water, whisking quickly to avoid lumps. Let it sit for 5 minutes to bloom.
- Mix in lemon juice: Stir in 1 tsp lemon juice for a little zing. This also helps balance the sweetness.
- Prepare cups: Divide the diced mixed fresh fruits evenly among 4 small cups or glasses.
- Pour jelly: Slowly pour the gelatin mixture over the fruits in each cup, ensuring the fruits are evenly distributed.
- Chill to set: Refrigerate the cups for at least 2 hours, or until the jelly is firm to the touch.
The beauty of these jelly cups is in their layers of texture – the firm jelly against the soft, juicy fruits is a match made in heaven. Try serving them with a dollop of whipped cream on top for an extra indulgent treat.
Cherry and Banana Smoothie Bowl
Ready to blend up something that’ll make your morning feel like a vacation? This Cherry and Banana Smoothie Bowl is like a tropical getaway in a bowl, minus the sunscreen taste. It’s creamy, dreamy, and packed with enough fruity goodness to make your taste buds do a happy dance.
Ingredients
- 1 cup frozen cherries (no need to thaw, they’re perfect straight from the freezer)
- 1 ripe banana (the spottier, the sweeter)
- 1/2 cup almond milk (or whatever milk makes your heart sing)
- 1 tbsp honey (for that sweet, sweet love)
- 1/2 tsp vanilla extract (because vanilla makes everything better)
- A pinch of salt (to make all the flavors pop)
- Toppings: granola, sliced almonds, and extra cherries (for that Instagram-worthy finish)
Instructions
- Blend the base: Toss the frozen cherries, banana, almond milk, honey, vanilla extract, and a pinch of salt into your blender. Blend on high until smooth and creamy, about 1-2 minutes. If it’s too thick, add a splash more almond milk.
- Pour and decorate: Pour the smoothie into a bowl. Now, let’s get artsy—sprinkle granola, sliced almonds, and a few extra cherries on top. The more toppings, the merrier.
- Serve immediately: Grab a spoon and dive in before it melts into a puddle of deliciousness. Pro tip: If you’re feeling extra, a drizzle of peanut butter takes this bowl to the next level.
This bowl is a creamy, dreamy masterpiece with a texture that’s thick enough to spoon but smooth enough to slurp. The cherries and banana are a match made in heaven, offering a sweet-tart flavor that’s balanced by the crunch of granola. Serve it in a coconut shell for those ‘I’m definitely on a beach’ vibes.
Blueberry Pancakes with Maple Syrup
Think there’s nothing better than waking up to the smell of pancakes? Wait till you try these fluffy blueberry pancakes drizzled with maple syrup—it’s like a hug for your taste buds.
Ingredients
- 1 cup all-purpose flour
- 2 tbsp sugar
- 1 tsp baking powder
- 1/2 tsp baking soda
- 1/4 tsp salt
- 3/4 cup buttermilk
- 1 large egg
- 2 tbsp melted butter
- 1/2 cup fresh blueberries
- Maple syrup for serving
Instructions
- Mix dry ingredients: In a large bowl, whisk together the flour, sugar, baking powder, baking soda, and salt.
- Combine wet ingredients: In another bowl, beat the buttermilk, egg, and melted butter until smooth.
- Fold together: Pour the wet ingredients into the dry ingredients and stir until just combined. A few lumps are okay—overmixing makes tough pancakes.
- Add blueberries: Gently fold in the blueberries to distribute evenly throughout the batter.
- Heat the pan: Preheat a non-stick skillet over medium heat (about 350°F) and lightly grease with butter or cooking spray.
- Cook pancakes: Pour 1/4 cup of batter for each pancake onto the skillet. Cook until bubbles form on the surface and edges look set, about 2-3 minutes.
- Flip carefully: Turn the pancakes over and cook for another 1-2 minutes until golden brown and cooked through.
- Serve warm: Stack the pancakes on a plate and drizzle generously with maple syrup.
These pancakes are incredibly light and fluffy, with bursts of juicy blueberries in every bite. For an extra indulgent twist, top with a dollop of whipped cream or a sprinkle of powdered sugar.
Raspberry and Coconut Energy Bites
Guess what? I’ve got this no-bake, energy-boosting snack that’s perfect for when you’re running out the door or need a little pick-me-up. These Raspberry and Coconut Energy Bites are like little bursts of joy, packed with flavor and super easy to make.
Ingredients
- 1 cup rolled oats
- 1/2 cup almond butter
- 1/3 cup honey
- 1/2 cup dried raspberries
- 1/4 cup shredded coconut
- 1 tsp vanilla extract
- 1/2 tsp sea salt
Instructions
- Mix dry ingredients: In a large bowl, combine the rolled oats, dried raspberries, shredded coconut, and sea salt.
- Add wet ingredients: Pour in the almond butter, honey, and vanilla extract. Mix until everything is well combined. Tip: If the mixture seems too dry, add a bit more honey or almond butter to help it stick together.
- Form the bites: Roll the mixture into small balls, about 1 inch in diameter. Tip: Wetting your hands slightly can prevent the mixture from sticking to your fingers.
- Chill to set: Place the energy bites on a baking sheet lined with parchment paper and refrigerate for at least 30 minutes. This helps them firm up and hold their shape.
- Serve or store: Once set, enjoy immediately or store in an airtight container in the fridge for up to a week. Tip: For an extra coconutty flavor, roll the finished bites in additional shredded coconut before chilling.
These bites are delightfully chewy with a sweet-tart kick from the raspberries and a subtle crunch from the coconut. Try popping a couple in your lunchbox or blending them into your morning smoothie for an extra energy boost!
Melon Ball Skewers with Mint
So, you’re staring at a melon and thinking, ‘How can I make this more fun?’ Well, grab a skewer and let’s turn that melon into the life of the party with these Melon Ball Skewers with Mint. It’s like a fruit salad decided to dress up and go out.
Ingredients
- 1 large ripe honeydew melon
- 1 large ripe cantaloupe
- 1/4 cup fresh mint leaves, finely chopped
- 1 tbsp honey
- 1 tbsp lime juice
Instructions
- Prep the melons: Cut both honeydew and cantaloupe in half, scoop out the seeds, and use a melon baller to create balls from each melon. Tip: For easier scooping, make sure your melon is chilled.
- Make the dressing: In a small bowl, whisk together honey and lime juice until well combined. Tip: If your honey is too thick, warm it slightly for easier mixing.
- Skewer the melon balls: Thread melon balls onto skewers, alternating between honeydew and cantaloupe for a colorful effect. Tip: Soak wooden skewers in water for 30 minutes beforehand to prevent burning if you’re planning to grill them.
- Add the mint: Sprinkle the finely chopped mint over the skewered melon balls.
- Drizzle with dressing: Lightly drizzle the honey-lime dressing over the skewers just before serving to keep them fresh and vibrant.
The combination of sweet melon, zesty lime, and fresh mint is a total game-changer. Serve these skewers at your next BBQ or pool party, and watch them disappear faster than you can say ‘melon ball’.
Strawberry and Banana Quesadillas
Guess what? You’re about to turn your breakfast game upside down with these Strawberry and Banana Quesadillas. It’s like your favorite fruit salad decided to crash a quesadilla party, and honestly, it’s a match made in heaven.
Ingredients
- 2 large flour tortillas
- 1/2 cup sliced strawberries
- 1 medium banana, sliced
- 1/4 cup shredded mozzarella cheese
- 1/4 cup cream cheese, softened
- 1 tbsp honey
- 1/2 tsp cinnamon
- 1 tbsp butter
Instructions
- Prep the filling: In a bowl, mix the sliced strawberries, banana, mozzarella cheese, cream cheese, honey, and cinnamon until well combined.
- Butter up: Heat a large skillet over medium heat and melt the butter, swirling to coat the bottom.
- Assemble the quesadilla: Lay one tortilla flat in the skillet, spread the fruit and cheese mixture evenly over half, then fold the other half over.
- Cook to perfection: Cook for 2-3 minutes on each side, or until the tortilla is golden brown and the cheese is melted. Tip: Press down gently with a spatula to help it stick together.
- Flip with care: Carefully flip the quesadilla to cook the other side. Tip: If any filling escapes, just tuck it back in with the spatula.
- Serve warm: Remove from the skillet, let it cool for a minute, then slice into wedges. Tip: Drizzle a little extra honey on top for added sweetness.
The first bite gives you a gooey, cheesy pull with a sweet and slightly tangy burst from the strawberries. Perfect for a lazy weekend brunch or a quick dessert that feels fancy without the effort.
Fruit-Infused Water with Citrus Slices
Ready to jazz up your hydration game with something that’s as pretty as it is refreshing? Let’s dive into making this fruit-infused water with citrus slices that’ll make your water bottle the envy of the office.
Ingredients
- 1 medium lemon, thinly sliced
- 1 medium lime, thinly sliced
- 1 medium orange, thinly sliced
- 8 cups cold water
- Ice cubes (optional, for serving)
Instructions
- Slice the citrus: Using a sharp knife, thinly slice the lemon, lime, and orange. Pro tip: Remove any seeds you see to keep the water from getting bitter.
- Combine in pitcher: Gently place the citrus slices into a large pitcher. Be careful not to overcrowd; you want the water to flow freely around the fruit.
- Add water: Pour 8 cups of cold water over the citrus slices. Pro tip: If you’re in a hurry, use chilled water to skip the waiting time for it to cool.
- Infuse: Let the water sit in the fridge for at least 1 hour to allow the flavors to meld. For a stronger flavor, let it infuse for up to 4 hours.
- Serve: Fill glasses with ice cubes if desired, then pour the infused water over the ice. Pro tip: The citrus slices make a gorgeous garnish, so feel free to add a few to each glass for that extra flair.
The result? A subtly sweet and tangy water that’s bursting with freshness. Perfect for sipping on a hot day or serving at your next brunch to impress your friends with minimal effort.
Conclusion
With these 20 fun and easy fruit recipes, getting kids excited about healthy eating has never been tastier! Whether you’re whipping up a smoothie, fruit pizza, or playful skewers, there’s something here for every little chef. Give these recipes a try, and let us know which ones were a hit in your kitchen. Don’t forget to share the love—pin this article to spread the fruity fun!

I’m Brandon, the face behind the recipes. As a dedicated food enthusiast, I love experimenting with flavors and sharing my culinary adventures with you.