‘Tis the season for cozy kitchens, twinkling lights, and delicious holiday magic! Whether you’re hosting a festive feast or whipping up quick comfort food between celebrations, we’ve rounded up 19 merry must-try Christmas recipes—from showstopping mains to sweet treats—that’ll make your holidays extra joyful. Grab your apron and let’s dive into these flavorful favorites that are sure to delight every guest at your table!
Peppermint Hot Chocolate Cookies
These Peppermint Hot Chocolate Cookies are like a cozy winter hug in dessert form, perfect for when you’re craving something sweet with a little kick of peppermint. Trust me, they’re as fun to make as they are to eat, especially when you sneak a taste of the dough (no judgment here).
Ingredients
- 1 cup unsalted butter, softened to room temperature
- 1 cup granulated sugar
- 1 cup brown sugar, packed
- 2 large eggs, at room temperature
- 1 tsp vanilla extract
- 3 cups all-purpose flour
- 1 tsp baking soda
- 1/2 tsp baking powder
- 1 tsp salt
- 1/2 cup cocoa powder
- 1 cup dark chocolate chips
- 1/2 cup crushed peppermint candies
- 1/2 cup mini marshmallows
Instructions
- Preheat oven: Set your oven to 350°F (175°C) and line your baking sheets with parchment paper to prevent sticking.
- Cream butter and sugars: In a large bowl, beat the softened butter, granulated sugar, and brown sugar together until light and fluffy, about 3 minutes.
- Add eggs and vanilla: Beat in the eggs one at a time, then stir in the vanilla extract until well combined.
- Mix dry ingredients: In a separate bowl, whisk together the flour, baking soda, baking powder, salt, and cocoa powder.
- Combine wet and dry: Gradually add the dry ingredients to the wet ingredients, mixing until just combined to avoid overworking the dough.
- Fold in mix-ins: Gently fold in the dark chocolate chips, crushed peppermint candies, and mini marshmallows.
- Scoop dough: Use a cookie scoop or tablespoon to drop dough onto the prepared baking sheets, spacing them about 2 inches apart.
- Bake: Bake for 10-12 minutes, or until the edges are set but the centers are still soft. Let them cool on the baking sheet for 5 minutes before transferring to a wire rack.
These cookies come out perfectly chewy with a rich chocolate flavor, a cool peppermint zing, and gooey pockets of melted marshmallow. Try serving them warm with a glass of cold milk for the ultimate comfort food experience.
Gingerbread House Cupcakes
Baking these Gingerbread House Cupcakes is like throwing a holiday party in your mouth, and everyone’s invited! Imagine the cozy spice of gingerbread paired with the sweet, creamy frosting, all topped with adorable little gingerbread house decorations. Let’s get baking!
Ingredients
- 1 1/2 cups all-purpose flour
- 1 tsp baking soda
- 1/2 tsp salt
- 1 tsp ground ginger
- 1 tsp ground cinnamon
- 1/4 tsp ground cloves
- 1/2 cup unsalted butter, softened
- 1/2 cup brown sugar, packed
- 1 large egg
- 1/2 cup molasses
- 1/2 cup hot water
- 1 cup powdered sugar
- 2 tbsp milk
- 1/2 tsp vanilla extract
- Mini gingerbread house decorations
Instructions
- Preheat oven: Heat your oven to 350°F and line a muffin tin with cupcake liners.
- Mix dry ingredients: In a bowl, whisk together flour, baking soda, salt, ginger, cinnamon, and cloves.
- Cream butter and sugar: In another bowl, beat the softened butter and brown sugar until fluffy. Tip: Make sure your butter is at room temperature for the best texture.
- Add wet ingredients: Beat in the egg, then molasses, and finally the hot water. The batter will be thin, but that’s okay!
- Combine: Gradually mix the dry ingredients into the wet until just combined. Overmixing can make the cupcakes tough.
- Bake: Fill each liner 2/3 full and bake for 18-20 minutes, or until a toothpick comes out clean. Tip: Rotate the pan halfway through for even baking.
- Cool: Let cupcakes cool in the pan for 5 minutes, then transfer to a wire rack to cool completely.
- Make frosting: Whisk together powdered sugar, milk, and vanilla until smooth. Adjust consistency with more milk or sugar if needed.
- Decorate: Frost each cupcake and top with a mini gingerbread house. Tip: If your frosting is too runny, chill it for 10 minutes before using.
These cupcakes are a delightful mix of soft, spicy cake and sweet, creamy frosting, with a fun crunch from the gingerbread decorations. Serve them at your next holiday gathering or as a special treat to brighten a winter day!
Christmas Tree Pull-Apart Bread
Craving something festive and fun to make your holiday brunch pop? This Christmas Tree Pull-Apart Bread is your ticket to being the star of the breakfast table, combining the joy of the season with the irresistible pull of cheesy, herby goodness.
Ingredients
- 2 cans (16 oz each) refrigerated biscuit dough
- 1/2 cup unsalted butter, melted
- 1/4 cup grated Parmesan cheese
- 1 tbsp garlic powder
- 1 tbsp dried parsley
- 1 tsp dried oregano
- 1 tsp dried basil
- 1 cup shredded mozzarella cheese
- 1/2 cup marinara sauce, for serving
Instructions
- Preheat oven: Heat your oven to 375°F (190°C) and line a baking sheet with parchment paper.
- Prepare dough: Cut each biscuit into quarters and toss them in a large bowl with melted butter, Parmesan, garlic powder, parsley, oregano, and basil until evenly coated.
- Shape tree: Arrange the coated biscuit pieces on the prepared baking sheet in the shape of a Christmas tree, leaving small gaps between pieces for expansion.
- Add cheese: Sprinkle mozzarella cheese generously over the top of the arranged biscuit pieces.
- Bake: Bake in the preheated oven for 20-25 minutes, or until the bread is golden brown and the cheese is bubbly.
- Serve warm: Let the bread cool for a few minutes before serving with marinara sauce on the side for dipping.
The bread comes out fluffy and buttery with a crispy exterior, while the melted mozzarella adds a gooey, stretchy element that’s downright addictive. Serve it as the centerpiece of your holiday brunch or as a fun appetizer that’ll have everyone pulling apart piece after piece.
Santa Hat Cheesecake Bites
Picture this: it’s the holiday season, and you’re staring at a plate of these adorable Santa Hat Cheesecake Bites, wondering how you ever lived without them. They’re the perfect mix of creamy, tangy, and sweet, with a little festive flair that’ll have everyone reaching for seconds (or thirds, no judgment here).
Ingredients
- 1 cup graham cracker crumbs
- 1/4 cup melted butter
- 8 oz cream cheese, softened
- 1/4 cup granulated sugar
- 1 tsp vanilla extract
- 1/2 cup heavy whipping cream
- 12 fresh strawberries, hulled
- 1/4 cup white chocolate chips, melted
Instructions
- Prep the crust: Mix graham cracker crumbs and melted butter until combined. Press firmly into the bottom of a mini muffin tin to form the crust.
- Make the filling: Beat cream cheese, sugar, and vanilla until smooth. In another bowl, whip the heavy cream to stiff peaks, then fold into the cream cheese mixture.
- Assemble the bites: Spoon the filling over the crusts. Chill in the fridge for at least 2 hours, or until set.
- Add the hats: Slice the top off each strawberry to create a flat base, then place a strawberry, cut side down, on each cheesecake bite.
- Finish with flair: Drizzle melted white chocolate over the strawberries to create the ‘hat’ trim. Let set before serving.
These bites are a dreamy combo of crunchy crust, velvety cheesecake, and juicy strawberry, with the white chocolate adding just the right amount of sweetness. Try serving them on a platter with a dusting of powdered sugar ‘snow’ for an extra festive touch.
Eggnog Cinnamon Rolls
Okay, so you’re telling me you’ve never tried eggnog cinnamon rolls? Oh, buddy, you’re in for a treat that’s like a cozy holiday sweater but in dessert form. Let’s dive into making these bad boys, and yes, they’re as indulgent as they sound.
Ingredients
- 2 1/4 cups all-purpose flour, plus extra for dusting
- 1/4 cup granulated sugar
- 1 packet (2 1/4 tsp) instant yeast
- 1/2 tsp salt
- 1/2 cup eggnog, warmed to about 110°F
- 1/4 cup unsalted butter, melted
- 1 large egg
- 1/2 cup brown sugar, packed
- 1 1/2 tbsp ground cinnamon
- 2 tbsp unsalted butter, softened
- 1/2 cup powdered sugar
- 1 tbsp eggnog
Instructions
- Mix dry ingredients: In a large bowl, whisk together flour, granulated sugar, yeast, and salt.
- Add wet ingredients: Pour in the warmed eggnog, melted butter, and egg. Stir until a dough forms.
- Knead the dough: On a floured surface, knead for about 5 minutes until smooth. Tip: If the dough sticks, add a bit more flour.
- Let it rise: Place dough in a greased bowl, cover, and let rise in a warm place for 1 hour or until doubled.
- Roll out dough: On a floured surface, roll the dough into a 12×9 inch rectangle.
- Spread filling: Mix brown sugar and cinnamon. Spread softened butter over dough, then sprinkle the sugar mix evenly.
- Roll and cut: Roll up tightly from the long side, pinch seam to seal. Cut into 9 slices. Tip: Use dental floss for clean cuts.
- Second rise: Place rolls in a greased 9-inch pan, cover, let rise for 30 minutes.
- Bake: Preheat oven to 375°F. Bake rolls for 20-25 minutes until golden. Tip: Cover with foil if tops brown too fast.
- Glaze: Whisk powdered sugar and eggnog until smooth. Drizzle over warm rolls.
These rolls are fluffy, spiced just right, and that eggnog glaze? Chef’s kiss. Serve them warm with a side of ‘try not to eat the whole pan’ willpower.
Snowman Pizza Bagels
Alright, let’s dive into making these adorable Snowman Pizza Bagels that are as fun to make as they are to eat. Imagine biting into a mini snowman that’s actually a delicious pizza bagel—yeah, it’s as awesome as it sounds.
Ingredients
- 4 plain bagels, halved
- 1 cup marinara sauce
- 2 cups shredded mozzarella cheese
- 1 tbsp olive oil
- 1/2 tsp garlic powder
- 1/2 tsp dried oregano
- 8 small pepperoni slices
- 8 tiny black olives, sliced
- 1 carrot, cut into small sticks
Instructions
- Preheat oven: Set your oven to 375°F (190°C) to get it nice and toasty for the bagels.
- Prepare bagels: Place the bagel halves on a baking sheet, cut side up, and lightly brush each with olive oil for a crispy base.
- Add sauce: Spread about 2 tablespoons of marinara sauce on each bagel half, leaving a little edge for the crust.
- Sprinkle spices: Evenly sprinkle garlic powder and dried oregano over the sauce for that classic pizza flavor.
- Layer cheese: Generously cover each bagel with shredded mozzarella, ensuring every bite is cheesy.
- Create snowmen: Arrange two pepperoni slices on each bagel for the snowman’s body and head, then add olive slices for eyes and a carrot stick for the nose.
- Bake: Pop them in the oven for 10-12 minutes, or until the cheese is bubbly and slightly golden.
- Cool slightly: Let them sit for a minute before serving—trust me, molten cheese burns are no joke.
These Snowman Pizza Bagels come out with a perfect crunch from the bagel, a gooey cheese pull, and just the right amount of spice from the pepperoni. Serve them up at your next winter gathering or just enjoy them as a quirky lunch—either way, they’re a hit.
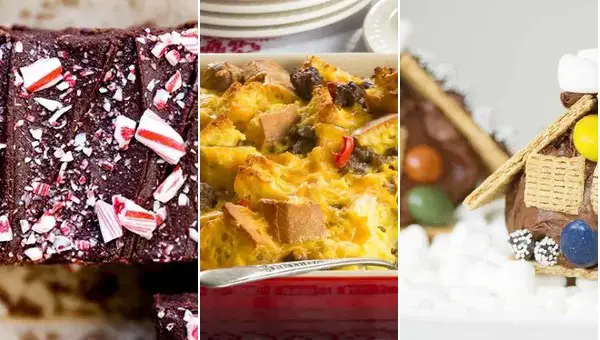
Candy Cane Brownies
First off, let me tell you, these Candy Cane Brownies are the holiday treat you didn’t know you needed. They’re fudgy, minty, and have just the right amount of crunch from the candy canes—perfect for when you want to impress at a party or just treat yourself.
Ingredients
- 1 cup unsalted butter, melted
- 2 cups granulated sugar
- 4 large eggs, room temperature
- 1 tsp vanilla extract
- 1 cup all-purpose flour, sifted
- 3/4 cup cocoa powder
- 1/2 tsp salt
- 1/2 tsp peppermint extract
- 1 cup crushed candy canes, divided
- 1 cup white chocolate chips
Instructions
- Preheat oven: Heat your oven to 350°F (175°C) and line a 9×13 inch baking pan with parchment paper, leaving an overhang for easy removal.
- Mix wet ingredients: In a large bowl, whisk together the melted butter and sugar until well combined. Beat in the eggs one at a time, then stir in the vanilla and peppermint extracts.
- Combine dry ingredients: Gently fold in the sifted flour, cocoa powder, and salt until just combined—overmixing leads to tough brownies.
- Add mix-ins: Stir in 1/2 cup of the crushed candy canes and all the white chocolate chips for that festive crunch and creamy pockets.
- Bake to perfection: Pour the batter into the prepared pan and smooth the top. Bake for 25-30 minutes, or until a toothpick comes out with a few moist crumbs.
- Cool and garnish: Let the brownies cool completely in the pan, then sprinkle the remaining 1/2 cup crushed candy canes on top for a pop of color and extra minty zing.
These brownies are a dream—super moist with a rich chocolate base, a cool minty finish, and those candy cane bits add a festive crunch. Serve them chilled for a firmer texture or slightly warmed with a scoop of vanilla ice cream for the ultimate indulgence.
Reindeer Chow Snack Mix
So, you’ve got a craving for something sweet, salty, and downright addictive? Let me introduce you to Reindeer Chow Snack Mix, the perfect pick-me-up for any time of day. It’s like your favorite cereal, pretzels, and chocolate had a party, and you’re invited.
Ingredients
- 4 cups Rice Chex cereal
- 2 cups mini pretzels
- 1 cup white chocolate chips
- 1/2 cup peanut butter
- 1/4 cup unsalted butter
- 1 tsp vanilla extract
- 1 1/2 cups powdered sugar
Instructions
- Melt the goodies: In a microwave-safe bowl, combine white chocolate chips, peanut butter, and unsalted butter. Microwave on high for 1 minute, stir, then microwave in 30-second intervals until fully melted and smooth.
- Add flavor: Stir in 1 tsp vanilla extract into the melted mixture for that extra depth of flavor.
- Mix it up: In a large bowl, toss together Rice Chex cereal and mini pretzels. Pour the melted mixture over the dry ingredients and gently stir until everything is evenly coated.
- Powder time: Transfer the coated mix into a large resealable bag, add powdered sugar, seal, and shake until the mix is fully covered in a sweet, snowy blanket.
- Let it set: Spread the mix out on a baking sheet lined with parchment paper and let it cool for about 30 minutes, or until the coating has hardened.
This Reindeer Chow Snack Mix is a magical combination of crunchy, sweet, and salty, with a creamy texture from the white chocolate and peanut butter coating. Serve it in a big bowl at your next gathering, or pack it into cute little bags for a festive treat on the go.
Festive Christmas Wreath Salad
Kick off your holiday feast with this eye-catching Festive Christmas Wreath Salad that’s as fun to make as it is to eat. Imagine a vibrant, edible wreath that brings a pop of color and a burst of flavors to your table, and yes, it’s totally okay to play with your food this time.
Ingredients
- 2 cups baby spinach, washed and dried
- 1 cup arugula, washed and dried
- 1/2 cup pomegranate seeds
- 1/2 cup feta cheese, crumbled
- 1/4 cup pecans, toasted and roughly chopped
- 2 tbsp olive oil
- 1 tbsp balsamic vinegar
- 1 tsp honey
- 1/2 tsp salt
- 1/4 tsp black pepper
Instructions
- Prep the greens: In a large bowl, gently toss the baby spinach and arugula together until evenly mixed.
- Toast the pecans: Spread the pecans on a baking sheet and toast in a preheated 350°F oven for 5-7 minutes, or until fragrant. Let them cool before chopping.
- Make the dressing: In a small bowl, whisk together the olive oil, balsamic vinegar, honey, salt, and black pepper until well combined.
- Assemble the wreath: On a large platter, arrange the mixed greens in a circle, leaving a hole in the center to resemble a wreath.
- Add the toppings: Sprinkle the pomegranate seeds, crumbled feta, and toasted pecans evenly over the greens.
- Drizzle the dressing: Just before serving, drizzle the dressing over the salad for a glossy finish.
This salad is a delightful mix of textures, from the crisp greens to the juicy pomegranate seeds and creamy feta, all tied together with a sweet and tangy dressing. Serve it as a centerpiece and watch it disappear before the main course even hits the table.
Hot Cocoa Marshmallow Pops
Just when you thought hot cocoa couldn’t get any better, here comes a game-changer: Hot Cocoa Marshmallow Pops. Imagine your favorite cozy drink, but on a stick, with a gooey marshmallow center that’s downright magical. Perfect for those days when you need a little extra hug in edible form.
Ingredients
- 1 cup granulated sugar
- 1/2 cup unsweetened cocoa powder
- 1/4 tsp salt
- 1/2 cup water
- 1/2 tsp vanilla extract
- 12 large marshmallows
- 12 popsicle sticks
- 1/2 cup semi-sweet chocolate chips
- 1 tbsp coconut oil
- Assorted sprinkles (for decoration)
Instructions
- Mix dry ingredients: In a medium saucepan, whisk together sugar, cocoa powder, and salt until well combined.
- Add water: Pour in water and stir over medium heat until the mixture comes to a boil, about 2 minutes.
- Simmer for thickness: Reduce heat to low and simmer for another 3 minutes, stirring constantly, until the mixture thickens slightly.
- Stir in vanilla: Remove from heat and stir in vanilla extract. Let cool for 5 minutes.
- Prepare marshmallows: Insert a popsicle stick into each marshmallow, pushing it about halfway through.
- Dip marshmallows: Dip each marshmallow into the cooled cocoa mixture, ensuring it’s fully coated. Let excess drip off.
- Melt chocolate: In a microwave-safe bowl, melt chocolate chips and coconut oil in 30-second intervals, stirring until smooth.
- Drizzle chocolate: Drizzle melted chocolate over the coated marshmallows and immediately add sprinkles for decoration.
- Set pops: Place pops on a parchment-lined tray and refrigerate for 15 minutes, or until set.
The result? A crunchy chocolate shell giving way to a soft, melty marshmallow inside, with just the right amount of sweetness. Try sticking a few in a mug of warm milk for an over-the-top hot cocoa experience.
Christmas Pudding Truffles
Zesty as a holiday party and just as festive, these Christmas Pudding Truffles are your ticket to impressing everyone without breaking a sweat. Imagine all the cozy flavors of Christmas pudding, but in bite-sized, no-bake balls that are ridiculously easy to make and even easier to love.
Ingredients
- 2 cups leftover Christmas pudding, crumbled
- 1/2 cup cream cheese, softened
- 1/4 cup powdered sugar
- 1 tsp vanilla extract
- 1/2 tsp ground cinnamon
- 1/4 tsp ground nutmeg
- 1 cup dark chocolate chips
- 1 tbsp coconut oil
- Sprinkles or edible glitter for decoration
Instructions
- Mix the base: In a large bowl, combine the crumbled Christmas pudding, softened cream cheese, powdered sugar, vanilla extract, ground cinnamon, and ground nutmeg. Mix until everything is well incorporated and the mixture holds together when pressed.
- Shape the truffles: Roll the mixture into small balls, about 1 inch in diameter, and place them on a baking sheet lined with parchment paper. Chill in the freezer for 30 minutes to firm up.
- Melt the chocolate: In a microwave-safe bowl, combine the dark chocolate chips and coconut oil. Microwave in 30-second intervals, stirring in between, until the chocolate is completely melted and smooth.
- Coat the truffles: Using a fork, dip each chilled truffle into the melted chocolate, ensuring it’s fully coated. Let the excess chocolate drip off before placing it back on the parchment paper.
- Decorate immediately: While the chocolate is still wet, sprinkle your choice of decorations over the truffles. Let them set at room temperature until the chocolate hardens, about 1 hour.
These truffles are a dreamy mix of creamy, spiced, and chocolatey, with a texture that’s somehow both dense and melt-in-your-mouth. Serve them on a festive platter or package them up as edible gifts that’ll have everyone asking for the recipe.
Rudolph the Red-Nosed Pancakes
Very few things bring as much joy to a winter morning as a stack of whimsical, Rudolph the Red-Nosed Pancakes. They’re not just pancakes; they’re a festive breakfast adventure that’ll have everyone at the table grinning from ear to ear.
Ingredients
- 1 cup all-purpose flour
- 2 tbsp granulated sugar
- 1 tsp baking powder
- 1/2 tsp baking soda
- 1/4 tsp salt
- 1 cup buttermilk
- 1 large egg
- 2 tbsp unsalted butter, melted
- 1 tsp vanilla extract
- Red food coloring, as needed
- Chocolate chips, for decorating
- Whipped cream, for serving
Instructions
- Mix dry ingredients: In a large bowl, whisk together the flour, sugar, baking powder, baking soda, and salt.
- Combine wet ingredients: In another bowl, beat the buttermilk, egg, melted butter, and vanilla extract until smooth.
- Create the batter: Pour the wet ingredients into the dry ingredients and stir until just combined. A few lumps are okay; overmixing makes pancakes tough.
- Color the batter: Add red food coloring to the batter until you achieve a bright red color, stirring gently to mix.
- Heat the pan: Heat a non-stick skillet over medium heat (about 350°F) and lightly grease it with butter or cooking spray.
- Cook the pancakes: Pour 1/4 cup of batter onto the skillet for each pancake. Cook until bubbles form on the surface and the edges look set, about 2-3 minutes, then flip and cook for another 1-2 minutes.
- Decorate Rudolph: Once cooled slightly, use chocolate chips to create eyes and a nose on each pancake. Serve with a dollop of whipped cream for his fluffy antlers.
These pancakes are fluffy, slightly tangy from the buttermilk, and just sweet enough. The chocolate chips add a fun crunch, and the whipped cream makes them irresistibly creamy. Try serving them with a side of bacon ‘reindeer’ for a full holiday breakfast spread!
Snowball Rice Krispie Treats
Alright, let’s dive into making these Snowball Rice Krispie Treats that are as fun to make as they are to eat. Imagine biting into a cloud of marshmallow-y, crispy goodness that’s rolled in coconut to look like little snowballs—perfect for when you’re craving something sweet but want to keep it playful.
Ingredients
- 3 tbsp unsalted butter
- 1 package (10 oz) marshmallows
- 6 cups Rice Krispies cereal
- 1 cup shredded coconut (sweetened or unsweetened, your call)
Instructions
- Melt the butter: In a large pot over low heat, melt the 3 tbsp of unsalted butter. Keep an eye on it—butter has a sneaky way of going from melted to burnt if you’re not careful.
- Add marshmallows: Toss in the entire 10 oz package of marshmallows. Stir constantly until they’re completely melted and smooth. This is your arm workout for the day, but trust me, it’s worth it.
- Mix in cereal: Remove the pot from heat and quickly stir in the 6 cups of Rice Krispies cereal until everything is evenly coated. Pro tip: Work fast here to prevent the mixture from setting before you’re ready.
- Shape the treats: With slightly wet hands (to prevent sticking), scoop out portions of the mixture and roll them into balls. This is where the fun begins—get creative with the sizes!
- Roll in coconut: Spread the 1 cup of shredded coconut on a plate and roll each Rice Krispie ball in it until fully covered. The coconut not only adds a tasty crunch but also gives them that snowy look.
These Snowball Rice Krispie Treats are delightfully chewy with a crispy crunch, and the coconut adds a tropical twist. Serve them on a platter as is, or stick a lollipop stick in each for a fun, handheld treat at your next party.
Christmas Star Sugar Cookies
Picture this: you’re in your kitchen, flour dusting your apron like the first snow of the season, and you’re about to make the most festive Christmas Star Sugar Cookies that’ll have your friends begging for the recipe. These aren’t just any cookies; they’re buttery, sweet, and shaped like the star atop your tree, perfect for holiday cheer or when you just need a little sparkle in your day.
Ingredients
- 1 cup unsalted butter, softened to room temperature
- 1 cup granulated sugar
- 1 large egg, at room temperature
- 2 tsp vanilla extract
- 3 cups all-purpose flour, spooned and leveled
- 1/2 tsp baking powder
- 1/4 tsp salt
- 1/2 cup colored sugar crystals for decorating
Instructions
- Cream butter and sugar: In a large bowl, beat the softened butter and granulated sugar together on medium speed until light and fluffy, about 2 minutes. Tip: Make sure your butter is truly at room temperature for the best texture.
- Add wet ingredients: Beat in the egg and vanilla extract until fully incorporated. The mixture might look a bit curdled, but that’s totally fine.
- Combine dry ingredients: In a separate bowl, whisk together the flour, baking powder, and salt. Gradually add this to the butter mixture, mixing on low speed until just combined. Tip: Overmixing can lead to tough cookies, so stop as soon as the flour disappears.
- Chill the dough: Divide the dough in half, flatten each into a disk, wrap in plastic, and refrigerate for at least 1 hour. This makes rolling out much easier.
- Roll and cut: Preheat your oven to 350°F. Roll out one disk of dough on a floured surface to about 1/4-inch thickness. Use a star-shaped cookie cutter to cut out shapes, re-rolling scraps as needed. Tip: Dip your cutter in flour to prevent sticking.
- Decorate: Sprinkle the cookies with colored sugar crystals before baking to add that festive sparkle.
- Bake: Place cookies on parchment-lined baking sheets and bake for 10-12 minutes, until the edges are just starting to turn golden. Let them cool on the sheets for 5 minutes, then transfer to a wire rack.
These cookies come out perfectly tender with a slight crunch from the sugar crystals, and their star shape makes them a hit at any holiday gathering. Try stacking them with a drizzle of icing in between for an extra special treat.
Frosted Cranberry Bliss Bars
Very few treats scream ‘holiday season’ quite like these Frosted Cranberry Bliss Bars. Imagine a blondie base, studded with tart cranberries and white chocolate, all topped with a creamy frosting and a sprinkle of more cranberries—because why not? It’s like your favorite coffee shop’s version, but hey, you made it, so it’s automatically better.
Ingredients
- 1 cup unsalted butter, melted
- 1 1/2 cups packed light brown sugar
- 2 large eggs, room temperature
- 1 tsp vanilla extract
- 2 cups all-purpose flour
- 1/2 tsp baking powder
- 1/4 tsp salt
- 1 cup dried cranberries, chopped
- 1/2 cup white chocolate chips
- 8 oz cream cheese, softened
- 1 cup powdered sugar
- 1/2 tsp orange zest
- 1 tbsp orange juice
Instructions
- Preheat oven: Heat your oven to 350°F (175°C) and line a 9×13 inch baking pan with parchment paper, letting the edges hang over for easy removal.
- Mix wet ingredients: In a large bowl, whisk together the melted butter and brown sugar until smooth. Beat in the eggs one at a time, then stir in the vanilla.
- Combine dry ingredients: In another bowl, sift together the flour, baking powder, and salt. Gradually add this to the wet ingredients, mixing just until combined.
- Add mix-ins: Fold in the chopped cranberries and white chocolate chips until evenly distributed throughout the batter.
- Bake: Spread the batter evenly in the prepared pan. Bake for 20-25 minutes, or until the edges are golden and a toothpick inserted in the center comes out clean. Let cool completely in the pan.
- Make frosting: While the bars cool, beat the cream cheese, powdered sugar, orange zest, and orange juice together until smooth and creamy.
- Frost and decorate: Once the bars are cool, spread the frosting evenly over the top. Sprinkle with additional chopped cranberries if desired. Chill for at least 30 minutes before cutting into squares.
These bars are a delightful mix of chewy, creamy, and tangy, with the orange zest adding a bright note that cuts through the sweetness. Serve them on a platter at your next gathering, or hey, keep them all to yourself—no judgment here.
Elf-Inspired Popcorn Balls
Ready to whip up a snack that’s as magical as your favorite holiday movie? These Elf-Inspired Popcorn Balls are your ticket to a sweet, crunchy treat that’ll have everyone asking for seconds—no Buddy the Elf required.
Ingredients
- 10 cups popped popcorn (about 1/2 cup unpopped kernels)
- 1 cup mini marshmallows
- 1/4 cup unsalted butter
- 1/2 cup light corn syrup
- 1/2 cup granulated sugar
- 1/4 tsp salt
- 1 tsp vanilla extract
- Green food coloring (a few drops)
- 1/2 cup red and green M&M’s (for mixing in and topping)
Instructions
- Prep the popcorn: Spread the popped popcorn on a large baking sheet, picking out any unpopped kernels.
- Melt the base: In a medium saucepan over low heat, combine butter, corn syrup, sugar, and salt. Stir until the butter is melted and the sugar is dissolved.
- Add marshmallows: Stir in the mini marshmallows until completely melted and the mixture is smooth. Tip: Keep the heat low to avoid burning the marshmallows.
- Mix in color and flavor: Remove from heat and stir in vanilla extract and green food coloring until you achieve a vibrant green hue.
- Combine with popcorn: Pour the marshmallow mixture over the popcorn, adding the M&M’s, and gently fold until everything is evenly coated. Tip: Use a silicone spatula for easier mixing and to prevent sticking.
- Shape the balls: With lightly greased hands, quickly shape the mixture into 2-inch balls before the mixture cools. Tip: Work fast as the mixture sets quickly.
- Let them set: Place the popcorn balls on parchment paper and let them cool completely, about 30 minutes.
These popcorn balls are a riot of crunch and chew, with a sweet vanilla flavor that’s perfectly balanced by the salty popcorn. Serve them stacked high on a platter for a festive touch, or wrap them individually in cellophane for a fun party favor.
Spiced Christmas Punch
Mmm, nothing says holiday cheer like a steaming mug of Spiced Christmas Punch, right? It’s like a warm hug in a cup, perfect for those chilly December nights when you’re decking the halls or just chilling by the fire.
Ingredients
- 4 cups apple cider
- 2 cups cranberry juice
- 1/2 cup orange juice
- 1/4 cup honey
- 2 cinnamon sticks
- 1 tsp whole cloves
- 1 star anise
- 1 orange, sliced into rounds
- 1/2 lemon, sliced into rounds
Instructions
- Combine liquids: In a large pot, pour in the apple cider, cranberry juice, orange juice, and honey. Stir well to combine.
- Add spices: Toss in the cinnamon sticks, whole cloves, and star anise. Drop in the orange and lemon slices for that extra zing.
- Heat gently: Place the pot over medium heat and bring the mixture to a simmer, not a boil—you want it hot but not scorching the flavors.
- Simmer for flavor: Let it bubble gently for about 10 minutes, stirring occasionally, to let all those spices mingle and get cozy.
- Serve warm: Ladle the punch into mugs, making sure each one gets a few floating fruit slices and a cinnamon stick for stirring.
The punch is a beautiful balance of sweet and tart, with the spices adding a warm, aromatic depth that’ll make your taste buds sing carols. For an extra festive touch, rim your mugs with a mix of sugar and cinnamon before pouring.
Christmas Morning Breakfast Casserole
There’s something magical about a dish that lets you prep the night before, especially when it’s as cozy and comforting as this Christmas Morning Breakfast Casserole. Trust me, your future self will thank you when all you have to do is pop this beauty in the oven and bask in the aroma while sipping your coffee.
Ingredients
- 6 cups cubed day-old bread (about 1/2 inch pieces)
- 2 cups shredded cheddar cheese
- 1 pound cooked and crumbled breakfast sausage
- 6 large eggs
- 2 cups whole milk
- 1 teaspoon dry mustard
- 1/2 teaspoon salt
- 1/4 teaspoon black pepper
- 1/4 teaspoon onion powder
- 1/4 teaspoon garlic powder
- 1 tablespoon melted butter (for greasing the dish)
Instructions
- Prep the dish: Grease a 9×13 inch baking dish with the melted butter.
- Layer the base: Spread the cubed bread evenly in the bottom of the dish.
- Add the goodies: Sprinkle the shredded cheese and crumbled sausage over the bread.
- Whisk the wet ingredients: In a large bowl, whisk together the eggs, milk, dry mustard, salt, pepper, onion powder, and garlic powder until well combined.
- Pour and soak: Pour the egg mixture evenly over the bread, cheese, and sausage. Press down lightly to ensure everything is submerged. Cover and refrigerate overnight.
- Bake to perfection: The next morning, preheat your oven to 350°F. Bake the casserole, uncovered, for 45-50 minutes, or until the top is golden and the center is set.
- Rest before serving: Let the casserole sit for 5 minutes before cutting into squares. This helps it set up perfectly for serving.
The casserole comes out fluffy and rich, with pockets of melty cheese and savory sausage in every bite. Serve it with a drizzle of maple syrup or a dollop of sour cream for an extra special touch.
Fruitcake Energy Bites
Now, let’s talk about these little nuggets of joy – Fruitcake Energy Bites. They’re like the love child of your grandma’s fruitcake and those energy balls you keep seeing on Instagram, minus the weird candied fruit. Perfect for when you need a quick pick-me-up without the guilt.
Ingredients
- 1 cup pitted dates, soaked in warm water for 10 minutes and drained
- 1/2 cup almonds, roughly chopped
- 1/4 cup dried cranberries
- 1/4 cup dried apricots, chopped
- 2 tbsp honey
- 1 tbsp coconut oil, melted
- 1/2 tsp cinnamon
- 1/4 tsp nutmeg
- Pinch of salt
Instructions
- Blend the base: In a food processor, combine the soaked dates, almonds, cranberries, apricots, honey, coconut oil, cinnamon, nutmeg, and salt. Pulse until the mixture sticks together when pressed between your fingers.
- Shape the bites: Scoop out tablespoon-sized portions of the mixture and roll them into balls with your hands. If the mixture is too sticky, lightly wet your hands to make rolling easier.
- Chill to set: Place the energy bites on a parchment-lined tray and refrigerate for at least 30 minutes to firm up. This step is crucial for that perfect chewy texture.
These bites are chewy, slightly sweet, and packed with flavor – a far cry from the dense fruitcakes of holidays past. Try rolling them in shredded coconut or cocoa powder for an extra fancy touch.
Conclusion
With these 19 festive Christmas recipes, your holiday table will be brimming with joy and flavor! Whether you’re baking cookies, whipping up a cozy main, or mixing a merry drink, there’s something here for every home cook. We’d love to hear which recipes you try—leave a comment with your favorites, and don’t forget to share the holiday cheer by pinning this roundup on Pinterest. Happy cooking!

I’m Brandon, the face behind the recipes. As a dedicated food enthusiast, I love experimenting with flavors and sharing my culinary adventures with you.