Ready to kickstart your weight loss journey without sacrificing flavor? Our roundup of 21 Healthy 21-Day Diet Recipes makes eating well a breeze—think vibrant salads, protein-packed dinners, and satisfying snacks that keep you on track. Whether you’re meal prepping or craving a quick, nourishing bite, these dishes prove that healthy eating can be deliciously simple. Let’s cook up some success—one tasty meal at a time!
Low-Calorie Veggie Stir-Fry
So, you’re staring into your fridge, wondering how to turn those sad-looking veggies into something that doesn’t taste like punishment, right? Let’s whip up a Low-Calorie Veggie Stir-Fry that’s actually bursting with flavor and won’t leave you missing the takeout menu.
Ingredients
- 1 tbsp olive oil
- 2 cups broccoli florets (fresh, cut into bite-sized pieces)
- 1 red bell pepper (sliced into thin strips)
- 1 carrot (julienned)
- 1 cup snap peas (trimmed)
- 2 cloves garlic (minced)
- 1 tbsp ginger (freshly grated)
- 2 tbsp low-sodium soy sauce
- 1 tsp sesame oil
- 1/2 tsp red pepper flakes
- 1/4 cup water
Instructions
- Heat the pan: Warm 1 tbsp olive oil in a large skillet over medium-high heat until it shimmers, about 1 minute.
- Sauté the aromatics: Add minced garlic and grated ginger to the pan, stirring constantly for 30 seconds until fragrant. Tip: Don’t let them burn, or you’ll lose that lovely flavor.
- Add the veggies: Toss in broccoli, bell pepper, carrot, and snap peas. Stir-fry for 5 minutes until they’re bright and slightly tender. Tip: Keep the heat high to get a nice sear without overcooking.
- Season the stir-fry: Pour in 2 tbsp low-sodium soy sauce, 1 tsp sesame oil, and 1/2 tsp red pepper flakes. Mix well to coat every piece evenly.
- Steam to perfection: Add 1/4 cup water to the pan, cover with a lid, and let the veggies steam for 2 minutes. This keeps them crisp yet tender. Tip: Listen for the sizzle to die down a bit before uncovering.
- Final toss: Give everything one last good stir, then take the pan off the heat. Your kitchen should smell amazing right about now.
This stir-fry is a rainbow of crunch with a kick of heat and a whisper of sesame. Try piling it over a heap of cauliflower rice for a guilt-free bowl that’s as Instagram-worthy as it is delicious.
Grilled Chicken with Steamed Broccoli
Man, if you’re looking for a meal that’s as satisfying to make as it is to eat, you’ve hit the jackpot with this Grilled Chicken and Steamed Broccoli combo. It’s simple, it’s delicious, and it’s got that perfect balance of juicy and crisp that’ll have you coming back for seconds.
Ingredients
- 2 boneless, skinless chicken breasts (about 1 lb total)
- 1 tbsp olive oil
- 1 tsp salt
- 1/2 tsp black pepper
- 1/2 tsp garlic powder
- 1/2 tsp paprika
- 2 cups broccoli florets
- 1/2 cup water
Instructions
- Prep the chicken: Pat the chicken breasts dry with paper towels. This helps get that perfect sear. Rub them all over with olive oil, then sprinkle with salt, pepper, garlic powder, and paprika.
- Heat the grill: Preheat your grill to medium-high heat, about 375°F. A little tip: if you’re using charcoal, wait until the coals are covered with white ash before you start cooking.
- Grill the chicken: Place the chicken on the grill. Cook for 6-7 minutes on one side, then flip and cook for another 6-7 minutes, or until the internal temperature reaches 165°F. Pro tip: resist the urge to poke and prod the chicken too much; let it do its thing for the best crust.
- Steam the broccoli: While the chicken is grilling, place the broccoli florets in a steamer basket over 1/2 cup of boiling water. Cover and steam for 5 minutes, or until bright green and tender-crisp. Another tip: don’t overcook the broccoli unless you’re into that mushy vibe.
- Rest and serve: Let the chicken rest for 5 minutes before slicing. This keeps all those juicy flavors locked in. Serve alongside the steamed broccoli for a meal that’s as nutritious as it is delicious.
The chicken comes out with a smoky, slightly spicy crust that gives way to tender, juicy meat, while the broccoli stays crisp and fresh, making every bite a perfect contrast of textures. Try drizzling a little lemon juice over the broccoli for an extra zing, or slice the chicken over a bed of greens for a hearty salad.
Quinoa and Black Bean Salad
Perfect for those days when you’re craving something hearty yet healthy, this Quinoa and Black Bean Salad is a breeze to whip up. Packed with protein and bursting with flavors, it’s the kind of dish that makes you feel like a kitchen hero without breaking a sweat.
Ingredients
- 1 cup quinoa, rinsed and drained
- 2 cups water
- 1 can (15 oz) black beans, rinsed and drained
- 1 red bell pepper, diced
- 1/2 cup corn kernels (fresh or frozen)
- 1/4 cup olive oil
- 2 tbsp lime juice
- 1 tsp ground cumin
- 1/2 tsp salt
- 1/4 tsp black pepper
- 1/4 cup fresh cilantro, chopped
Instructions
- Cook quinoa: In a medium saucepan, combine quinoa and water. Bring to a boil over high heat, then reduce heat to low, cover, and simmer for 15 minutes or until water is absorbed. Remove from heat and let sit, covered, for 5 minutes. Fluff with a fork.
- Prep veggies: While quinoa cooks, dice the red bell pepper and chop the cilantro. If using frozen corn, thaw it by running under warm water.
- Mix dressing: In a small bowl, whisk together olive oil, lime juice, cumin, salt, and black pepper until well combined.
- Combine everything: In a large bowl, mix the cooked quinoa, black beans, diced bell pepper, corn, and cilantro. Pour the dressing over and toss until everything is evenly coated.
- Chill for flavor: Cover the bowl and refrigerate for at least 30 minutes to let the flavors meld together. This step is optional but highly recommended for the best taste.
The salad comes out refreshingly light with a satisfying crunch from the veggies, and the cumin-lime dressing adds a zesty kick that ties it all together. Serve it as a standalone meal or scoop it onto a bed of greens for an extra veggie boost.
Avocado and Spinach Smoothie
Guess what? I’ve got this super easy, ridiculously healthy smoothie that’s gonna make you feel like a morning person even if you’re not. It’s packed with all the good stuff – avocado for that creamy dreaminess and spinach because, well, adulting.
Ingredients
- 1 ripe avocado, peeled and pitted
- 1 cup fresh spinach, tightly packed
- 1 banana, peeled
- 1 cup almond milk
- 1 tbsp honey
- 1/2 cup ice cubes
Instructions
- Prep the avocado: Scoop out the flesh of the avocado into your blender. No need to chop it up too much; the blender will do the heavy lifting.
- Add the greens: Toss in the spinach. If you’re wary about the taste, trust me, you won’t even notice it’s there once everything’s blended.
- Sweeten the deal: Peel the banana, break it into chunks, and add it to the mix. Drizzle in the honey for a little extra sweetness.
- Pour in the liquid: Add the almond milk to help everything blend smoothly. If you like your smoothie thicker, you can start with 3/4 cup and add more as needed.
- Blend it up: Toss in the ice cubes and blend on high for about 30 seconds, or until the mixture is smooth and no leafy bits remain. Tip: If your blender struggles, stop and scrape down the sides with a spatula.
- Adjust consistency: If the smoothie is too thick, add a splash more almond milk and blend for another 10 seconds. Too thin? Add a few more ice cubes or another slice of avocado.
- Serve immediately: Pour into your favorite glass and enjoy right away for the best texture and flavor. Tip: For an extra fancy touch, garnish with a thin slice of avocado or a sprinkle of chia seeds.
This smoothie comes out luxuriously creamy with a sweet, slightly nutty flavor that’ll have you forgetting it’s actually good for you. Perfect for sipping on the go or pretending you’re at a fancy café in your pajamas.
Baked Salmon with Asparagus
Just imagine this: you’re about to make the easiest, most foolproof baked salmon with asparagus that’ll have everyone thinking you’re a gourmet chef. No fancy skills required, just a baking sheet and a craving for something delicious.
Ingredients
- 1 lb salmon fillet
- 1 bunch asparagus, trimmed
- 2 tbsp olive oil
- 1 tsp salt
- 1/2 tsp black pepper
- 1 tsp garlic powder
- 1/2 tsp paprika
- 1 lemon, sliced
Instructions
- Preheat oven: Crank your oven to 400°F (200°C) to get it nice and hot for that perfect bake.
- Prep salmon: Place the salmon fillet on a baking sheet lined with parchment paper. Drizzle with 1 tbsp olive oil and sprinkle with salt, pepper, garlic powder, and paprika. Tip: Let the salmon sit at room temperature for 10 minutes before baking for even cooking.
- Arrange asparagus: Toss the asparagus with the remaining 1 tbsp olive oil, salt, and pepper. Spread them around the salmon on the baking sheet. Tip: Trim the woody ends of the asparagus by snapping them off where they naturally break.
- Add lemon: Place lemon slices on top of the salmon for a burst of flavor. Tip: Squeeze a little lemon juice over the asparagus for extra zing.
- Bake to perfection: Slide the baking sheet into the oven and bake for 12-15 minutes, until the salmon flakes easily with a fork and the asparagus is tender-crisp. Tip: Don’t overcook the salmon; it’s done when it’s just opaque in the center.
The salmon comes out flaky and moist, with the asparagus adding a crisp, fresh contrast. Serve it straight from the baking sheet for a no-fuss dinner, or plate it up fancy with a side of quinoa for those Instagram-worthy shots.
Zucchini Noodles with Pesto
Alright, let’s dive into making some zucchini noodles with pesto that’ll make you forget all about pasta. It’s fresh, it’s easy, and hey, it’s a great way to sneak in some veggies without feeling like you’re missing out.
Ingredients
- 2 medium zucchinis, spiralized into noodles
- 1/2 cup fresh basil leaves, packed
- 1/4 cup grated Parmesan cheese
- 1/4 cup pine nuts
- 1 garlic clove, minced
- 1/2 cup extra virgin olive oil
- 1/2 tsp salt
- 1/4 tsp black pepper
Instructions
- Prep the pesto: In a food processor, combine the basil, Parmesan, pine nuts, and garlic. Pulse until finely chopped.
- Blend in oil: With the processor running, slowly add the olive oil until the pesto is smooth. Season with salt and pepper.
- Spiralize zucchini: Use a spiralizer to turn your zucchinis into noodles. No spiralizer? A julienne peeler works in a pinch.
- Toss noodles with pesto: In a large bowl, gently toss the zucchini noodles with the pesto until evenly coated. Tip: Don’t overmix to keep the noodles from getting watery.
- Serve immediately: Zucchini noodles are best fresh. If you must wait, keep the pesto and noodles separate until the last minute.
These zucchini noodles are light yet satisfying, with the pesto adding a rich, herby punch. Try topping with extra Parmesan or cherry tomatoes for a pop of color and sweetness.
Egg White Omelette with Veggies
Breakfast just got a whole lot brighter with this egg white omelette packed with veggies. It’s light, fluffy, and honestly, it’s the kind of meal that makes you feel like you’ve got your life together, even if you’re still in your pajamas.
Ingredients
- 1 cup egg whites (about 8 large eggs, separated)
- 1/2 cup diced bell peppers (any color)
- 1/2 cup diced onions
- 1/2 cup sliced mushrooms
- 1 tbsp olive oil
- 1/4 tsp salt
- 1/4 tsp black pepper
- 1/4 tsp garlic powder
- 1/4 cup shredded low-fat cheese (optional)
Instructions
- Prep the veggies: Dice the bell peppers and onions, and slice the mushrooms if they’re not pre-sliced.
- Heat the pan: Place a non-stick skillet over medium heat and add 1 tbsp olive oil, letting it warm up for about 30 seconds.
- Sauté the veggies: Add the diced bell peppers, onions, and mushrooms to the pan. Cook for about 5 minutes, until they’re soft and the onions are translucent. Tip: Don’t overcrowd the pan to ensure even cooking.
- Season the egg whites: While the veggies cook, whisk the egg whites with salt, black pepper, and garlic powder until slightly frothy.
- Cook the omelette: Pour the seasoned egg whites over the cooked veggies in the pan. Let it cook undisturbed for 2 minutes, then gently lift the edges with a spatula to let the uncooked egg flow underneath. Tip: Keep the heat medium to avoid browning the eggs too quickly.
- Add cheese: If using, sprinkle the shredded cheese over one half of the omelette. Cook for another minute until the cheese starts to melt.
- Fold and serve: Carefully fold the omelette in half with the spatula, covering the cheese side. Slide it onto a plate and let it sit for a minute before cutting. Tip: Letting it rest ensures the cheese melts perfectly and the omelette holds its shape.
This omelette comes out incredibly fluffy with a slight crisp on the edges, and the veggies add a nice crunch. Serve it with a side of avocado or whole-grain toast for a meal that’s as satisfying as it is healthy.
Greek Yogurt Parfait with Berries
Hey there! Let’s whip up something that’s as easy as it is delicious—a Greek Yogurt Parfait with Berries. It’s the kind of no-fuss, throw-together breakfast or snack that feels a little fancy but is honestly just yogurt and fruit doing their thing.
Ingredients
- 1 cup Greek yogurt (go for full-fat for extra creaminess)
- 1/2 cup mixed berries (fresh or frozen, your call)
- 1/4 cup granola (the chunkier, the better for texture)
- 1 tbsp honey (because a little sweetness never hurt nobody)
- A pinch of cinnamon (just a whisper, for that warm spice kick)
Instructions
- Layer the yogurt: Spoon half of the Greek yogurt into a glass or bowl. Smooth it out so it’s nice and even.
- Add the berries: Scatter half of your mixed berries over the yogurt. If you’re using frozen berries, let them thaw a bit first unless you’re into the whole ice cream sundae vibe.
- Sprinkle the granola: Now, sprinkle half of the granola over the berries. This is where you get that crunch, so don’t skimp.
- Drizzle the honey: Drizzle half of the honey over the granola. Pro tip: warm the honey for a few seconds to make it extra runny and easy to drizzle.
- Repeat the layers: Do the whole thing one more time—yogurt, berries, granola, honey—so every bite is a little bit of everything.
- Finish with cinnamon: That pinch of cinnamon? Now’s the time. Sprinkle it on top for a little warmth and color.
And just like that, you’ve got a parfait that’s creamy, crunchy, sweet, and a tiny bit spicy. It’s like breakfast decided to dress up for brunch. Serve it straight up, or go wild and add a mint leaf on top if you’re feeling extra.
Lentil and Vegetable Soup
Craving something hearty but don’t want to spend all day in the kitchen? This Lentil and Vegetable Soup is your ticket to a cozy, nutritious meal that’s as easy to make as it is delicious. Let’s dive right in!
Ingredients
- 1 tbsp olive oil
- 1 medium onion, diced
- 2 carrots, peeled and chopped
- 2 celery stalks, chopped
- 3 garlic cloves, minced
- 1 cup dried green lentils, rinsed
- 4 cups vegetable broth
- 1 can (14.5 oz) diced tomatoes
- 1 tsp ground cumin
- 1/2 tsp smoked paprika
- Salt and pepper to taste
- 2 cups fresh spinach, roughly chopped
Instructions
- Heat the oil: In a large pot, heat 1 tbsp olive oil over medium heat until shimmering.
- Sauté the veggies: Add the diced onion, chopped carrots, and celery to the pot. Cook, stirring occasionally, until the vegetables are soft, about 5 minutes.
- Add garlic: Stir in the minced garlic and cook for another minute until fragrant.
- Cook the lentils: Add the rinsed lentils, vegetable broth, diced tomatoes (with their juice), cumin, and smoked paprika to the pot. Bring to a boil, then reduce heat to low and simmer, covered, for 25 minutes or until the lentils are tender.
- Season and finish: Season the soup with salt and pepper to taste. Stir in the fresh spinach and cook for another 2 minutes until the spinach is wilted.
This soup is a beautiful medley of textures, from the tender lentils to the slight crunch of the veggies, all swimming in a richly flavored broth. Serve it with a slice of crusty bread for dipping, or top with a dollop of Greek yogurt for a creamy contrast.
Grilled Turkey Burger with Lettuce Wrap
Kicking off grilling season with a twist, let’s swap out the usual beef for something lighter but just as satisfying—a grilled turkey burger wrapped in crisp lettuce. Perfect for those days when you’re craving a burger but want to keep things on the healthier side, without skimping on flavor.
Ingredients
- 1 lb ground turkey
- 1 tbsp olive oil
- 1 tsp garlic powder
- 1 tsp onion powder
- 1/2 tsp smoked paprika
- 1/2 tsp salt
- 1/4 tsp black pepper
- 4 large lettuce leaves (for wrapping)
- 1 tbsp mustard
- 1 tbsp ketchup
Instructions
- Mix the spices: In a large bowl, combine the ground turkey with olive oil, garlic powder, onion powder, smoked paprika, salt, and black pepper. Mix gently until just combined—overmixing can make the burgers tough.
- Form the patties: Divide the mixture into 4 equal parts and shape each into a patty about 1/2 inch thick. Pro tip: Make a slight indentation in the center of each patty to prevent puffing up during grilling.
- Preheat the grill: Heat your grill to medium-high, about 375°F. A properly heated grill ensures those beautiful grill marks and locks in the juices.
- Grill the burgers: Place the patties on the grill and cook for about 5 minutes on each side, or until the internal temperature reaches 165°F. No peeking too often—let them develop a nice crust.
- Add the sauces: In the last minute of grilling, brush each patty with a mix of mustard and ketchup for an extra flavor kick.
- Wrap and serve: Let the burgers rest for a couple of minutes, then wrap each in a lettuce leaf. The crisp lettuce adds a refreshing crunch that complements the juicy, flavorful turkey perfectly.
These grilled turkey burgers are juicy, packed with smoky flavors, and the lettuce wrap adds a fresh crunch that’ll make you forget all about the bun. Serve them with a side of sweet potato fries or a tangy coleslaw for the ultimate meal.
Cauliflower Rice with Stir-Fried Shrimp
Dinner just got a whole lot easier with this Cauliflower Rice with Stir-Fried Shrimp recipe. It’s the perfect blend of light, flavorful, and oh-so-satisfying, making it a weeknight hero in my kitchen.
Ingredients
- 1 large head of cauliflower, riced (about 4 cups)
- 1 lb shrimp, peeled and deveined
- 2 tbsp olive oil
- 2 cloves garlic, minced
- 1 tbsp ginger, grated
- 2 tbsp soy sauce
- 1 tbsp sesame oil
- 1/2 tsp red pepper flakes
- 1 cup frozen peas and carrots, thawed
- 2 green onions, sliced
- Salt to taste
Instructions
- Prep the shrimp: Pat the shrimp dry with paper towels to ensure they get a nice sear.
- Heat the pan: In a large skillet, heat 1 tbsp olive oil over medium-high heat until shimmering.
- Cook the shrimp: Add the shrimp to the skillet, cooking for 2 minutes per side until pink and opaque. Remove and set aside.
- Sauté aromatics: In the same skillet, add the remaining olive oil, garlic, and ginger, stirring for 30 seconds until fragrant.
- Add veggies: Toss in the peas and carrots, cooking for 2 minutes until heated through.
- Incorporate cauliflower rice: Add the riced cauliflower to the skillet, stirring to combine with the veggies. Cook for 5 minutes, stirring occasionally.
- Season the dish: Pour in the soy sauce, sesame oil, and red pepper flakes, mixing well to coat everything evenly.
- Combine everything: Return the shrimp to the skillet, adding the green onions. Stir everything together and cook for an additional minute.
- Final touch: Taste and adjust salt if needed, then remove from heat.
The cauliflower rice soaks up all the savory flavors, while the shrimp adds a juicy bite. Serve it up in bowls with a sprinkle of extra green onions for a pop of color and freshness.
Cucumber and Tomato Salad with Lemon Dressing
Unbelievably easy and refreshing, this Cucumber and Tomato Salad with Lemon Dressing is your go-to for those days when you want something light, zesty, and downright delicious without spending hours in the kitchen. Perfect for picnics, potlucks, or just because you deserve something nice.
Ingredients
- 2 cups cucumber, thinly sliced
- 1 cup cherry tomatoes, halved
- 1/4 cup red onion, thinly sliced
- 2 tbsp olive oil
- 1 tbsp lemon juice
- 1/2 tsp salt
- 1/4 tsp black pepper
- 1 tbsp fresh dill, chopped
Instructions
- Prep the veggies: In a large bowl, combine the thinly sliced cucumber, halved cherry tomatoes, and thinly sliced red onion.
- Whisk the dressing: In a small bowl, whisk together olive oil, lemon juice, salt, and black pepper until well combined.
- Combine and toss: Pour the dressing over the veggies and gently toss to ensure everything is evenly coated.
- Add the dill: Sprinkle the chopped fresh dill over the salad and give it one final gentle toss.
- Chill for flavor: Let the salad sit in the fridge for at least 30 minutes before serving to allow the flavors to meld together beautifully.
The crunch of the cucumber paired with the burst of cherry tomatoes and the tangy lemon dressing makes every bite a little celebration. Try serving it alongside grilled chicken or fish for a meal that’s as balanced as it is bursting with flavor.
Baked Sweet Potato with Cinnamon
Alright, let’s dive into making this cozy, cinnamon-kissed baked sweet potato that’s about to become your go-to side dish or even a humble dessert. It’s simple, it’s sweet, and it’s got that warm spice that makes everything better.
Ingredients
- 1 large sweet potato (about 1 lb), scrubbed clean
- 1 tbsp olive oil
- 1 tsp ground cinnamon
- 1/2 tsp salt
- 1 tbsp unsalted butter, softened
- 1 tbsp brown sugar
Instructions
- Preheat oven: Crank your oven to 400°F (200°C) to get it nice and toasty for the potato.
- Prep potato: Poke the sweet potato all over with a fork to let steam escape while it bakes. This prevents any potato explosions, and trust me, nobody wants that.
- Oil and season: Rub the potato with olive oil, then sprinkle with salt and half the cinnamon. This not only adds flavor but also helps the skin get deliciously crispy.
- Bake: Place the potato directly on the oven rack with a baking sheet on the rack below to catch any drips. Bake for 45-60 minutes, until it’s tender all the way through when poked with a fork.
- Butter and sugar: Once out of the oven, split the potato open and fluff the inside with a fork. Dot with butter, sprinkle the remaining cinnamon and brown sugar over the top, and let it melt into all those nooks and crannies.
The result? A sweet potato that’s fluffy on the inside, slightly crispy on the outside, and ridiculously aromatic. Serve it as is, or go wild with a scoop of vanilla ice cream on top for dessert vibes.
Chickpea and Spinach Curry
Just imagine coming home after a long day, and the only thing standing between you and a cozy night in is a quick, delicious meal. That’s where this Chickpea and Spinach Curry comes in—it’s hearty, flavorful, and ready in no time, making it the perfect weeknight dinner.
Ingredients
- 1 tbsp olive oil
- 1 medium onion, diced
- 2 garlic cloves, minced
- 1 tbsp ginger, grated
- 1 tsp ground cumin
- 1 tsp ground coriander
- 1/2 tsp turmeric
- 1/4 tsp cayenne pepper
- 1 can (15 oz) chickpeas, drained and rinsed
- 1 can (14.5 oz) diced tomatoes
- 1/2 cup vegetable broth
- 4 cups fresh spinach
- Salt to taste
Instructions
- Heat the oil: In a large skillet, heat 1 tbsp olive oil over medium heat until shimmering.
- Sauté aromatics: Add the diced onion, minced garlic, and grated ginger to the skillet. Cook for about 3 minutes, or until the onion is translucent.
- Toast spices: Sprinkle in the cumin, coriander, turmeric, and cayenne pepper. Stir constantly for 30 seconds to toast the spices and release their flavors.
- Add chickpeas and tomatoes: Pour in the chickpeas and diced tomatoes with their juices. Stir to combine everything well.
- Simmer: Add the vegetable broth and bring the mixture to a simmer. Let it cook for 10 minutes, stirring occasionally.
- Wilt spinach: Gradually add the fresh spinach, stirring until it wilts down into the curry. This should take about 2 minutes.
- Season: Taste the curry and add salt as needed. Remember, you can always add more, but you can’t take it out!
The curry is creamy from the chickpeas, with a slight kick from the spices, and the spinach adds a fresh, earthy note. Serve it over a bed of fluffy rice or with some warm naan bread to scoop up all that delicious sauce.
Grilled Tofu with Sesame Glaze
Trust me, even the most devout meat-eaters at your BBQ are going to sneak a bite of this Grilled Tofu with Sesame Glaze. It’s that good—crispy on the outside, tender on the inside, and slathered in a glaze that’s equal parts sweet, salty, and downright addictive.
Ingredients
- 1 block (14 oz) extra-firm tofu, pressed for 30 minutes to remove excess water
- 2 tbsp sesame oil
- 2 tbsp soy sauce
- 1 tbsp honey
- 1 tsp grated ginger
- 1 clove garlic, minced
- 1 tbsp sesame seeds
- 1 tbsp vegetable oil, for grilling
Instructions
- Prep the tofu: After pressing, cut the tofu into 1/2-inch thick slices. This thickness ensures it won’t fall apart on the grill but still soaks up all the glaze.
- Make the glaze: In a small bowl, whisk together sesame oil, soy sauce, honey, ginger, and garlic. Taste it—yep, it’s that easy and already delicious.
- Marinate the tofu: Brush both sides of each tofu slice with the glaze. Let it sit for 10 minutes; no need to go longer since tofu’s like a sponge and will soak up flavors fast.
- Heat the grill: Preheat your grill to medium-high (about 375°F) and lightly oil the grates with vegetable oil to prevent sticking.
- Grill to perfection: Place tofu slices on the grill. Cook for 4-5 minutes per side, brushing with extra glaze after flipping. You’ll know it’s ready when you see those gorgeous grill marks.
- Garnish and serve: Sprinkle with sesame seeds right off the grill so they stick. Serve hot, maybe over a bed of rice or alongside some grilled veggies for the ultimate plate.
The tofu’s got this amazing contrast—crispy edges with a melt-in-your-mouth center, and that glaze? It’s the kind of sticky, finger-licking goodness that’ll have you making double batches next time. Try skewering the slices with some pineapple for a fun, shareable appetizer.
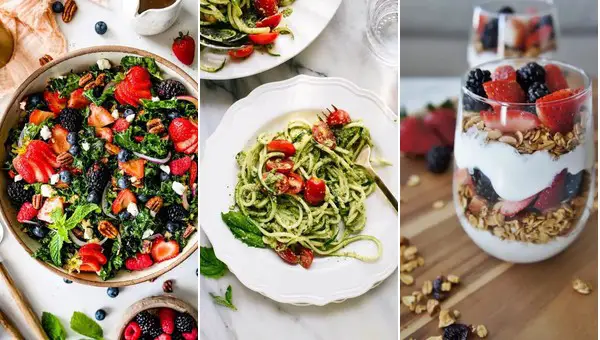
Mixed Berry and Kale Salad
Now, let’s talk about turning that sad-looking kale in your fridge into something you’ll actually crave. This Mixed Berry and Kale Salad is the perfect mix of sweet, tangy, and crunchy, and it’s so easy you’ll wonder why you haven’t been eating it every day.
Ingredients
- 4 cups kale, stems removed and leaves torn into bite-sized pieces
- 1 cup mixed berries (strawberries, blueberries, raspberries), sliced if large
- 1/4 cup sliced almonds, toasted
- 2 tbsp olive oil
- 1 tbsp balsamic vinegar
- 1 tsp honey
- 1/4 tsp salt
- 1/4 tsp black pepper
Instructions
- Prep the kale: In a large bowl, massage the kale with your hands for about 2 minutes until it starts to soften and turn a brighter green.
- Toast the almonds: In a small pan over medium heat, toast the sliced almonds for 3-4 minutes, stirring occasionally, until they’re golden and fragrant. Tip: Keep an eye on them to prevent burning!
- Make the dressing: In a small bowl, whisk together the olive oil, balsamic vinegar, honey, salt, and pepper until well combined.
- Combine everything: Add the mixed berries and toasted almonds to the bowl with the kale. Drizzle the dressing over the top and toss gently to coat everything evenly. Tip: If you’re not serving immediately, hold off on the dressing to keep the salad from getting soggy.
- Serve and enjoy: Give the salad a final toss and serve immediately for the best texture and flavor. Tip: For an extra crunch, sprinkle some additional toasted almonds on top right before serving.
This salad is a fantastic play of textures—the crisp kale, juicy berries, and crunchy almonds—with a dressing that ties it all together with just the right amount of sweetness and tang. Try serving it alongside grilled chicken or fish for a complete meal that’s as nutritious as it is delicious.
Roasted Brussels Sprouts with Garlic
Trust me, even the Brussels sprouts skeptics out there will be begging for seconds of this dish. It’s got that perfect combo of crispy edges, tender insides, and just enough garlic to keep things interesting without overpowering the whole pan.
Ingredients
- 1.5 lbs Brussels sprouts, trimmed and halved
- 3 tbsp olive oil
- 4 cloves garlic, minced
- 1/2 tsp salt
- 1/4 tsp black pepper
- 1/4 tsp red pepper flakes (optional)
Instructions
- Preheat oven: Crank your oven up to 400°F (200°C) to get it nice and hot for those sprouts.
- Toss sprouts: In a large bowl, mix the Brussels sprouts with olive oil, minced garlic, salt, black pepper, and red pepper flakes if you’re using them. Make sure every sprout is coated in that garlicky goodness.
- Spread on pan: Dump the sprouts onto a baking sheet in a single layer. Crowding the pan is a no-go if you want them to crisp up.
- Roast to perfection: Slide the pan into the oven and let the sprouts roast for 25-30 minutes. You’re looking for a deep golden brown on the outside and a fork-tender inside.
- Flip halfway: About 15 minutes in, give the sprouts a good stir or flip to ensure even browning. This is the secret to no sad, pale sprouts.
- Serve hot: Pull them out when they’re perfectly crispy and fragrant. Let them cool for a minute because that garlic oil is lava-hot.
These sprouts come out with a killer texture—crispy on the outside, melt-in-your-mouth on the inside. The garlic gets just toasted enough to mellow out, and if you went for the red pepper flakes, there’s a subtle heat that creeps up on you. Try tossing them with a squeeze of lemon or a drizzle of balsamic glaze right before serving for an extra punch of flavor.
Turkey Meatballs with Zucchini Pasta
Craving something light yet satisfying that won’t have you slaving over the stove for hours? Let me introduce you to these turkey meatballs with zucchini pasta, a dish that’s as fun to make as it is to eat, and hey, it’s sneakily healthy too.
Ingredients
- 1 lb ground turkey
- 1/2 cup breadcrumbs
- 1/4 cup grated Parmesan cheese
- 1 egg, beaten
- 2 cloves garlic, minced
- 1 tsp salt
- 1/2 tsp black pepper
- 1 tbsp olive oil
- 2 medium zucchinis, spiralized into noodles
- 1 cup marinara sauce
- 1/4 cup fresh basil, chopped
Instructions
- Preheat oven: Heat your oven to 375°F (190°C) to get it ready for the meatballs.
- Mix meatball ingredients: In a large bowl, combine ground turkey, breadcrumbs, Parmesan, egg, garlic, salt, and pepper. Mix until just combined—overmixing can make the meatballs tough.
- Form meatballs: Roll the mixture into 1-inch balls. Pro tip: wet your hands slightly to prevent sticking.
- Bake meatballs: Place meatballs on a greased baking sheet and bake for 20 minutes, or until golden and cooked through.
- Heat sauce: While the meatballs bake, warm the marinara sauce in a large skillet over medium heat.
- Sauté zucchini: In another pan, heat olive oil over medium heat and sauté zucchini noodles for 2-3 minutes, just until tender.
- Combine and serve: Add the baked meatballs to the skillet with marinara, toss to coat, then serve over zucchini noodles. Garnish with fresh basil.
The turkey meatballs are juicy and flavorful, perfectly complemented by the light, fresh zucchini noodles. Try serving this with a sprinkle of extra Parmesan for that extra oomph.
Chia Seed Pudding with Almond Milk
Mmm, let me tell you about this chia seed pudding with almond milk that’s about to change your breakfast game. It’s like dessert for breakfast, but you can totally pretend it’s healthy because, well, it kinda is.
Ingredients
- 1/4 cup chia seeds
- 1 cup unsweetened almond milk
- 1 tbsp maple syrup
- 1/2 tsp vanilla extract
- A pinch of salt
Instructions
- Mix the base: In a medium bowl, whisk together chia seeds, almond milk, maple syrup, vanilla extract, and a pinch of salt until well combined.
- Let it sit: Cover the bowl and refrigerate for at least 4 hours, or overnight, stirring once after the first 30 minutes to prevent clumping. Tip: The longer it sits, the thicker it gets!
- Check consistency: After chilling, give the pudding a stir. If it’s too thick, add a splash more almond milk to loosen it up.
- Serve it up: Divide the pudding into two bowls. Top with your favorite fruits, nuts, or a drizzle of extra maple syrup if you’re feeling fancy. Tip: Fresh berries add a nice tart contrast to the sweet pudding.
This pudding turns out luxuriously creamy with a slight chew from the chia seeds, and the almond milk keeps it light. Try layering it with granola and banana slices for a parfait that’ll make your mornings a whole lot brighter.
Grilled Eggplant with Balsamic Glaze
Eggplant might just be the underdog of the vegetable world, but grill it up with a balsamic glaze, and suddenly it’s the star of the show. Let’s turn that humble purple veggie into something you’ll wanna brag about.
Ingredients
- 1 large eggplant, sliced into 1/2-inch rounds
- 2 tbsp olive oil
- 1/2 tsp salt
- 1/4 tsp black pepper
- 1/4 cup balsamic vinegar
- 1 tbsp honey
- 1 garlic clove, minced
Instructions
- Prep the eggplant: Lay the eggplant slices on a tray, brush both sides with olive oil, and sprinkle with salt and pepper.
- Heat the grill: Preheat your grill to medium-high, about 400°F, so it’s ready to give those slices a nice char.
- Grill to perfection: Place the eggplant on the grill. Cook for 4-5 minutes per side until you see those gorgeous grill marks and the slices are tender.
- Make the glaze: While the eggplant grills, mix balsamic vinegar, honey, and minced garlic in a small saucepan. Simmer over low heat for 5 minutes until it thickens slightly.
- Glaze and serve: Brush the grilled eggplant with the balsamic glaze right before serving. A little extra drizzle never hurt anybody.
The eggplant comes out smoky and tender, with the sweet and tangy glaze making every bite irresistible. Try stacking them with fresh mozzarella and basil for a killer caprese twist.
Homemade Hummus with Veggie Sticks
Did you know that whipping up a batch of homemade hummus is easier than convincing your cat to take a bath? And pairing it with fresh veggie sticks? That’s just showing off. Let’s dive into making this creamy, dreamy dip that’ll have your taste buds doing the cha-cha.
Ingredients
- 1 can (15 oz) chickpeas, drained and rinsed
- 1/4 cup tahini
- 1/4 cup extra virgin olive oil, plus more for drizzling
- 3 tbsp fresh lemon juice
- 1 garlic clove, minced
- 1/2 tsp ground cumin
- 1/2 tsp salt
- 2-3 tbsp water
- Assorted veggie sticks (carrots, cucumbers, bell peppers), for serving
Instructions
- Blend the base: In a food processor, combine the chickpeas, tahini, olive oil, lemon juice, garlic, cumin, and salt. Process until smooth, about 1 minute.
- Adjust consistency: With the processor running, slowly add water, 1 tbsp at a time, until the hummus reaches your desired creaminess. Tip: The hummus will thicken in the fridge, so err on the side of slightly thinner.
- Season to perfection: Taste and adjust seasoning with more salt or lemon juice if needed. Tip: A pinch of smoked paprika can add a nice depth of flavor.
- Serve with style: Transfer the hummus to a bowl, drizzle with olive oil, and serve with fresh veggie sticks. Tip: For an extra touch, sprinkle with chopped parsley or a dash of sumac.
This hummus is so smooth it could double as a face mask (but please don’t). The garlic and cumin give it a punchy kick, while the tahini keeps it rich and velvety. Try spreading it on toast or dolloping it on grilled chicken for a flavor upgrade that’s anything but basic.
Conclusion
With these 21 healthy and delicious recipes, your weight loss journey just got a whole lot tastier! Whether you’re meal prepping or cooking on the fly, these dishes make eating well easy and enjoyable. Give them a try, then let us know which ones you loved—we’d love to hear from you! Don’t forget to share this roundup on Pinterest to inspire others. Happy cooking!

I’m Brandon, the face behind the recipes. As a dedicated food enthusiast, I love experimenting with flavors and sharing my culinary adventures with you.