Feeding a picky 2-year-old can feel like a culinary puzzle—but it doesn’t have to be a battle! Whether you’re dodging food tosses or negotiating “just one bite,” these 20 fun, nutritious recipes are designed to win over tiny taste buds. From sneaky veggie-packed bites to playful twists on classics, we’ve got creative ideas to make mealtime stress-free (and maybe even fun!). Ready to turn picky into yummy? Dig in!
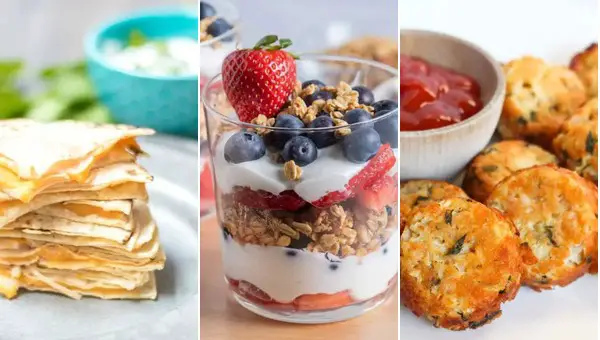
Cheesy Veggie Quesadillas with Hidden Greens
Ever had one of those days where you’re trying to be healthy but all you really want is something cheesy and delicious? Well, these Cheesy Veggie Quesadillas with Hidden Greens are here to save the day, packing in the goodness without skimping on flavor.
Ingredients
- 1 cup shredded cheddar cheese
- 1 cup shredded mozzarella cheese
- 1 cup finely chopped spinach
- 1/2 cup diced bell peppers
- 1/2 cup diced onions
- 1 tbsp olive oil
- 1/2 tsp garlic powder
- 1/2 tsp salt
- 4 large flour tortillas
Instructions
- Prep the veggies: In a bowl, mix together the spinach, bell peppers, onions, garlic powder, and salt until well combined.
- Heat the pan: Place a large skillet over medium heat and add the olive oil, letting it warm up for about 1 minute.
- Assemble the quesadilla: Lay one tortilla flat in the skillet, sprinkle half of the cheese blend, spread the veggie mixture evenly, then top with the remaining cheese and another tortilla.
- Cook to perfection: Cook for 3-4 minutes on each side or until the tortilla is golden brown and the cheese is melted. Tip: Press down lightly with a spatula to help the quesadilla stick together.
- Slice and serve: Remove from the skillet, let it cool for a minute, then cut into wedges. Tip: Use a pizza cutter for easy slicing.
The result? A crispy, gooey masterpiece with a sneaky veggie boost that even picky eaters won’t notice. Try dipping these in salsa or sour cream for an extra flavor kick.
Mini Banana Pancakes with a Touch of Cinnamon
Zesty mornings call for something special, and these mini banana pancakes with a dash of cinnamon are just the ticket. They’re fluffy, they’re flavorful, and they’re so easy to whip up, you’ll be flipping them like a pro in no time.
Ingredients
- 1 cup all-purpose flour
- 1 tbsp sugar
- 1 tsp baking powder
- 1/2 tsp cinnamon
- 1/4 tsp salt
- 1 ripe banana, mashed
- 3/4 cup milk
- 1 egg
- 1 tbsp melted butter
- 1 tsp vanilla extract
- Butter or oil for cooking
Instructions
- Mix dry ingredients: In a large bowl, whisk together the flour, sugar, baking powder, cinnamon, and salt.
- Combine wet ingredients: In another bowl, mix the mashed banana, milk, egg, melted butter, and vanilla extract until smooth.
- Make the batter: Pour the wet ingredients into the dry ingredients and stir until just combined. A few lumps are okay; overmixing makes tough pancakes.
- Heat the pan: Heat a non-stick skillet over medium heat and add a small amount of butter or oil.
- Cook the pancakes: Pour 1 tbsp of batter for each pancake onto the skillet. Cook for about 2 minutes, until bubbles form on the surface, then flip and cook for another 1-2 minutes until golden brown.
- Serve warm: Stack them high and serve with a drizzle of maple syrup or a sprinkle of extra cinnamon for that cozy vibe.
These mini pancakes are the perfect combo of sweet banana and warm cinnamon, with a texture that’s light yet satisfying. Try topping them with a dollop of whipped cream and a few banana slices for an extra indulgent treat.
Sweet Potato Fries with a Yogurt Dip
Now, who doesn’t love a good crunch with a side of creamy dip? Sweet potato fries are the ultimate snack that walks the fine line between healthy and indulgent, and when paired with a tangy yogurt dip, they’re downright irresistible. Let’s dive into making these bad boys from scratch, shall we?
Ingredients
- 2 large sweet potatoes, peeled and cut into 1/4-inch sticks
- 2 tablespoons olive oil
- 1 teaspoon salt
- 1/2 teaspoon paprika
- 1/4 teaspoon garlic powder
- 1/4 teaspoon black pepper
- 1 cup plain Greek yogurt
- 1 tablespoon lemon juice
- 1 teaspoon honey
- 1/2 teaspoon cumin
Instructions
- Preheat oven: Preheat your oven to 425°F and line a baking sheet with parchment paper.
- Toss potatoes: In a large bowl, toss the sweet potato sticks with olive oil, salt, paprika, garlic powder, and black pepper until evenly coated.
- Spread out: Spread the potatoes in a single layer on the prepared baking sheet, making sure they’re not touching for maximum crispiness.
- Bake: Bake for 20 minutes, then flip the fries and bake for another 15-20 minutes until crispy and golden brown.
- Mix dip: While the fries bake, mix together the Greek yogurt, lemon juice, honey, and cumin in a small bowl until smooth.
- Serve hot: Serve the sweet potato fries hot with the yogurt dip on the side for dipping.
These fries come out perfectly crispy on the outside and tender on the inside, with the dip adding a cool, tangy contrast. Try sprinkling some chopped cilantro or a pinch of chili powder on top for an extra kick!
Hidden Spinach Muffins with Blueberries
You know those days when you’re trying to sneak some greens into your kid’s diet (or let’s be real, your own) without the eye rolls? Yeah, today’s that day, and these Hidden Spinach Muffins with Blueberries are about to become your new best friend.
Ingredients
- 1 cup fresh spinach, tightly packed
- 1 cup all-purpose flour
- 1/2 cup sugar
- 1/2 tsp baking soda
- 1/4 tsp salt
- 1/4 cup vegetable oil
- 1 large egg
- 1/2 cup plain Greek yogurt
- 1 tsp vanilla extract
- 1 cup fresh blueberries
Instructions
- Preheat oven: Crank that oven up to 375°F (190°C) and line a muffin tin with paper liners. No liners? A light spray of cooking oil will do the trick.
- Blend spinach: Toss the spinach into a blender or food processor and pulse until it’s finely chopped. No big leafy bits here—we’re going for stealth mode.
- Mix dry ingredients: In a large bowl, whisk together the flour, sugar, baking soda, and salt. This is where the muffin magic starts.
- Combine wet ingredients: In another bowl, mix the oil, egg, yogurt, and vanilla until smooth. Then, stir in the spinach. It’s okay if it looks a little weird—trust the process.
- Fold together: Pour the wet ingredients into the dry and gently fold until just combined. Overmixing is the enemy of fluffy muffins. Then, gently fold in the blueberries.
- Bake: Divide the batter evenly among the muffin cups, filling each about 2/3 full. Bake for 18-20 minutes, or until a toothpick comes out clean. Tip: Rotate the pan halfway through for even baking.
- Cool: Let the muffins cool in the pan for 5 minutes, then transfer to a wire rack. They’ll be hot, and the blueberries will be like little lava pockets—patience is key.
These muffins come out moist with a subtle sweetness, and the blueberries burst with flavor in every bite. Serve them warm with a dab of butter, or pack them for a sneaky healthy snack on the go.
Chicken and Rice Balls with a Cheesy Center
Just imagine biting into a crispy, golden-brown ball only to find a gooey, cheesy surprise waiting inside. That’s exactly what you get with these Chicken and Rice Balls with a Cheesy Center, a dish that’s as fun to make as it is to eat.
Ingredients
- 2 cups cooked white rice, cooled
- 1 lb ground chicken
- 1/2 cup grated mozzarella cheese
- 1/4 cup grated parmesan cheese
- 1 egg, beaten
- 1/2 cup breadcrumbs
- 1 tbsp olive oil
- 1 tsp garlic powder
- 1 tsp onion powder
- 1/2 tsp salt
- 1/4 tsp black pepper
- 1 cup vegetable oil, for frying
Instructions
- Mix the base: In a large bowl, combine the cooled rice, ground chicken, beaten egg, breadcrumbs, olive oil, garlic powder, onion powder, salt, and pepper until well mixed.
- Form the balls: Take a small handful of the mixture, flatten it in your palm, place a teaspoon of mozzarella and a pinch of parmesan in the center, then roll it into a ball, ensuring the cheese is completely enclosed.
- Heat the oil: In a deep skillet, heat the vegetable oil over medium heat until it reaches 350°F. A breadcrumb should sizzle when dropped in.
- Fry to perfection: Carefully add the balls to the hot oil in batches, frying for about 3-4 minutes or until golden brown and crispy. Don’t overcrowd the pan to ensure even cooking.
- Drain and serve: Use a slotted spoon to transfer the balls to a paper towel-lined plate to drain any excess oil. Let them sit for a minute—trust me, that cheese is lava-hot!
The outside is satisfyingly crunchy, giving way to a tender, flavorful chicken and rice mixture that hugs the molten cheese center. Serve these bad boys with a side of marinara for dipping, or go wild and toss them in buffalo sauce for a spicy twist.
Soft Veggie Nuggets with a Crunchy Coating
You know those days when you’re craving something crispy but also want to sneak in some veggies without feeling like you’re eating a salad? Yeah, me too. That’s why these Soft Veggie Nuggets with a Crunchy Coating are about to become your new best friend. They’re the perfect mix of tender on the inside and crispy on the outside, and hey, they’re packed with veggies, so you can totally pat yourself on the back after eating them.
Ingredients
- 2 cups mashed sweet potatoes (already cooked and peeled)
- 1 cup finely chopped broccoli florets (steamed and drained)
- 1/2 cup grated cheddar cheese
- 1/2 cup breadcrumbs (plus extra for coating)
- 1 large egg (beaten)
- 1 tsp garlic powder
- 1 tsp onion powder
- 1/2 tsp salt
- 1/4 tsp black pepper
- 2 tbsp olive oil (for frying)
Instructions
- Mix the base: In a large bowl, combine the mashed sweet potatoes, chopped broccoli, cheddar cheese, breadcrumbs, beaten egg, garlic powder, onion powder, salt, and black pepper. Mix until everything is well incorporated.
- Shape the nuggets: Take about 2 tablespoons of the mixture and shape it into a nugget. Repeat with the remaining mixture. Tip: Wet your hands slightly to prevent sticking.
- Coat for crunch: Roll each nugget in extra breadcrumbs until fully coated. This is what gives them that irresistible crunch.
- Fry to perfection: Heat olive oil in a large skillet over medium heat. Once hot, add the nuggets in batches, frying for about 3-4 minutes on each side or until golden brown and crispy. Tip: Don’t overcrowd the pan to ensure even cooking.
- Drain and serve: Transfer the fried nuggets to a paper towel-lined plate to drain any excess oil. Let them cool for a minute before serving. Tip: They’re great with a side of ranch or your favorite dipping sauce.
These nuggets are seriously addictive with their soft, veggie-packed centers and that golden, crunchy exterior. Try serving them on a stick for a fun twist at your next party, or just enjoy them straight off the plate like I do.
Apple and Carrot Puree with a Hint of Ginger
Craving something sweet, nutritious, and a tad spicy to kickstart your day or as a comforting side? This Apple and Carrot Puree with a Hint of Ginger is your go-to. It’s like autumn in a bowl, but honestly, it’s so good you’ll want it year-round.
Ingredients
- 2 cups peeled and chopped carrots (about 4 medium carrots)
- 2 cups peeled, cored, and chopped apples (about 2 large apples)
- 1 tbsp freshly grated ginger
- 1 tbsp unsalted butter
- 1/2 cup water
- 1/4 tsp salt
Instructions
- Prep the veggies: Start by peeling and chopping your carrots and apples into roughly equal-sized pieces to ensure they cook evenly.
- Cook the base: In a medium saucepan over medium heat, melt the butter. Add the carrots, apples, and grated ginger, stirring to coat them in the butter. Tip: The butter helps bring out the flavors, so don’t skip it!
- Simmer to soften: Pour in the water and add the salt. Bring to a boil, then reduce the heat to low, cover, and let it simmer for 20 minutes, or until the carrots and apples are fork-tender. Tip: Check at the 15-minute mark to avoid overcooking.
- Blend it up: Once tender, remove from heat and let it cool slightly. Then, transfer everything to a blender and puree until smooth. Tip: For an extra silky texture, pass the puree through a fine-mesh sieve.
This puree is velvety with a sweet kick from the apples and a warm spice from the ginger. Serve it as a side, swirl it into oatmeal, or even use it as a unique spread on toast for a breakfast upgrade.
Peanut Butter and Banana Roll-Ups
These peanut butter and banana roll-ups are the perfect quick snack or light lunch that’ll make you feel like a kid again, but hey, no judgment here—adults need fun food too. Trust me, once you try these, you’ll be making them on the regular.
Ingredients
- 2 large flour tortillas (8-inch)
- 1/2 cup creamy peanut butter
- 2 medium bananas, peeled
- 2 tbsp honey
- 1/4 tsp cinnamon
Instructions
- Spread the peanut butter: Lay the tortillas flat on a clean surface. Evenly spread 1/4 cup of peanut butter on each tortilla, leaving a small border around the edges to prevent spillage when rolling.
- Add the bananas: Place one banana near the edge of each tortilla. Drizzle 1 tbsp of honey over each banana and sprinkle with 1/8 tsp of cinnamon.
- Roll them up: Carefully roll the tortilla around the banana, tucking in the sides as you go to keep all the goodness inside. If the tortilla cracks, no worries—just press it back together; the peanut butter acts like glue.
- Slice and serve: Using a sharp knife, cut each roll-up into 1-inch pieces. For a neat presentation, wipe the knife between cuts. Serve immediately or wrap in parchment paper for a grab-and-go snack.
The combination of creamy peanut butter, sweet banana, and a hint of cinnamon wrapped in a soft tortilla is downright addictive. Try drizzling a little extra honey on top before serving for an extra touch of sweetness.
Creamy Avocado Pasta with Cherry Tomatoes
Oh boy, do I have a game-changer for your weeknight dinner rotation! This Creamy Avocado Pasta with Cherry Tomatoes is like a hug in a bowl, and it’s so easy, you’ll be wondering why you haven’t been making it every single day.
Ingredients
- 8 oz spaghetti
- 2 ripe avocados, peeled and pitted
- 1/4 cup fresh basil leaves
- 2 cloves garlic, minced
- 2 tbsp lemon juice
- 1/4 cup olive oil
- 1/2 tsp salt
- 1/4 tsp black pepper
- 1 cup cherry tomatoes, halved
- 1/4 cup grated Parmesan cheese
Instructions
- Boil the pasta: Cook spaghetti according to package instructions until al dente, about 8-10 minutes. Reserve 1/2 cup of pasta water before draining.
- Blend the sauce: In a blender, combine avocados, basil, garlic, lemon juice, olive oil, salt, and pepper. Blend until smooth, adding a little pasta water if needed to thin it out.
- Toss it all together: In a large bowl, mix the cooked spaghetti with the avocado sauce until the pasta is evenly coated. Gently fold in the cherry tomatoes.
- Serve with flair: Sprinkle Parmesan cheese on top and give it one final gentle toss. Serve immediately for the best texture and flavor.
The creaminess of the avocado paired with the burst of sweetness from the cherry tomatoes is nothing short of magical. Try serving it with a sprinkle of red pepper flakes for a little kick, or alongside a crisp white wine for the ultimate dining experience.
Mini Meatloaf Muffins with Hidden Veggies
Kicking off with a dish that’s as fun to make as it is to eat, these Mini Meatloaf Muffins with Hidden Veggies are a game-changer for weeknight dinners. Perfect for sneaking in those greens without the dinner table drama, and hey, everything’s better in muffin form, right?
Ingredients
- 1 lb ground beef (85% lean)
- 1/2 cup finely grated zucchini (squeezed dry)
- 1/2 cup finely grated carrot
- 1/4 cup finely chopped onion
- 1/4 cup breadcrumbs
- 1 large egg
- 2 tbsp ketchup
- 1 tbsp Worcestershire sauce
- 1 tsp garlic powder
- 1 tsp salt
- 1/2 tsp black pepper
- 1/4 cup grated Parmesan cheese
- 1/4 cup additional ketchup for topping
Instructions
- Preheat oven: Heat your oven to 375°F and lightly grease a 12-cup muffin tin.
- Mix ingredients: In a large bowl, combine ground beef, zucchini, carrot, onion, breadcrumbs, egg, 2 tbsp ketchup, Worcestershire sauce, garlic powder, salt, pepper, and Parmesan cheese. Mix until just combined—overmixing can make the meatloaf tough.
- Fill muffin cups: Divide the mixture evenly among the muffin cups, pressing down lightly to pack.
- Add topping: Spread a small amount of the additional ketchup on top of each meatloaf muffin.
- Bake: Bake for 20-25 minutes, or until the internal temperature reaches 160°F. Let them rest for 5 minutes before serving—this helps them hold their shape.
These mini meatloaves come out juicy with a slight sweetness from the ketchup topping, and the hidden veggies add a nice texture without being detectable. Serve them with a side of mashed potatoes or pop them into lunchboxes for a protein-packed snack.
Fruit and Yogurt Parfaits with Granola
Unbelievably easy and ridiculously delicious, these Fruit and Yogurt Parfaits with Granola are your ticket to breakfast heaven or a snack-time victory. Let’s layer up some goodness!
Ingredients
- 1 cup Greek yogurt (plain or vanilla)
- 1/2 cup granola (your favorite kind)
- 1 cup mixed fresh berries (strawberries, blueberries, raspberries)
- 1 tbsp honey (for drizzling)
- 1/2 tsp vanilla extract (mix into yogurt)
Instructions
- Prep the berries: Wash your mixed berries thoroughly and slice the strawberries into bite-sized pieces.
- Mix yogurt: In a small bowl, stir the vanilla extract into the Greek yogurt until well combined. This adds a subtle sweetness and aroma.
- Layer the parfait: Start with a layer of yogurt at the bottom of a glass, followed by a layer of granola, then a layer of mixed berries. Repeat the layers until the glass is full.
- Drizzle honey: Finish off your parfait with a generous drizzle of honey over the top for that extra touch of sweetness.
- Serve immediately: Enjoy your parfait right away to keep the granola crunchy and the berries fresh. If you’re prepping ahead, keep the granola separate until serving time.
The contrast between the creamy yogurt, crunchy granola, and juicy berries is nothing short of magical. Try serving these in clear glasses to show off those beautiful layers at your next brunch!
Butternut Squash Mac and Cheese
Veggie lovers and cheese enthusiasts, gather around! Today, we’re diving into a cozy bowl of Butternut Squash Mac and Cheese that’s creamy, dreamy, and packed with a sneaky veggie twist. Perfect for those days when you want comfort food with a side of ‘I kinda ate something healthy.’
Ingredients
- 1 medium butternut squash, peeled, seeded, and cubed (about 3 cups)
- 2 cups elbow macaroni
- 2 tbsp olive oil
- 1/2 cup heavy cream
- 1 cup shredded sharp cheddar cheese
- 1/2 cup grated Parmesan cheese
- 1/2 tsp garlic powder
- 1/2 tsp onion powder
- 1/4 tsp nutmeg
- Salt and pepper to taste
- 1/4 cup panko breadcrumbs
- 1 tbsp melted butter
Instructions
- Roast the squash: Toss the cubed butternut squash with 1 tbsp olive oil, salt, and pepper. Spread on a baking sheet and roast at 400°F for 25 minutes or until fork-tender.
- Cook the pasta: Boil the elbow macaroni in salted water according to package instructions until al dente. Drain and set aside.
- Blend the sauce: In a blender, combine the roasted squash, heavy cream, cheddar cheese, Parmesan cheese, garlic powder, onion powder, and nutmeg. Blend until smooth.
- Combine everything: In a large bowl, mix the cooked macaroni with the squash cheese sauce until well coated. Pour into a baking dish.
- Add the topping: Mix panko breadcrumbs with melted butter and sprinkle over the mac and cheese.
- Bake to perfection: Bake at 375°F for 15 minutes or until the topping is golden brown and crispy.
This Butternut Squash Mac and Cheese comes out with a velvety texture that hugs every noodle, and the subtle sweetness of the squash plays so nicely with the sharp cheeses. Try serving it with a sprinkle of fresh thyme or a dash of hot sauce for an extra kick!
Zucchini Fritters with a Yogurt Dip
Guess what? I’ve got this ridiculously easy and utterly delicious recipe for zucchini fritters that’ll make you look like a kitchen wizard with minimal effort. Pair them with a cool, tangy yogurt dip, and you’ve got yourself a snack that’s crispy on the outside, tender on the inside, and packed with flavor.
Ingredients
- 2 medium zucchinis, grated and squeezed dry
- 1/2 cup all-purpose flour
- 1 large egg, lightly beaten
- 2 tbsp fresh dill, finely chopped
- 1/2 tsp salt
- 1/4 tsp black pepper
- 1/4 cup olive oil, for frying
- 1 cup plain Greek yogurt
- 1 garlic clove, minced
- 1 tbsp lemon juice
- 1/4 tsp salt
Instructions
- Mix the batter: In a large bowl, combine the grated zucchini, flour, egg, dill, salt, and pepper. Stir until everything is well mixed.
- Heat the oil: Pour the olive oil into a large skillet and heat over medium heat until shimmering, about 2 minutes.
- Form the fritters: Scoop about 2 tablespoons of the zucchini mixture per fritter into the skillet, flattening slightly with the back of the spoon. Cook in batches to avoid overcrowding.
- Fry to golden perfection: Cook each fritter for 3-4 minutes per side, or until golden brown and crispy. Transfer to a paper towel-lined plate to drain.
- Make the dip: While the fritters are cooking, mix together the Greek yogurt, minced garlic, lemon juice, and salt in a small bowl until smooth.
- Serve immediately: Enjoy the fritters hot with the yogurt dip on the side. For an extra zing, sprinkle some extra dill on top of the dip.
These zucchini fritters are the perfect combo of crispy and tender, with the yogurt dip adding a creamy contrast that’s just irresistible. Try serving them on a bed of mixed greens for a light lunch or as a fancy appetizer at your next dinner party.
Oatmeal Cookies with Raisins and Carrots
Picture this: you’re craving something sweet but not too guilty, and bam! These oatmeal cookies with raisins and carrots are here to save the day. They’re like your morning oatmeal decided to dress up as a cookie, and honestly, we’re here for it.
Ingredients
- 1 cup rolled oats
- 1/2 cup all-purpose flour
- 1/2 tsp baking soda
- 1/4 tsp salt
- 1/2 tsp cinnamon
- 1/4 cup unsalted butter, softened
- 1/4 cup brown sugar, packed
- 1/4 cup granulated sugar
- 1 large egg
- 1/2 tsp vanilla extract
- 1/2 cup grated carrots
- 1/4 cup raisins
Instructions
- Preheat oven: Heat your oven to 350°F (175°C) and line a baking sheet with parchment paper.
- Mix dry ingredients: In a bowl, whisk together the oats, flour, baking soda, salt, and cinnamon.
- Cream butter and sugars: In another bowl, beat the softened butter with both sugars until fluffy. Tip: Make sure your butter is at room temperature for easier mixing.
- Add wet ingredients: Beat in the egg and vanilla extract until well combined.
- Combine mixtures: Gradually mix the dry ingredients into the wet mixture until just combined.
- Fold in extras: Gently stir in the grated carrots and raisins. Tip: Don’t overmix to keep the cookies tender.
- Shape cookies: Drop tablespoon-sized balls of dough onto the prepared baking sheet, spacing them about 2 inches apart.
- Bake: Bake for 10-12 minutes or until the edges are golden but the centers are still soft. Tip: They’ll firm up as they cool, so don’t overbake.
- Cool: Let the cookies cool on the baking sheet for 5 minutes before transferring to a wire rack.
These cookies come out perfectly chewy with a hint of spice from the cinnamon and little bursts of sweetness from the raisins. Serve them with a glass of cold milk for the ultimate comfort snack, or crumble them over yogurt for a breakfast twist.
Turkey and Cheese Pinwheels with Spinach
Craving something quick, delicious, and a little fancy without the fuss? These Turkey and Cheese Pinwheels with Spinach are your new go-to for easy entertaining or a satisfying snack. They’re like a party in your mouth, with every bite packed with flavor and fun.
Ingredients
- 1 large flour tortilla (10-inch)
- 2 tbsp cream cheese, softened
- 1/2 cup baby spinach leaves, tightly packed
- 4 slices deli turkey
- 1/4 cup shredded cheddar cheese
- 1/4 tsp garlic powder
- 1/4 tsp onion powder
- 1/8 tsp black pepper
Instructions
- Spread the base: Lay the tortilla flat on a clean surface. Evenly spread the softened cream cheese over the entire surface of the tortilla.
- Layer the greens: Scatter the baby spinach leaves over the cream cheese, covering as much surface area as possible.
- Add the turkey: Place the turkey slices in a single layer over the spinach, slightly overlapping the edges to ensure full coverage.
- Sprinkle the cheese: Evenly distribute the shredded cheddar cheese over the turkey slices.
- Season it up: Lightly sprinkle the garlic powder, onion powder, and black pepper over the cheese for that extra flavor kick.
- Roll it tight: Starting at one end, tightly roll the tortilla into a log, ensuring all ingredients are snug inside.
- Chill to set: Wrap the rolled tortilla in plastic wrap and refrigerate for at least 30 minutes to firm up, making slicing easier.
- Slice and serve: Remove the tortilla log from the fridge, unwrap, and use a sharp knife to slice into 1-inch pinwheels. Serve immediately or chill until ready to eat.
These pinwheels are a delightful mix of creamy, crunchy, and cheesy, with the spinach adding a fresh pop. Perfect for picnics, or slice them thinner for adorable party appetizers that disappear in seconds.
Cauliflower Tots with a Cheesy Twist
Who knew that cauliflower could be this fun? These Cauliflower Tots with a Cheesy Twist are about to become your new favorite snack—crispy on the outside, tender on the inside, and packed with cheesy goodness that’ll have everyone asking for seconds.
Ingredients
- 1 medium head cauliflower, cut into florets (about 4 cups)
- 1 cup shredded cheddar cheese
- 1/2 cup grated Parmesan cheese
- 1/2 cup breadcrumbs
- 1 large egg, beaten
- 1 tsp garlic powder
- 1/2 tsp salt
- 1/4 tsp black pepper
- 2 tbsp olive oil, for brushing
Instructions
- Prep the cauliflower: Steam the cauliflower florets until very tender, about 10 minutes. Let them cool slightly, then pat dry with paper towels to remove excess moisture.
- Mash and mix: In a large bowl, mash the cauliflower with a fork until it resembles rice. Stir in the cheddar cheese, Parmesan cheese, breadcrumbs, egg, garlic powder, salt, and pepper until well combined.
- Shape the tots: Roll the mixture into small cylinders, about 1 inch in diameter and 2 inches long. Place them on a baking sheet lined with parchment paper.
- Brush and bake: Lightly brush each tot with olive oil. Bake in a preheated oven at 400°F for 20-25 minutes, flipping halfway through, until golden and crispy.
- Serve hot: Let them cool for a minute or two before serving. They’re perfect with a side of ranch or marinara sauce for dipping.
These tots are irresistibly crispy on the outside with a soft, cheesy center. Try serving them atop a salad for a crunchy twist or alongside your favorite burger for a fun, veggie-packed side.
Pumpkin and Apple Smoothie with Cinnamon
Wow, have I got a treat for you today! Imagine blending the cozy flavors of fall into a smoothie so delicious, you’ll forget it’s actually good for you. This Pumpkin and Apple Smoothie with Cinnamon is like autumn in a glass, and I’m here to walk you through making it.
Ingredients
- 1 cup canned pumpkin puree (not pumpkin pie filling)
- 1 medium apple, cored and chopped (no need to peel)
- 1 cup almond milk (or any milk you love)
- 1/2 cup plain Greek yogurt
- 1 tbsp honey (or maple syrup for a vegan twist)
- 1/2 tsp ground cinnamon
- 1/4 tsp ground nutmeg
- 1 cup ice cubes
Instructions
- Prep the apple: Core and chop the apple into small pieces to make blending easier.
- Blend the base: In a blender, combine the pumpkin puree, chopped apple, almond milk, Greek yogurt, honey, cinnamon, and nutmeg. Blend until smooth.
- Add ice: Toss in the ice cubes and blend again until the mixture is smooth and frosty. If it’s too thick, add a splash more almond milk.
- Taste and adjust: Give it a quick taste. Want it sweeter? Add a bit more honey. More spice? A pinch more cinnamon won’t hurt.
- Serve immediately: Pour into glasses and enjoy right away for the best texture and flavor.
This smoothie is creamy, spiced just right, and has a refreshing chill that makes it perfect for sipping on a crisp morning. Try topping it with a sprinkle of cinnamon or a dollop of whipped cream for an extra special touch.
Egg and Veggie Muffins with a Cheesy Topping
Craving something deliciously easy for breakfast or a snack? These Egg and Veggie Muffins with a Cheesy Topping are your new best friend—fluffy, packed with veggies, and topped with melty cheese that’ll make you wanna do a little happy dance.
Ingredients
- 6 large eggs
- 1/2 cup diced bell peppers (any color)
- 1/2 cup chopped spinach
- 1/4 cup diced onions
- 1/2 cup shredded cheddar cheese
- 1 tbsp olive oil
- 1/2 tsp salt
- 1/4 tsp black pepper
- 1/4 tsp garlic powder
Instructions
- Preheat oven: Heat your oven to 350°F (175°C) and grease a muffin tin with olive oil to prevent sticking.
- Sauté veggies: In a pan over medium heat, sauté the bell peppers, spinach, and onions with olive oil until soft, about 5 minutes. Tip: Let them cool a bit before adding to eggs to avoid scrambling them.
- Whisk eggs: In a bowl, whisk together the eggs, salt, black pepper, and garlic powder until well combined.
- Combine ingredients: Stir the sautéed veggies into the egg mixture, then evenly pour into the prepared muffin tin.
- Add cheese: Sprinkle shredded cheddar cheese on top of each muffin. Tip: For extra flavor, mix a little Parmesan into the cheddar.
- Bake: Bake for 20-25 minutes, or until the eggs are set and the cheese is golden and bubbly. Tip: Check doneness by inserting a toothpick; if it comes out clean, they’re ready.
These muffins come out so fluffy and cheesy, with little bursts of veggie goodness in every bite. Perfect for grabbing on the go or serving with a side of hot sauce for an extra kick.
Rice Cake Pizzas with Tomato Sauce and Cheese
Guess what? You’re about to turn those plain rice cakes into something magical—Rice Cake Pizzas with Tomato Sauce and Cheese. It’s the perfect quick fix for pizza cravings without the hassle of dough, and honestly, it’s so easy you could probably do it half-asleep.
Ingredients
- 4 rice cakes
- 1/2 cup tomato sauce
- 1 cup shredded mozzarella cheese
- 1 tbsp olive oil
- 1/2 tsp garlic powder
- 1/2 tsp dried oregano
- 1/4 tsp red pepper flakes (optional)
- Fresh basil leaves for garnish
Instructions
- Preheat oven: Set your oven to 375°F (190°C) to get it nice and toasty for your rice cake pizzas.
- Prepare rice cakes: Lightly brush each rice cake with olive oil to help them crisp up in the oven.
- Add sauce: Spread about 2 tablespoons of tomato sauce on each rice cake, leaving a tiny border around the edges for that authentic pizza look.
- Season: Sprinkle garlic powder, dried oregano, and red pepper flakes (if using) over the sauce for that classic pizza flavor.
- Top with cheese: Generously cover each sauced rice cake with shredded mozzarella, because let’s be real, more cheese is always better.
- Bake: Place the rice cakes on a baking sheet and bake for 10-12 minutes, or until the cheese is bubbly and slightly golden.
- Garnish and serve: Top with fresh basil leaves right out of the oven for a pop of color and freshness. Let them cool for a minute before digging in to avoid a cheese burn.
These Rice Cake Pizzas are all about the crunch with a gooey, cheesy top—perfect for a fun snack or a lazy dinner. Try adding your favorite pizza toppings before baking for a personalized twist!
Strawberry and Spinach Smoothie with a Hint of Honey
So, you’re staring at your blender at 7 AM, wondering how to make breakfast both healthy and something you’ll actually want to eat? Let me introduce you to this Strawberry and Spinach Smoothie with a Hint of Honey—it’s like a morning hug in a glass.
Ingredients
- 1 cup fresh strawberries, hulled and halved
- 1 cup fresh baby spinach, tightly packed
- 1/2 cup plain Greek yogurt
- 1/2 cup almond milk
- 1 tablespoon honey
- 1/2 teaspoon vanilla extract
- 1 cup ice cubes
Instructions
- Prep your fruits and greens: Rinse the strawberries and spinach under cold water. Pat them dry with a paper towel to avoid a watery smoothie.
- Blend the base: In your blender, combine the strawberries, spinach, Greek yogurt, almond milk, honey, and vanilla extract. Blend on high for 30 seconds until smooth.
- Add ice for texture: Toss in the ice cubes and blend again for another 30 seconds, or until the smoothie reaches your desired thickness. Tip: If it’s too thick, add a splash more almond milk.
- Taste and adjust: Give it a quick taste. Want it sweeter? Add another teaspoon of honey. Tip: The honey’s sweetness can vary, so adjust based on your strawberries’ natural sweetness.
- Serve immediately: Pour into your favorite glass and enjoy right away. Tip: For an extra fancy touch, garnish with a strawberry slice on the rim.
This smoothie strikes the perfect balance between sweet and earthy, with a creamy texture that’ll make you forget it’s good for you. Try sipping it through a colorful straw for an instant mood lift!
Conclusion
With these 20 fun and nutritious recipes, mealtime with your picky 2-year-old just got a whole lot easier! From playful shapes to sneaky veggies, there’s something here to delight even the fussiest little eater. Give them a try, and let us know which ones were a hit in the comments below. Don’t forget to share your favorites on Pinterest to help other parents in the same boat—happy cooking!

I’m Brandon, the face behind the recipes. As a dedicated food enthusiast, I love experimenting with flavors and sharing my culinary adventures with you.