Ready to kickstart your weight loss journey without sacrificing flavor? These 20 healthy, delicious recipes are your secret weapon for a 6-week body makeover—think hearty meals, quick dinners, and crave-worthy dishes that keep you on track. No bland salads here—just real, satisfying food that makes healthy eating easy (and tasty!). Let’s cook your way to a fitter, happier you—one bite at a time!
Grilled Lemon Herb Chicken Breast
Now, let me tell you about this Grilled Lemon Herb Chicken Breast that’s about to become your weeknight hero. It’s juicy, flavorful, and honestly, so easy you’ll wonder why you haven’t been making it every single day.
Ingredients
- 2 boneless, skinless chicken breasts (about 1 lb total)
- 1/4 cup olive oil
- 2 tbsp lemon juice (freshly squeezed, please)
- 1 tsp lemon zest (because we’re fancy)
- 2 cloves garlic, minced (no jarred stuff here)
- 1 tsp dried oregano
- 1 tsp dried thyme
- 1/2 tsp salt (kosher is king)
- 1/4 tsp black pepper (freshly ground)
Instructions
- Marinate for flavor: In a bowl, whisk together olive oil, lemon juice, lemon zest, garlic, oregano, thyme, salt, and pepper. Add chicken breasts, turning to coat. Cover and refrigerate for at least 30 minutes, but hey, overnight is even better.
- Preheat for perfection: Fire up your grill to medium-high heat, about 375°F to 400°F. No grill? A grill pan over medium-high heat works too.
- Grill for glory: Remove chicken from marinade, letting excess drip off. Grill for 6-7 minutes per side, or until internal temp hits 165°F. No poking holes early – let those juices stay put.
- Rest for juiciness: Transfer chicken to a plate, tent with foil, and let it rest for 5 minutes. This is non-negotiable for maximum juiciness.
This chicken comes off the grill with a gorgeous crust, bursting with lemony, herby goodness. Slice it up over a salad, stuff it in a pita, or just devour it straight off the cutting board – no judgment here.
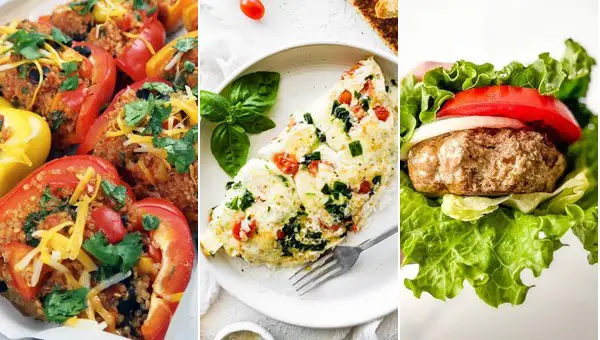
Quinoa and Black Bean Stuffed Peppers
Guess what? I’ve got this killer recipe for Quinoa and Black Bean Stuffed Peppers that’s going to blow your mind. It’s the perfect mix of hearty, healthy, and downright delicious, and I’m here to walk you through it like we’re chatting in my kitchen.
Ingredients
- 1 cup quinoa, rinsed
- 2 cups water
- 4 large bell peppers, tops cut off and seeds removed
- 1 tbsp olive oil
- 1 small onion, diced
- 2 cloves garlic, minced
- 1 can (15 oz) black beans, drained and rinsed
- 1 cup corn kernels (fresh or frozen)
- 1 tsp ground cumin
- 1 tsp chili powder
- 1/2 tsp salt
- 1/2 cup shredded cheese (cheddar or Mexican blend)
- Fresh cilantro, chopped (for garnish)
Instructions
- Cook quinoa: In a medium saucepan, combine quinoa and water. Bring to a boil, then reduce heat to low, cover, and simmer for 15 minutes or until water is absorbed. Remove from heat and let sit, covered, for 5 minutes.
- Preheat oven: Heat your oven to 375°F (190°C) while you prepare the filling.
- Sauté veggies: Heat olive oil in a large skillet over medium heat. Add onion and garlic, sautéing until soft, about 5 minutes. Tip: Don’t rush this step; letting the onions caramelize slightly adds depth.
- Mix filling: To the skillet, add black beans, corn, cumin, chili powder, and salt. Stir in cooked quinoa until everything is well combined. Tip: Taste and adjust seasoning here—more spice? Go for it!
- Stuff peppers: Spoon the quinoa mixture into the hollowed-out bell peppers, packing it down slightly. Place them in a baking dish.
- Bake: Cover with foil and bake for 25 minutes. Remove foil, sprinkle cheese on top, and bake uncovered for another 10 minutes or until cheese is bubbly. Tip: For extra crispiness, broil for the last 2 minutes.
- Garnish and serve: Sprinkle with fresh cilantro before serving. These peppers are a textural dream—creamy quinoa, hearty beans, and that melted cheese pull. Try serving with a dollop of sour cream or avocado slices for extra yum.
Baked Salmon with Garlic and Dill
First off, let me tell you, this Baked Salmon with Garlic and Dill is the kind of dish that makes you feel like a gourmet chef without needing to fuss over a bunch of ingredients or techniques. It’s simple, flavorful, and honestly, a total crowd-pleaser.
Ingredients
- 1.5 lbs salmon fillet, skin-on
- 2 tbsp olive oil
- 3 garlic cloves, minced
- 1 tbsp fresh dill, chopped
- 1/2 tsp salt
- 1/4 tsp black pepper
- 1 lemon, sliced
Instructions
- Preheat oven: Crank your oven to 375°F (190°C) to get it nice and toasty for the salmon.
- Prep salmon: Place the salmon fillet on a baking sheet lined with parchment paper, skin side down. Drizzle olive oil over the top and rub it all over the salmon.
- Season generously: Sprinkle the minced garlic, chopped dill, salt, and black pepper evenly over the salmon. Lay the lemon slices on top for that extra zesty flavor.
- Bake to perfection: Slide the baking sheet into the oven and bake for 12-15 minutes. The salmon is done when it flakes easily with a fork but still looks juicy inside.
- Rest before serving: Let the salmon sit for a couple of minutes after baking. This lets the juices redistribute, making every bite as flavorful as possible.
The salmon comes out so tender and flaky, with the garlic and dill creating this aromatic flavor that’s just irresistible. Serve it over a bed of quinoa or with some roasted veggies, and you’ve got yourself a meal that’s both nutritious and downright delicious.
Zucchini Noodles with Avocado Pesto
Zucchini noodles with avocado pesto is the kind of dish that makes you feel like a kitchen wizard without needing a degree in culinary arts. It’s fresh, it’s creamy, and it’s downright delicious—plus, it’s a sneaky way to get your greens in without feeling like you’re eating a salad.
Ingredients
- 2 medium zucchinis, spiralized into noodles
- 1 ripe avocado, pitted and peeled
- 1/2 cup fresh basil leaves, packed
- 1/4 cup grated Parmesan cheese
- 1/4 cup pine nuts
- 2 cloves garlic, minced
- 2 tbsp lemon juice
- 1/4 cup olive oil
- Salt and pepper to taste
Instructions
- Prep the zucchini: Spiralize the zucchinis into noodles and set them aside in a large bowl.
- Blend the pesto: In a food processor, combine the avocado, basil, Parmesan, pine nuts, garlic, and lemon juice. Pulse until finely chopped.
- Emulsify the pesto: With the processor running, slowly drizzle in the olive oil until the pesto is smooth and creamy. Season with salt and pepper to taste.
- Toss the noodles: Pour the avocado pesto over the zucchini noodles and toss gently until everything is well coated.
- Serve immediately: For the best texture, serve the zucchini noodles right away. If you let them sit, they’ll release water and get a bit soggy.
The creamy avocado pesto clings to every strand of zucchini, giving you a dish that’s rich yet refreshing. Try topping it with a sprinkle of extra Parmesan and a few pine nuts for crunch, or add some grilled chicken for a protein boost.
Turkey and Spinach Stuffed Bell Peppers
Mmm, let me tell you about these Turkey and Spinach Stuffed Bell Peppers – they’re like a cozy hug in food form, perfect for when you want something hearty but not too heavy. Plus, they’re a sneaky way to get some greens in, and who doesn’t love that?
Ingredients
- 4 large bell peppers, any color, tops cut off and seeds removed
- 1 lb ground turkey
- 2 cups fresh spinach, roughly chopped
- 1 cup cooked quinoa
- 1/2 cup shredded mozzarella cheese
- 1/4 cup grated Parmesan cheese
- 1 tbsp olive oil
- 1 tsp garlic powder
- 1 tsp onion powder
- 1/2 tsp salt
- 1/2 tsp black pepper
- 1/2 tsp dried oregano
Instructions
- Preheat oven: Heat your oven to 375°F (190°C) to get it ready for the peppers.
- Cook turkey: In a large skillet over medium heat, cook the ground turkey until no pink remains, about 5-7 minutes. Tip: Break it up as it cooks for even browning.
- Add spinach: Toss in the spinach and cook until just wilted, about 2 minutes. It’ll shrink down a lot, don’t worry!
- Mix ingredients: Off the heat, stir in the quinoa, mozzarella, Parmesan, olive oil, garlic powder, onion powder, salt, pepper, and oregano. Tip: Let the mixture cool slightly so the cheese doesn’t melt too soon.
- Stuff peppers: Spoon the turkey mixture into the hollowed-out bell peppers, packing it in gently. Tip: Stand them up in a baking dish so they don’t tip over.
- Bake: Pop them in the oven for 25-30 minutes, until the peppers are tender and the filling is heated through.
These stuffed peppers come out with the perfect balance of tender and crisp, and the filling is savory with a cheesy, herby kick. Try serving them with a dollop of sour cream or a sprinkle of fresh basil for an extra flavor boost.
Cauliflower Rice Stir-Fry with Shrimp
Believe it or not, this Cauliflower Rice Stir-Fry with Shrimp is about to become your weeknight hero—quick, healthy, and packed with flavors that’ll make you forget it’s actually good for you.
Ingredients
- 1 lb shrimp, peeled and deveined
- 4 cups cauliflower rice
- 2 tbsp olive oil
- 1 tbsp minced garlic
- 1 tbsp ginger, freshly grated
- 1/2 cup bell peppers, diced
- 1/2 cup carrots, julienned
- 2 tbsp soy sauce
- 1 tbsp sesame oil
- 1/2 tsp red pepper flakes
- 2 green onions, sliced
- 1 tbsp sesame seeds
Instructions
- Prep the shrimp: Pat the shrimp dry with paper towels to ensure they get a nice sear.
- Heat the pan: In a large skillet, heat 1 tbsp olive oil over medium-high heat until shimmering, about 2 minutes.
- Sear the shrimp: Add the shrimp to the skillet, cooking for 2 minutes per side until pink and opaque. Remove and set aside.
- Cook the veggies: In the same skillet, add the remaining olive oil, garlic, and ginger. Sauté for 30 seconds until fragrant, then add bell peppers and carrots. Cook for 3 minutes until slightly softened.
- Add cauliflower rice: Stir in the cauliflower rice, breaking up any clumps, and cook for 5 minutes until tender.
- Season the dish: Mix in soy sauce, sesame oil, and red pepper flakes, stirring well to combine all the flavors.
- Combine everything: Return the shrimp to the skillet, tossing everything together for 1 minute to heat through.
- Garnish and serve: Sprinkle with green onions and sesame seeds before serving hot.
The cauliflower rice soaks up all the savory goodness, while the shrimp stays juicy and tender. Try serving it in lettuce cups for a fun, hands-on meal that’s sure to impress.
Greek Yogurt and Berry Parfait
Ever find yourself staring into the fridge at 3 PM, craving something sweet but not wanting to undo your entire day? Let me introduce you to the Greek Yogurt and Berry Parfait—your new go-to snack that’s as easy to make as it is delicious.
Ingredients
- 1 cup Greek yogurt (go for full-fat for extra creaminess)
- 1/2 cup mixed berries (fresh or frozen, but thaw if using frozen)
- 1/4 cup granola (the chunkier, the better for texture)
- 1 tbsp honey (because a little sweetness never hurt anybody)
- 1/2 tsp vanilla extract (for that hint of fancy)
Instructions
- Layer the yogurt: Spoon half of the Greek yogurt into a clear glass or bowl. Seeing the layers is half the fun, so don’t skip this part.
- Add the berries: Scatter half of the mixed berries over the yogurt. If you’re using frozen berries, make sure they’re thawed to avoid icy surprises.
- Sprinkle granola: Sprinkle half of the granola over the berries. This adds a nice crunch that’ll make you forget you’re eating something healthy.
- Drizzle honey: Drizzle half of the honey over the granola. This is where the magic happens, folks.
- Repeat the layers: Repeat the layers with the remaining yogurt, berries, granola, and honey. It’s like building a delicious little tower of joy.
- Finish with vanilla: Add the vanilla extract on top. It’s the secret ingredient that ties everything together.
The first spoonful is a creamy, crunchy, sweet-and-tart revelation. Serve it in a mason jar for that Instagram-worthy picnic vibe, or just eat it straight from the bowl—no judgment here.
Roasted Sweet Potato and Kale Salad
Perfect for those days when you’re craving something hearty but still want to keep it on the healthier side, this Roasted Sweet Potato and Kale Salad is a game-changer. It’s like autumn decided to throw a party in your mouth, and everyone’s invited.
Ingredients
- 2 medium sweet potatoes, peeled and diced into 1-inch cubes
- 1 bunch kale, stems removed and leaves torn into bite-sized pieces
- 2 tbsp olive oil
- 1/2 tsp salt
- 1/4 tsp black pepper
- 1/2 tsp garlic powder
- 1/4 tsp smoked paprika
- 1 tbsp maple syrup
- 1/4 cup crumbled feta cheese
- 1/4 cup chopped pecans
Instructions
- Preheat oven: Preheat your oven to 400°F (200°C). This ensures your sweet potatoes get perfectly crispy.
- Toss sweet potatoes: In a large bowl, toss the diced sweet potatoes with 1 tbsp olive oil, salt, black pepper, garlic powder, and smoked paprika until evenly coated.
- Roast sweet potatoes: Spread the sweet potatoes on a baking sheet in a single layer. Roast for 25-30 minutes, flipping halfway through, until they’re golden and fork-tender.
- Massage kale: While the sweet potatoes roast, place the kale in a large bowl. Drizzle with the remaining 1 tbsp olive oil and massage the kale for 2-3 minutes until it softens and darkens in color.
- Add maple syrup: Drizzle the maple syrup over the roasted sweet potatoes and toss to coat. This adds a subtle sweetness that balances the smokiness.
- Combine ingredients: Add the roasted sweet potatoes to the bowl with the kale. Sprinkle with feta cheese and chopped pecans, then gently toss to combine.
The result? A salad that’s a delightful mix of crispy, creamy, and crunchy, with a sweet and smoky flavor profile that’s downright addictive. Serve it warm for maximum comfort, or pack it cold for a next-day lunch that actually excites you.
Lentil and Vegetable Soup
Zesty, hearty, and packed with nutrients, this Lentil and Vegetable Soup is your go-to comfort dish that doesn’t skimp on flavor or simplicity. Perfect for those chilly evenings or when you’re just in need of a wholesome meal that feels like a hug in a bowl.
Ingredients
- 1 tbsp olive oil
- 1 medium onion, diced
- 2 carrots, peeled and chopped
- 2 celery stalks, chopped
- 3 garlic cloves, minced
- 1 tsp ground cumin
- 1/2 tsp smoked paprika
- 1 cup dried green lentils, rinsed
- 4 cups vegetable broth
- 1 can (14.5 oz) diced tomatoes, undrained
- 1 bay leaf
- Salt and pepper to taste
- 2 cups fresh spinach, roughly chopped
- 1 tbsp lemon juice
Instructions
- Heat the oil: In a large pot, heat 1 tbsp olive oil over medium heat until shimmering.
- Sauté the veggies: Add the diced onion, chopped carrots, and celery. Cook for about 5 minutes, until the onions are translucent. Tip: Don’t rush this step; letting the veggies soften properly builds the soup’s flavor base.
- Add garlic and spices: Stir in the minced garlic, ground cumin, and smoked paprika. Cook for another minute until fragrant.
- Combine lentils and liquids: Add the rinsed lentils, vegetable broth, diced tomatoes with their juice, and the bay leaf. Bring to a boil.
- Simmer: Reduce heat to low, cover, and simmer for 25 minutes, or until the lentils are tender. Tip: Check the soup halfway through to give it a stir and ensure the lentils aren’t sticking to the bottom.
- Season and finish: Remove the bay leaf. Stir in the fresh spinach and lemon juice, cooking just until the spinach wilts. Season with salt and pepper to taste. Tip: The lemon juice brightens the whole dish, so don’t skip it!
This soup turns out luxuriously thick with a smoky depth from the paprika, while the spinach adds a fresh pop of color and texture. Serve it with a slice of crusty bread for dipping, or top with a dollop of yogurt for a creamy contrast.
Grilled Turkey Burgers with Lettuce Wraps
Ever tried to make turkey burgers that don’t taste like cardboard? Well, buckle up, because we’re about to turn that lean ground turkey into the juiciest, most flavor-packed burgers you’ve ever had, all wrapped up in crisp lettuce for that perfect crunch.
Ingredients
- 1 lb ground turkey (93% lean)
- 1/4 cup breadcrumbs
- 1 large egg, beaten
- 2 tbsp Worcestershire sauce
- 1 tsp garlic powder
- 1 tsp onion powder
- 1/2 tsp salt
- 1/2 tsp black pepper
- 1 tbsp olive oil
- 8 large lettuce leaves (iceberg or romaine)
- Your favorite burger toppings (sliced tomato, avocado, etc.)
Instructions
- Mix the ingredients: In a large bowl, combine ground turkey, breadcrumbs, beaten egg, Worcestershire sauce, garlic powder, onion powder, salt, and pepper. Mix just until combined—overmixing can make the burgers tough.
- Form the patties: Divide the mixture into 4 equal portions and shape each into a 1/2-inch thick patty. Pro tip: Make a slight indentation in the center of each patty to prevent puffing up during cooking.
- Heat the grill: Preheat your grill or grill pan to medium-high heat (about 375°F) and brush with olive oil to prevent sticking.
- Grill the burgers: Place the patties on the grill and cook for about 5-6 minutes per side, or until the internal temperature reaches 165°F. No peeking too often—let those burgers get a nice crust!
- Serve with lettuce wraps: Let the burgers rest for a couple of minutes, then wrap each in a lettuce leaf with your favorite toppings. Extra tip: A drizzle of sriracha mayo takes these to the next level.
These burgers are seriously juicy with a hint of smokiness from the grill, and the lettuce wraps add a refreshing crunch. Try stacking them with a slice of cheddar and a dollop of guacamole for an extra indulgent twist.
Steamed Broccoli with Lemon and Garlic
Zesty doesn’t even begin to cover it—this Steamed Broccoli with Lemon and Garlic is like a little sunshine on your plate, perfect for when you want something healthy but refuse to compromise on flavor. Let’s dive in, shall we?
Ingredients
- 1 large head of broccoli, cut into florets (about 4 cups)
- 2 tbsp olive oil
- 3 cloves garlic, minced
- 1 lemon, zested and juiced
- 1/2 tsp salt
- 1/4 tsp black pepper
Instructions
- Prep the broccoli: Rinse the broccoli florets under cold water and shake off the excess. No one likes soggy broccoli, so let’s keep it crisp.
- Steam to perfection: Bring a pot of water to a boil and place a steamer basket over it. Add the broccoli, cover, and steam for 5 minutes. You’re looking for bright green and just tender—poke a fork in to test.
- Sauté the garlic: While the broccoli steams, heat olive oil in a pan over medium heat. Add the minced garlic and sauté for about 1 minute, until fragrant but not browned. Burnt garlic is a no-go.
- Combine and season: Toss the steamed broccoli with the garlic oil, lemon zest, lemon juice, salt, and pepper. Mix well so every floret gets some love.
- Serve immediately: This dish is best enjoyed hot, with the lemon and garlic flavors at their peak. If you’re feeling fancy, a sprinkle of parmesan or red pepper flakes can take it up a notch.
The broccoli comes out perfectly tender-crisp, with the garlic and lemon playing off each other like they were made to be together. Try it alongside grilled chicken or tossed into pasta for an easy upgrade.
Chia Seed Pudding with Almond Milk
Wow, have you ever wanted a breakfast that feels like dessert but is actually good for you? Let me introduce you to chia seed pudding with almond milk — it’s like a hug in a bowl, but way easier to make than your grandma’s casserole.
Ingredients
- 1/4 cup chia seeds
- 1 cup unsweetened almond milk
- 1 tbsp maple syrup
- 1/2 tsp vanilla extract
- A pinch of salt
Instructions
- Mix the base: In a medium bowl, whisk together chia seeds, almond milk, maple syrup, vanilla extract, and a pinch of salt until well combined.
- Let it sit: Cover the bowl and refrigerate for at least 4 hours, or overnight. Tip: Stir the mixture after 30 minutes to prevent clumping.
- Check consistency: After chilling, give the pudding a good stir. If it’s too thick, add a splash more almond milk to reach your desired consistency.
- Serve and enjoy: Spoon the pudding into bowls and top with your favorite fruits, nuts, or a drizzle of honey. Tip: For an extra flavor boost, add a sprinkle of cinnamon or cocoa powder before serving.
This pudding turns out luxuriously creamy with a slight chew from the chia seeds, making every spoonful a delight. Try layering it with fresh berries and granola for a parfait that’ll make your morning routine something to look forward to.
Baked Cod with Tomato and Basil
Okay, so you’re staring at a piece of cod like it’s gonna tell you what to do, right? Let’s turn that fish into something that’ll make your taste buds do a little happy dance. Baked Cod with Tomato and Basil is like a hug in a dish—simple, comforting, and packed with flavors that just work. Here’s how we do it.
Ingredients
- 1 lb cod fillets, patted dry
- 2 tbsp olive oil
- 1 cup cherry tomatoes, halved
- 1/4 cup fresh basil leaves, chopped
- 2 garlic cloves, minced
- 1/2 tsp salt
- 1/4 tsp black pepper
- 1/2 tsp red pepper flakes (optional for a kick)
- 1 lemon, sliced for garnish
Instructions
- Preheat oven: Crank that oven to 375°F because we’re about to get baking.
- Prep the fish: Lay your cod fillets in a baking dish like they’re sunbathing. Drizzle with 1 tbsp olive oil and season both sides with salt and black pepper.
- Tomato magic: In a bowl, toss the cherry tomatoes, garlic, red pepper flakes, and the remaining 1 tbsp olive oil. Spoon this juicy mix over the cod.
- Bake to perfection: Slide the dish into the oven and bake for 15-20 minutes. You’ll know it’s done when the fish flakes easily with a fork.
- Basil finale: Sprinkle the chopped basil over the top and add lemon slices for that Instagram-worthy finish.
The cod comes out tender and flaky, with the tomatoes bursting with sweetness against the slight heat from the pepper flakes. Serve it over a bed of quinoa or with crusty bread to soak up all those delicious juices. Trust me, it’s a game-changer.
Cucumber and Avocado Salad
Unbelievably easy and refreshing, this Cucumber and Avocado Salad is your go-to for those days when you want something light yet satisfying without spending hours in the kitchen. Perfect for picnics, potlucks, or just because you deserve a little crunch in your life.
Ingredients
- 2 medium cucumbers, thinly sliced
- 1 large avocado, diced
- 1/4 cup red onion, thinly sliced
- 2 tbsp olive oil
- 1 tbsp lemon juice
- 1/2 tsp salt
- 1/4 tsp black pepper
- 1 tbsp fresh dill, chopped
Instructions
- Prep the veggies: In a large bowl, combine the thinly sliced cucumbers, diced avocado, and thinly sliced red onion.
- Make the dressing: In a small bowl, whisk together the olive oil, lemon juice, salt, and black pepper until well combined.
- Combine and toss: Pour the dressing over the cucumber and avocado mixture. Gently toss to coat all the ingredients evenly without mashing the avocado.
- Add the herbs: Sprinkle the chopped fresh dill over the salad and give it one final gentle toss to distribute the herbs throughout.
- Chill for flavor: Let the salad sit in the refrigerator for at least 15 minutes before serving to allow the flavors to meld together beautifully.
The crispness of the cucumbers paired with the creamy avocado and the tangy dressing makes every bite a delight. Try serving it on a bed of greens or alongside grilled chicken for a fuller meal.
Spaghetti Squash with Marinara Sauce
Believe it or not, turning a spaghetti squash into a noodle-like masterpiece is easier than convincing your cat to take a bath. And when you toss it with a homemade marinara sauce? Chef’s kiss. Let’s get into it.
Ingredients
- 1 medium spaghetti squash (about 3 lbs)
- 2 tbsp olive oil
- 1/2 tsp salt
- 1/4 tsp black pepper
- 2 cups marinara sauce (store-bought or homemade)
- 1/4 cup grated Parmesan cheese
- 1 tbsp chopped fresh basil
Instructions
- Preheat oven: Heat your oven to 400°F. This ensures your squash cooks evenly and gets those perfect, fork-tender strands.
- Prep squash: Cut the spaghetti squash in half lengthwise. Scoop out the seeds and guts with a spoon—think of it as Halloween prep, but tastier.
- Season: Drizzle the cut sides with olive oil and sprinkle with salt and pepper. Rub it all over for even coverage.
- Roast: Place the halves cut-side down on a baking sheet. Roast for 40-45 minutes, or until the flesh is easily pierced with a fork.
- Shred: Let the squash cool for a few minutes, then use a fork to scrape the flesh into strands. It’s oddly satisfying, like unraveling a yarn ball but edible.
- Heat sauce: Warm the marinara sauce in a saucepan over medium heat for about 5 minutes, stirring occasionally. Tip: A splash of red wine in the sauce? *Chef’s kiss*.
- Combine: Toss the spaghetti squash strands with the warm marinara sauce. Tip: Don’t drown the squash—start with half the sauce and add more if needed.
- Garnish: Sprinkle with Parmesan cheese and fresh basil before serving. Tip: For extra flair, serve it in the squash shells. Instant Instagram fame.
The texture? Al dente meets veggie, with a sauce that clings just right. And the flavor? Like your favorite spaghetti night, but with a veggie twist. Try topping it with meatballs or keeping it veggie with a side of garlic bread. Either way, it’s a win.
Grilled Chicken and Vegetable Skewers
Wow, have you ever had one of those days where you just want something delicious but don’t want to spend hours in the kitchen? Grilled Chicken and Vegetable Skewers are your answer—easy, flavorful, and perfect for those lazy summer evenings.
Ingredients
- 1.5 lbs boneless, skinless chicken breasts, cut into 1-inch cubes
- 2 tbsp olive oil
- 2 tbsp soy sauce
- 1 tbsp honey
- 1 tsp garlic powder
- 1 tsp smoked paprika
- 1/2 tsp salt
- 1/4 tsp black pepper
- 1 red bell pepper, cut into 1-inch pieces
- 1 yellow bell pepper, cut into 1-inch pieces
- 1 red onion, cut into 1-inch pieces
- 8 wooden skewers, soaked in water for 30 minutes
Instructions
- Marinate the chicken: In a large bowl, whisk together olive oil, soy sauce, honey, garlic powder, smoked paprika, salt, and black pepper. Add chicken cubes and toss to coat. Let marinate for at least 30 minutes in the fridge.
- Prep the grill: Preheat your grill to medium-high heat (about 375°F to 400°F).
- Skewer the goods: Thread marinated chicken, bell peppers, and onion onto the soaked skewers, alternating between ingredients.
- Grill to perfection: Place skewers on the grill. Cook for 10-12 minutes, turning every 3-4 minutes, until chicken is cooked through (internal temperature of 165°F) and veggies are charred.
- Rest before serving: Let skewers rest for 5 minutes off the grill to let juices redistribute.
The skewers come off the grill with a smoky sweetness from the marinade, and the veggies add a crisp contrast. Serve them over a bed of quinoa or with a side of garlic aioli for dipping, and watch them disappear.
Oven-Roasted Brussels Sprouts with Balsamic Glaze
Man, if you think Brussels sprouts are just those sad, mushy things you had to eat as a kid, you’re in for a treat. These oven-roasted beauties with a sweet and tangy balsamic glaze will make you a sprout believer in no time.
Ingredients
- 1 lb Brussels sprouts, trimmed and halved
- 2 tbsp olive oil
- 1/2 tsp salt
- 1/4 tsp black pepper
- 2 tbsp balsamic vinegar
- 1 tbsp honey
Instructions
- Preheat oven: Crank your oven to 400°F (200°C) to get it nice and hot for roasting.
- Toss sprouts: In a big bowl, mix the Brussels sprouts with olive oil, salt, and pepper until they’re all shiny and seasoned.
- Roast to perfection: Spread them out on a baking sheet in a single layer and roast for 20-25 minutes, flipping halfway, until they’re crispy and golden brown.
- Make glaze: While the sprouts are doing their thing, whisk together balsamic vinegar and honey in a small saucepan over medium heat. Let it simmer for about 3-5 minutes until it thickens slightly.
- Glaze and serve: Drizzle the balsamic glaze over the roasted sprouts right before serving, and watch them disappear.
These sprouts come out with the perfect combo of crispy edges and tender centers, with the glaze adding just the right amount of sweetness to balance their natural bitterness. Try topping them with some crumbled bacon or shaved Parmesan for an extra flavor punch.
Egg White and Spinach Omelette
Alright, let’s dive into making this Egg White and Spinach Omelette that’s not only gonna kickstart your day but also make you feel like a breakfast champ. A simple, fluffy omelette packed with greens is what we’re aiming for, and trust me, it’s easier than you think.
Ingredients
- 3 large egg whites
- 1 cup fresh spinach, roughly chopped
- 1/4 cup shredded mozzarella cheese
- 1 tbsp olive oil
- 1/8 tsp salt
- 1/8 tsp black pepper
- 1/8 tsp garlic powder
Instructions
- Prep the spinach: Give your spinach a quick chop if the leaves are too big. We want them to wilt evenly in the omelette.
- Whisk the egg whites: In a bowl, whisk the egg whites with salt, pepper, and garlic powder until they’re frothy. This is your ticket to a fluffy omelette.
- Heat the pan: Warm up a non-stick skillet over medium heat and add the olive oil. Make sure the oil coats the pan evenly to prevent sticking.
- Cook the spinach: Toss the spinach into the pan and sauté for about 1 minute until it’s just wilted. Overcooking will make it soggy, so keep an eye on it.
- Pour the eggs: Reduce the heat to low and pour the whisked egg whites over the spinach. Let it sit for a few seconds to start setting.
- Add the cheese: Sprinkle the mozzarella evenly over one half of the omelette. This is where the magic happens.
- Fold and serve: Once the edges start to lift, gently fold the omelette in half over the cheese. Let it cook for another 30 seconds to melt the cheese, then slide it onto a plate.
And there you have it—a light, fluffy omelette with just the right amount of chew from the spinach and a gooey cheese center. Perfect with a side of avocado toast or a fresh fruit salad for that extra morning boost.
Mixed Berry Smoothie with Protein Powder
Hey there, let’s whip up a Mixed Berry Smoothie with Protein Powder that’s not just a treat for your taste buds but also a sneaky way to get some extra protein in your day. Perfect for those mornings when you’re half-asleep but still want something delicious and nutritious.
Ingredients
- 1 cup mixed berries (frozen, for that icy thickness)
- 1 banana (peeled and sliced, because smoothies love bananas)
- 1 scoop vanilla protein powder (about 30g, pick your favorite brand)
- 1 cup almond milk (unsweetened, unless you like it sweet)
- 1 tbsp honey (for a touch of sweetness, optional but recommended)
- 1/2 cup Greek yogurt (for creaminess and a protein boost)
- 1 tsp chia seeds (because we’re fancy and healthy)
Instructions
- Prep your blender: Grab your blender and make sure it’s clean. Nobody wants last night’s dinner in their smoothie.
- Add the liquids first: Pour in the almond milk and Greek yogurt. This helps everything blend smoothly without sticking.
- Toss in the fruits: Add the mixed berries and banana slices. Frozen berries work best for a thick texture.
- Sprinkle the powders: Add the protein powder and chia seeds. If you’re using honey, drizzle it in now.
- Blend it up: Start on low speed, then gradually increase to high. Blend for about 30 seconds or until everything is smooth and creamy.
- Check the consistency: If it’s too thick, add a splash more almond milk. Too thin? Throw in a few more berries.
- Serve immediately: Pour into your favorite glass and enjoy right away for the best texture and flavor.
This smoothie is creamy, packed with flavor, and has just the right amount of sweetness. Try topping it with a few fresh berries or a sprinkle of granola for an extra crunch.
Grilled Asparagus with Lemon Zest
Picture this: it’s a breezy evening, and you’re craving something light yet bursting with flavor. That’s where this grilled asparagus with lemon zest comes in—it’s the perfect side to elevate any meal, and guess what? It’s a breeze to make.
Ingredients
- 1 bunch of asparagus, trimmed
- 2 tablespoons olive oil
- 1 teaspoon salt
- 1/2 teaspoon black pepper
- Zest of 1 lemon
Instructions
- Preheat the grill: Fire up your grill to medium-high heat, aiming for about 400°F. This ensures those beautiful grill marks without charring the asparagus to a crisp.
- Toss with love: In a large bowl, drizzle the asparagus with olive oil, then sprinkle with salt and pepper. Toss gently to coat each spear evenly. Tip: Use your hands for this—it’s the best way to ensure every piece gets its fair share of flavor.
- Grill to perfection: Lay the asparagus on the grill perpendicular to the grates to prevent them from falling through. Grill for 2-3 minutes per side, until they’re tender with a slight crunch. Tip: Don’t wander off—asparagus cooks fast, and nobody likes a limp spear.
- Zest it up: Once off the grill, immediately zest the lemon over the hot asparagus. The heat helps the zest release its oils, packing a punch of brightness. Tip: Use a microplane for the finest zest that’ll distribute evenly.
The result? Asparagus that’s smoky with a vibrant kick from the lemon, tender yet with just enough bite. Try serving it atop a creamy risotto or alongside a juicy steak for a meal that sings.
Conclusion
With these 20 healthy and delicious recipes, your 6-week body makeover just got a whole lot easier—and tastier! Whether you’re craving something hearty or light, there’s a dish here to keep you on track. Give them a try, and let us know which ones you love in the comments below. Don’t forget to share this roundup on Pinterest to inspire others on their weight-loss journey. Happy cooking!

I’m Brandon, the face behind the recipes. As a dedicated food enthusiast, I love experimenting with flavors and sharing my culinary adventures with you.