Eating well with diabetes doesn’t have to be complicated—or time-consuming! Whether you’re craving cozy comfort food, fresh seasonal dishes, or quick weeknight dinners, these 20 easy 4-ingredient diabetic recipes prove that healthy eating can be simple and delicious. No fuss, no long ingredient lists—just wholesome meals that fit your lifestyle. Ready to simplify your cooking? Let’s dive in!
Sugar-Free Peanut Butter Cookies
Hey there! So, you’re in the mood for something sweet but trying to keep it sugar-free? I’ve got you covered with these peanut butter cookies that are so good, you won’t even miss the sugar. Let’s get baking!
Ingredients
- 1 cup creamy peanut butter (no sugar added)
- 1 large egg
- 1/2 tsp vanilla extract
- 1/4 tsp baking soda
- A pinch of salt
Instructions
- Preheat oven: Start by preheating your oven to 350°F (175°C). This ensures your cookies bake evenly.
- Mix ingredients: In a medium bowl, combine the peanut butter, egg, vanilla extract, baking soda, and salt. Stir until everything is well mixed and you have a smooth dough.
- Shape cookies: Roll the dough into 1-inch balls and place them on a baking sheet lined with parchment paper. Flatten each ball slightly with a fork, making a criss-cross pattern.
- Bake: Pop them in the oven for about 10-12 minutes, or until the edges are just starting to turn golden. Don’t overbake, or they’ll be too dry.
- Cool: Let the cookies cool on the baking sheet for 5 minutes before transferring them to a wire rack to cool completely. They’ll firm up as they cool.
These cookies are delightfully chewy with a rich peanut butter flavor that’s not too sweet. Perfect with a glass of almond milk or crumbled over some sugar-free ice cream for an extra treat!
Zucchini Noodles with Garlic and Olive Oil
Unbelievably easy and downright delicious, this zucchini noodles with garlic and olive oil dish is your ticket to a quick, healthy meal that doesn’t skimp on flavor. Let’s turn those zucchinis into something magical, shall we?
Ingredients
- 2 medium zucchinis, spiralized into noodles
- 3 tbsp extra virgin olive oil
- 4 garlic cloves, minced
- 1/2 tsp red pepper flakes
- Salt, 1/4 tsp
- Black pepper, 1/4 tsp
- 1/4 cup grated Parmesan cheese
- 2 tbsp fresh parsley, chopped
Instructions
- Prep the zucchini: Spiralize the zucchinis into noodles and set aside. No spiralizer? A julienne peeler works in a pinch!
- Heat the oil: In a large skillet over medium heat, warm the olive oil until it shimmers, about 1 minute.
- Sauté the garlic: Add the minced garlic and red pepper flakes to the oil. Cook until the garlic is golden, about 30 seconds, stirring constantly to prevent burning.
- Cook the noodles: Toss in the zucchini noodles, salt, and black pepper. Cook for 2-3 minutes, just until they’re tender but still have a bit of crunch. Overcooking turns them mushy, so keep an eye out!
- Finish with toppings: Remove from heat and sprinkle with Parmesan cheese and parsley. Give it a quick toss to combine.
The zucchini noodles should be perfectly al dente, with a garlicky, slightly spicy kick that’s mellowed out by the Parmesan. Serve it straight from the skillet for a rustic touch, or plate it up fancy with a sprinkle of extra cheese on top.
Avocado and Egg Breakfast Bowl
Hey there! Let’s dive into making this Avocado and Egg Breakfast Bowl that’s gonna kickstart your day like a champ. It’s creamy, it’s protein-packed, and oh boy, it’s ridiculously easy to whip up.
Ingredients
- 1 ripe avocado, halved and pitted
- 2 large eggs
- 1 tbsp olive oil
- 1/4 tsp salt
- 1/4 tsp black pepper
- 1/4 tsp red pepper flakes
- 1 tbsp chopped fresh cilantro
- 1/2 lime, juiced
Instructions
- Prep the avocado: Scoop out the avocado flesh into a bowl, leaving a little around the edges to keep the shell intact for serving.
- Season the avocado: Drizzle the lime juice over the avocado to prevent browning and sprinkle with salt, black pepper, and red pepper flakes. Mash lightly with a fork.
- Cook the eggs: Heat olive oil in a non-stick skillet over medium heat. Crack the eggs into the skillet and cook for about 3 minutes for runny yolks, or until your desired doneness.
- Assemble the bowl: Spoon the mashed avocado back into the shells. Top each with a cooked egg.
- Garnish and serve: Sprinkle chopped cilantro on top for a fresh kick. Serve immediately.
The creaminess of the avocado pairs perfectly with the rich, runny egg yolk, creating a symphony of flavors in your mouth. Try adding a sprinkle of feta cheese for an extra tangy twist!
Cucumber and Tomato Salad with Lemon Dressing
Now, if you’re looking for a salad that’s as refreshing as a dive into the pool on a hot summer day, this Cucumber and Tomato Salad with Lemon Dressing is your go-to. It’s crisp, it’s zesty, and it’s ridiculously easy to throw together when you’re too busy to cook but still want something that tastes like you put in effort.
Ingredients
- 2 cups diced cucumbers (about 1 large cucumber, seeds scooped out)
- 2 cups cherry tomatoes, halved
- 1/4 cup red onion, thinly sliced
- 2 tbsp extra virgin olive oil
- 1 tbsp lemon juice (freshly squeezed, please)
- 1/2 tsp salt
- 1/4 tsp black pepper
- 1/4 tsp dried oregano
Instructions
- Prep the veggies: In a large bowl, toss together the diced cucumbers, halved cherry tomatoes, and thinly sliced red onion.
- Whisk the dressing: In a small bowl, whisk together the extra virgin olive oil, lemon juice, salt, black pepper, and dried oregano until well combined.
- Combine and toss: Pour the dressing over the veggies and gently toss everything together until the veggies are evenly coated. Tip: Let it sit for 5 minutes before serving to let the flavors meld together beautifully.
- Serve immediately: Enjoy this salad fresh for the best texture and flavor. Tip: If you’re making it ahead, hold off on adding the dressing until right before serving to keep the veggies crisp.
This salad is a symphony of crunch and zest, with the lemon dressing bringing a bright pop that’ll make your taste buds sing. Try serving it alongside grilled chicken or fish for a meal that feels fancy without the fuss, or just eat it straight out of the bowl—we won’t judge.
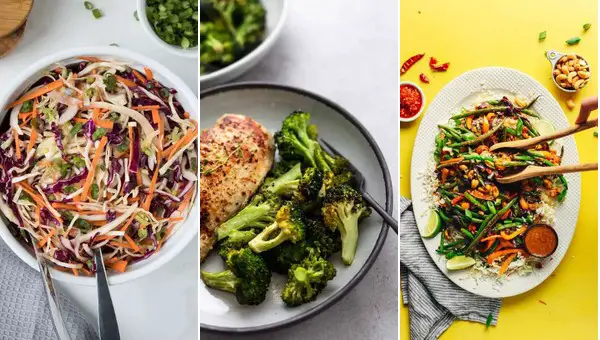
Grilled Chicken with Steamed Broccoli
Kick off your shoes and let’s make a dish that’s as easy as it is delicious—Grilled Chicken with Steamed Broccoli. Perfect for those nights when you want something healthy but don’t feel like spending hours in the kitchen.
Ingredients
– 2 boneless, skinless chicken breasts (about 1 lb total)
– 2 cups broccoli florets
– 2 tbsp olive oil
– 1 tsp garlic powder
– 1 tsp smoked paprika
– 1/2 tsp salt
– 1/4 tsp black pepper
– 1 tbsp lemon juice
Instructions
1. Prep the chicken: Pound the chicken breasts to an even thickness of about 1/2 inch for even cooking.
2. Season the chicken: Rub the chicken with 1 tbsp olive oil, then sprinkle evenly with garlic powder, smoked paprika, salt, and black pepper.
3. Grill the chicken: Heat your grill to medium-high (about 375°F). Grill the chicken for 6-7 minutes per side, or until the internal temperature reaches 165°F.
4. Steam the broccoli: While the chicken cooks, steam the broccoli florets over boiling water for 5 minutes, or until bright green and tender-crisp.
5. Finish with lemon: Drizzle the steamed broccoli with the remaining 1 tbsp olive oil and 1 tbsp lemon juice, tossing to coat.
6. Rest the chicken: Let the chicken rest for 5 minutes before slicing to keep all those juicy flavors locked in.
This dish is all about the contrast—the smoky, juicy chicken against the bright, crisp broccoli. Try serving it over a bed of quinoa for an extra protein punch, or chop the chicken and toss it with the broccoli for a hearty salad.
Spinach and Feta Stuffed Mushrooms
Ever find yourself staring at a pack of mushrooms in the fridge, wondering how to turn them into something that’ll make your taste buds do a happy dance? Well, buckle up, because these Spinach and Feta Stuffed Mushrooms are about to become your new go-to appetizer that’s as easy to make as it is delicious.
Ingredients
- 12 large white mushrooms, stems removed and finely chopped
- 1 tbsp olive oil
- 2 cloves garlic, minced
- 1 cup fresh spinach, chopped
- 1/2 cup feta cheese, crumbled
- 1/4 cup breadcrumbs
- 1/4 tsp salt
- 1/4 tsp black pepper
- 1/4 tsp dried oregano
Instructions
- Prep the mushrooms: Preheat your oven to 375°F. Carefully remove the stems from the mushrooms and chop them finely. Set the mushroom caps aside on a baking sheet.
- Sauté the filling: Heat olive oil in a pan over medium heat. Add the chopped mushroom stems and garlic, sautéing until soft, about 3 minutes. Toss in the spinach and cook until just wilted, another 2 minutes.
- Mix the stuffing: Remove the pan from heat. Stir in the feta, breadcrumbs, salt, pepper, and oregano until everything’s nicely combined. Tip: Let the mixture cool a bit before stuffing to make it easier to handle.
- Stuff and bake: Spoon the filling into each mushroom cap, packing it lightly. Bake for 20 minutes, or until the mushrooms are tender and the tops are golden. Tip: For an extra crispy top, broil for the last 2 minutes.
- Serve warm: Let them cool for a minute before serving because that cheese will be molten lava hot. Tip: A drizzle of balsamic glaze right before serving adds a sweet tang that’s just *chef’s kiss*.
These stuffed mushrooms come out with a juicy bite, the spinach and feta melding into a creamy, tangy filling that’s downright addictive. Perfect for popping straight into your mouth or fancying up on a platter with some prosciutto ribbons.
Berry and Greek Yogurt Parfait
Just imagine starting your day with something that’s not only a breeze to whip up but also packs a punch of flavor and nutrition. That’s exactly what this Berry and Greek Yogurt Parfait is all about—layers of creamy, tangy yogurt and sweet, juicy berries that’ll make your taste buds dance.
Ingredients
- 1 cup Greek yogurt (plain, for that tangy kick)
- 1/2 cup granola (for that irresistible crunch)
- 1 cup mixed berries (strawberries, blueberries, and raspberries, because why choose?)
- 1 tbsp honey (for a drizzle of sweetness)
- 1/2 tsp vanilla extract (to elevate the yogurt)
Instructions
- Prep the berries: Wash your mixed berries under cold water and pat them dry. If you’re using strawberries, slice them into thin pieces.
- Mix the yogurt: In a small bowl, combine the Greek yogurt with vanilla extract. Stir until the vanilla is fully incorporated.
- Layer the parfait: Start with a layer of the vanilla-infused yogurt at the bottom of your glass. Add a layer of mixed berries, then sprinkle a layer of granola. Repeat the layers until the glass is full, finishing with a drizzle of honey on top.
- Serve immediately: Dig in right away to enjoy the contrast between the creamy yogurt, juicy berries, and crunchy granola. If you let it sit, the granola will soften, which isn’t the end of the world, but that crunch is everything.
The beauty of this parfait lies in its layers—each spoonful is a little surprise. And if you’re feeling fancy, top it with a mint leaf for that Instagram-worthy finish.
Cauliflower Rice Stir-Fry
Ever find yourself staring into the fridge, hoping something quick and healthy will magically appear? Well, today’s your lucky day because this Cauliflower Rice Stir-Fry is about to become your go-to for those ‘I need dinner now’ moments.
Ingredients
- 1 large head of cauliflower, riced (about 4 cups)
- 2 tbsp olive oil
- 1 cup diced carrots
- 1 cup diced bell peppers
- 2 cloves garlic, minced
- 1 tbsp soy sauce
- 1 tsp ginger, grated
- 1/2 tsp red pepper flakes
- 2 eggs, beaten
- Salt to taste
Instructions
- Prep the veggies: Start by ricing your cauliflower if you haven’t bought it pre-riced. Dice the carrots and bell peppers into small, even pieces for uniform cooking.
- Heat the pan: Warm the olive oil in a large skillet over medium-high heat. You’ll know it’s ready when the oil shimmers but isn’t smoking.
- Sauté the aromatics: Add the garlic and ginger to the pan, stirring for about 30 seconds until fragrant. Tip: Don’t let them sit too long or they’ll burn!
- Cook the veggies: Toss in the carrots and bell peppers, cooking for 5 minutes until they start to soften but still have a bit of crunch.
- Add the cauliflower: Mix in the riced cauliflower, soy sauce, and red pepper flakes. Stir-fry for another 5 minutes. Tip: Keep the heat high to avoid soggy cauliflower.
- Scramble the eggs: Push the veggie mix to one side of the pan, pour in the beaten eggs, and scramble until just set. Then, mix everything together.
- Season and serve: Give it a quick taste and add salt if needed. Serve hot for a dish that’s packed with flavor and has the perfect mix of textures—crunchy veggies, tender cauliflower, and fluffy eggs. Try topping it with a fried egg for extra decadence!
Baked Salmon with Asparagus
Perfect for those nights when you want something fancy but don’t feel like putting in too much effort, this baked salmon with asparagus is a game-changer. It’s all about letting the oven do the heavy lifting while you kick back, and the result? A dish that’s as delicious as it is easy.
Ingredients
- 1 lb salmon fillet, skin-on
- 1 bunch asparagus, woody ends trimmed
- 2 tbsp olive oil
- 1 tsp garlic powder
- 1 tsp onion powder
- 1/2 tsp smoked paprika
- 1/2 tsp salt
- 1/4 tsp black pepper
- 1 lemon, sliced
Instructions
- Preheat oven: Crank your oven to 400°F (200°C) to get it nice and toasty.
- Prep salmon: Place the salmon skin-side down on a baking sheet lined with parchment paper. Drizzle with 1 tbsp olive oil and sprinkle evenly with garlic powder, onion powder, smoked paprika, salt, and black pepper.
- Arrange asparagus: Toss the asparagus with the remaining 1 tbsp olive oil and a pinch of salt, then lay them out around the salmon on the baking sheet.
- Add lemon: Top the salmon with lemon slices for that extra zing.
- Bake to perfection: Slide the baking sheet into the oven and bake for 12-15 minutes, or until the salmon flakes easily with a fork and the asparagus is tender-crisp.
- Rest before serving: Let the salmon sit for a couple of minutes after baking to let all those juices redistribute.
The salmon comes out melt-in-your-mouth tender with a hint of smokiness, while the asparagus adds a fresh crunch. Serve it over a bed of quinoa or with a side of crusty bread to soak up all the delicious juices.
Cottage Cheese and Pineapple Snack
Okay, so you’re staring into your fridge, and there’s that tub of cottage cheese you bought with grand plans of being healthy, and now it’s just… sitting there. Let’s turn that sad scene into a snack that’s actually exciting—cottage cheese and pineapple, a combo that’s weirdly perfect, like socks with sandals but in a good way.
Ingredients
- 1 cup cottage cheese (go for the small curd, it’s just better here)
- 1/2 cup fresh pineapple chunks (about 1/2 inch pieces, because nobody wants a mouthful)
- 1 tbsp honey (the runny kind, not the stuff that’s basically a sugar brick)
- A pinch of salt (trust me, it makes the sweet pop)
Instructions
- Prep the pineapple: If you’re using fresh pineapple, chop it into those 1/2 inch chunks. If it’s pre-cut, give it a quick check for any rogue giant pieces.
- Mix it up: In a bowl, combine the cottage cheese, pineapple chunks, honey, and that pinch of salt. Stir gently—you’re not trying to turn the cottage cheese into soup.
- Chill out: Pop the bowl in the fridge for about 10 minutes. This isn’t mandatory, but it lets the flavors get to know each other, and the cold makes it extra refreshing.
- Serve with style: Scoop into a bowl or, for bonus points, serve in the pineapple half if you’re feeling fancy. The contrast of creamy and juicy with a hint of sweet and salty is *chef’s kiss*.
The texture? Creamy meets juicy with a little bite from the pineapple. Flavor? Sweet, salty, and a tad tangy—like a tropical vacation in your mouth. Try it with a sprinkle of chili flakes if you’re into that sweet-heat thing.
Turkey Lettuce Wraps with Mustard
Okay, so you’re staring at your fridge, wondering how to make lunch exciting without turning on the oven, right? Let me introduce you to these Turkey Lettuce Wraps with Mustard – they’re crunchy, tangy, and ridiculously easy to throw together.
Ingredients
- 1 lb ground turkey
- 1 tbsp olive oil
- 1/2 cup diced onions
- 2 cloves garlic, minced
- 1 tbsp Dijon mustard
- 1 tbsp whole grain mustard
- 1/2 tsp salt
- 1/4 tsp black pepper
- 8 large lettuce leaves (like romaine or butter lettuce)
- 1/4 cup chopped fresh parsley
Instructions
- Heat the pan: Warm the olive oil in a large skillet over medium heat.
- Cook the onions: Add the diced onions to the skillet and sauté until they’re translucent, about 3 minutes.
- Add garlic: Toss in the minced garlic and cook for another 30 seconds until fragrant.
- Brown the turkey: Crumble the ground turkey into the skillet. Cook, stirring occasionally, until no pink remains, about 5 minutes.
- Mix in mustards: Stir in both Dijon and whole grain mustards, salt, and pepper. Cook for another minute to blend the flavors.
- Prep the lettuce: While the turkey cooks, wash and dry the lettuce leaves. Arrange them on a serving plate.
- Fill the wraps: Spoon the turkey mixture into the center of each lettuce leaf. Sprinkle with chopped parsley before serving.
These wraps are all about the contrast – the cool, crisp lettuce against the warm, savory turkey with a punch of mustard. Try adding a slice of avocado on top for extra creaminess, or a dash of hot sauce if you’re feeling bold.
Roasted Brussels Sprouts with Balsamic Glaze
Just when you thought Brussels sprouts couldn’t get any better, here comes this game-changer: Roasted Brussels Sprouts with Balsamic Glaze. It’s the perfect side dish that’s crispy on the outside, tender on the inside, and drizzled with a sweet and tangy glaze that’ll have you sneaking bites straight from the pan.
Ingredients
- 1.5 lbs Brussels sprouts, trimmed and halved
- 3 tbsp olive oil
- 1/2 tsp salt
- 1/4 tsp black pepper
- 1/4 cup balsamic vinegar
- 2 tbsp honey
- 1 clove garlic, minced
Instructions
- Preheat oven: Heat your oven to 400°F (200°C) to ensure it’s hot enough for roasting.
- Toss sprouts: In a large bowl, combine Brussels sprouts with olive oil, salt, and pepper until evenly coated.
- Roast to perfection: Spread the sprouts on a baking sheet in a single layer and roast for 25-30 minutes, flipping halfway, until they’re golden and crispy.
- Simmer glaze: While the sprouts roast, mix balsamic vinegar, honey, and garlic in a small saucepan over medium heat. Simmer for 5-7 minutes until it thickens slightly.
- Drizzle and serve: Once the sprouts are done, drizzle them with the balsamic glaze and toss gently to coat. Serve immediately for the best texture.
The contrast between the crispy sprouts and the sticky-sweet glaze is unreal. Try topping them with some shaved Parmesan or toasted nuts for an extra layer of flavor and crunch.
Hard-Boiled Eggs with Avocado Mash
Diving into the kitchen today to whip up something that’s both ridiculously easy and surprisingly satisfying? Let’s talk about hard-boiled eggs with avocado mash – it’s like the breakfast (or snack) version of a high-five.
Ingredients
- 4 large eggs
- 1 ripe avocado
- 1 tbsp fresh lemon juice
- 1/4 tsp salt
- 1/4 tsp black pepper
- 1 tbsp olive oil
Instructions
- Boil the eggs: Place the eggs in a saucepan and cover with water by 1 inch. Bring to a boil over high heat, then cover and remove from heat. Let sit for 12 minutes.
- Cool the eggs: Transfer the eggs to a bowl of ice water for 5 minutes to stop the cooking process. This makes peeling a breeze.
- Peel and slice: Gently tap each egg on the counter, roll to crack the shell, and peel under running water. Slice each egg in half lengthwise.
- Mash the avocado: In a bowl, mash the avocado with lemon juice, salt, and pepper until smooth but still a bit chunky.
- Assemble: Place the egg halves on a plate, spoon the avocado mash over the top, and drizzle with olive oil.
The creamy avocado mash with the firm, slightly springy eggs is a texture dream. Try sprinkling with red pepper flakes for a kick or serving on toast for a heartier bite.
Cabbage and Carrot Slaw with Apple Cider Vinegar
Now, let’s dive into making a refreshing Cabbage and Carrot Slaw with Apple Cider Vinegar that’s perfect for those hot summer days or whenever you’re craving something crisp and tangy.
Ingredients
- 4 cups shredded green cabbage
- 1 cup shredded carrots
- 1/4 cup apple cider vinegar
- 2 tbsp olive oil
- 1 tbsp honey
- 1/2 tsp salt
- 1/4 tsp black pepper
Instructions
- Prep the veggies: In a large bowl, combine the shredded cabbage and carrots. Toss them lightly to mix.
- Make the dressing: In a small bowl, whisk together the apple cider vinegar, olive oil, honey, salt, and black pepper until well combined.
- Combine and toss: Pour the dressing over the cabbage and carrot mixture. Use your hands or a pair of tongs to toss everything together, ensuring the veggies are evenly coated.
- Let it sit: Allow the slaw to sit at room temperature for about 10 minutes before serving. This lets the flavors meld together beautifully.
This slaw is wonderfully crunchy with a perfect balance of sweet and tangy flavors. Try serving it alongside grilled chicken or fish for a light and satisfying meal.
Grilled Shrimp with Zucchini Slices
Guess what? Grilled shrimp with zucchini slices is the kind of dish that makes you feel like a gourmet chef without having to put in gourmet effort. It’s fresh, it’s flavorful, and it’s got that perfect char that only a grill can give. Let’s dive in, shall we?
Ingredients
- 1 lb large shrimp, peeled and deveined
- 2 medium zucchinis, sliced into 1/4-inch rounds
- 2 tbsp olive oil
- 1 tsp garlic powder
- 1 tsp smoked paprika
- 1/2 tsp salt
- 1/4 tsp black pepper
- 1 tbsp lemon juice
Instructions
- Prep the shrimp: In a bowl, toss the shrimp with 1 tbsp olive oil, garlic powder, smoked paprika, salt, and black pepper until evenly coated. Let it sit for 10 minutes to marinate.
- Grill the zucchini: Brush the zucchini slices with the remaining olive oil and place them on a preheated grill over medium heat (about 375°F). Grill for 3-4 minutes per side until you see nice grill marks and they’re tender.
- Grill the shrimp: Add the shrimp to the grill and cook for 2-3 minutes per side until they’re pink and slightly charred. Tip: Don’t overcrowd the grill to ensure each shrimp gets that perfect sear.
- Finish with lemon: Drizzle lemon juice over the grilled shrimp and zucchini right before serving. Tip: A little zest adds an extra pop of flavor if you’re feeling fancy.
The shrimp come out juicy with a smoky kick, while the zucchini stays crisp-tender with a sweet, charred edge. Serve it over a bed of quinoa or with a side of garlic bread to soak up all those delicious juices.
Chia Seed Pudding with Almond Milk
Ready to dive into the easiest, most versatile breakfast or snack that’s been rocking my mornings? Let’s talk chia seed pudding with almond milk – it’s like dessert for breakfast, but you’re actually doing something good for your body. Plus, it’s so simple, you’ll wonder why you haven’t been making it every day.
Ingredients
- 1/4 cup chia seeds
- 1 cup unsweetened almond milk
- 1 tbsp maple syrup
- 1/2 tsp vanilla extract
- A pinch of salt
Instructions
- Mix the base: In a bowl, whisk together chia seeds, almond milk, maple syrup, vanilla extract, and a pinch of salt until well combined.
- Let it sit: Cover the bowl and refrigerate for at least 4 hours, or overnight. The chia seeds will absorb the liquid and expand, creating a pudding-like consistency.
- Stir halfway: After about 2 hours, give the mixture a good stir to break up any clumps and ensure even thickening.
- Serve and enjoy: Once thickened, give it a final stir and serve. You can eat it as is or top with your favorite fruits, nuts, or a drizzle of honey for extra sweetness.
This pudding turns out luxuriously thick with a slight crunch from the chia seeds, and the almond milk keeps it light and refreshing. Try layering it with fresh berries and granola for a parfait that’ll make your Instagram followers jealous.
Steamed Green Beans with Garlic
Hey there! Let me tell you about this super simple yet ridiculously flavorful side dish that’s about to become your go-to for busy weeknights or when you’re just too lazy to cook anything complicated. Steamed green beans with garlic – it’s crunchy, garlicky, and ready in a flash.
Ingredients
- 1 pound fresh green beans, ends trimmed
- 2 tablespoons olive oil
- 3 cloves garlic, minced
- 1/2 teaspoon salt
- 1/4 teaspoon black pepper
- 1 tablespoon lemon juice
Instructions
- Prep the beans: Rinse the green beans under cold water and pat them dry. Trim the ends off each bean.
- Steam the beans: Bring a pot of water to a boil and place a steamer basket over it. Add the green beans to the basket, cover, and steam for 5 minutes until they’re bright green and just tender.
- Sauté the garlic: While the beans steam, heat olive oil in a large pan over medium heat. Add the minced garlic and sauté for about 1 minute until fragrant but not browned.
- Combine everything: Toss the steamed green beans into the pan with the garlic. Sprinkle with salt and pepper, then drizzle with lemon juice. Stir everything together for another minute so the beans are well coated.
- Serve immediately: Transfer the beans to a serving dish. They’re best eaten right away while they’re still hot and crisp.
These green beans come out perfectly crisp-tender with a punch of garlic and a hint of lemon. Try topping them with a sprinkle of parmesan or toasted almonds for an extra layer of flavor!
Eggplant and Tomato Bake
Wow, have I got a cozy, veggie-packed dish for you today that’s as easy to make as it is delicious. Let’s dive into this Eggplant and Tomato Bake that’ll have your kitchen smelling like an Italian grandmother’s dream.
Ingredients
- 1 large eggplant, sliced into 1/2-inch rounds
- 2 cups tomato sauce
- 1 cup shredded mozzarella cheese
- 1/4 cup grated Parmesan cheese
- 2 tbsp olive oil
- 1 tsp dried basil
- 1 tsp dried oregano
- 1/2 tsp salt
- 1/4 tsp black pepper
Instructions
- Prep the eggplant: Lay the eggplant slices on a baking sheet, brush both sides with olive oil, and sprinkle with salt. Let them sit for 10 minutes to draw out bitterness.
- Layer the bake: In a baking dish, spread a thin layer of tomato sauce, then arrange the eggplant slices. Sprinkle with half the basil, oregano, and black pepper.
- Add cheese: Cover the eggplant with mozzarella and Parmesan cheeses, then repeat the layers until all ingredients are used, finishing with cheese on top.
- Bake to perfection: Preheat your oven to 375°F and bake for 25-30 minutes, or until the cheese is bubbly and slightly golden.
- Rest before serving: Let the bake sit for 5 minutes out of the oven to set, making it easier to slice.
This bake comes out with the eggplant tender and the cheese perfectly melted, creating a dish that’s hearty yet not too heavy. Try serving it over a bed of arugula for a fresh contrast or with a side of crusty bread to soak up all that saucy goodness.
Almond Butter and Celery Sticks
You know those days when you’re craving something crunchy, a little salty, and just a tad sweet, but you also want to pretend you’re being healthy? Yeah, me too. That’s exactly why almond butter and celery sticks are my go-to snack. It’s like nature’s perfect combo of crunch and creaminess, and it’s stupid easy to make.
Ingredients
- 4 celery sticks, washed and cut into 4-inch pieces
- 1/2 cup almond butter, creamy or crunchy
- 1 tbsp honey (optional, for drizzling)
- A pinch of sea salt
Instructions
- Prep the celery: After washing the celery sticks, pat them dry with a paper towel to ensure the almond butter sticks better. Cut them into 4-inch pieces for the perfect bite-size snack.
- Spread the almond butter: Using a butter knife, generously spread about 1 tablespoon of almond butter into the groove of each celery stick. If you’re feeling fancy, a little extra never hurt anybody.
- Drizzle and sprinkle: For a touch of sweetness, drizzle a tiny bit of honey over the almond butter. Then, sprinkle a pinch of sea salt on top to balance out the flavors. Trust me, it’s a game-changer.
- Serve immediately: These are best enjoyed right away, but if you must, you can refrigerate them for up to an hour. Just know the celery might lose a bit of its crunch.
The contrast between the crisp celery and the smooth almond butter is downright addictive, and that hint of honey and salt? Chef’s kiss. Try serving these on a platter with some dark chocolate chips sprinkled on top for an extra indulgent twist.
Mixed Nuts and Dark Chocolate Snack
Virtually everyone has those days when you’re craving something sweet, salty, and downright satisfying without wanting to spend hours in the kitchen. That’s where this Mixed Nuts and Dark Chocolate Snack comes in – it’s the perfect quick fix that feels indulgent but is surprisingly simple to whip up.
Ingredients
- 2 cups mixed nuts (almonds, cashews, and walnuts work great)
- 1 cup dark chocolate chips
- 1 tbsp coconut oil
- 1/2 tsp sea salt
- 1/2 tsp cinnamon
Instructions
- Prep the nuts: Spread the mixed nuts evenly on a baking sheet lined with parchment paper. This ensures they toast evenly without sticking.
- Toast to perfection: Bake at 350°F for 10 minutes, stirring halfway through. You’ll know they’re ready when they’re fragrant and slightly golden.
- Melt the chocolate: In a microwave-safe bowl, combine dark chocolate chips and coconut oil. Microwave in 30-second intervals, stirring in between, until smooth. Tip: The coconut oil makes the chocolate extra glossy and easier to drizzle.
- Combine and season: Pour the melted chocolate over the toasted nuts, sprinkling sea salt and cinnamon on top. Use a spatula to gently mix everything together. Tip: A light hand here keeps the nuts from breaking too much.
- Cool and break apart: Let the mixture cool at room temperature for about an hour, then break into clusters. For faster cooling, pop it in the fridge for 20 minutes. Tip: If you’re impatient (no judgment), the freezer can speed things up even more.
The result? A snack that’s irresistibly crunchy, with the deep richness of dark chocolate cut by the warmth of cinnamon and the pop of sea salt. Try serving these clusters over vanilla ice cream for an instant dessert upgrade, or just keep them all to yourself – we won’t tell.
Conclusion
With these 20 easy 4-ingredient diabetic-friendly recipes, eating well has never been simpler! Whether you’re craving something savory or sweet, these dishes prove that healthy eating can be delicious and fuss-free. Give them a try, and let us know which ones are your favorites in the comments below. Don’t forget to share this roundup on Pinterest to inspire others on their health journey—happy cooking!

I’m Brandon, the face behind the recipes. As a dedicated food enthusiast, I love experimenting with flavors and sharing my culinary adventures with you.